[Feature request] Dogbone fillets #9
Description
One situation I've run into that would have been trivial in traditional CNC manufacturing, but required me to do a significant amount of extra work for FDM printing is the problem of fitting a square peg in a square hole.
Neither CNC or FDM has the ability to make perfectly sharp corners in internal features: CNC is limited by the radius of the endmill, and FDM will cause material to be squished outward when encountering a sharp corner. That means internal pockets will always have rounded corners, which makes it impossible to exactly fit a mating peg of the same dimensions in that hole.
This generalizes to any pocket with a polygonal profile.
Users of the CAM workbench are lucky, because it already contains functions to create toolpaths to cut dogbone fillets into the sides of pockets. That is, erring on the side of removing too much material by cutting beyond the modeled corner.
Since the philosophy of 3D printing is to modify the model for printability (compared to CNC people modifying the toolpath), I think it would make total sense to provide a macro for it in this plugin.
Types of dogbone-like fillets
There are a couple different kinds of fillet you can use (pictures from here):
-
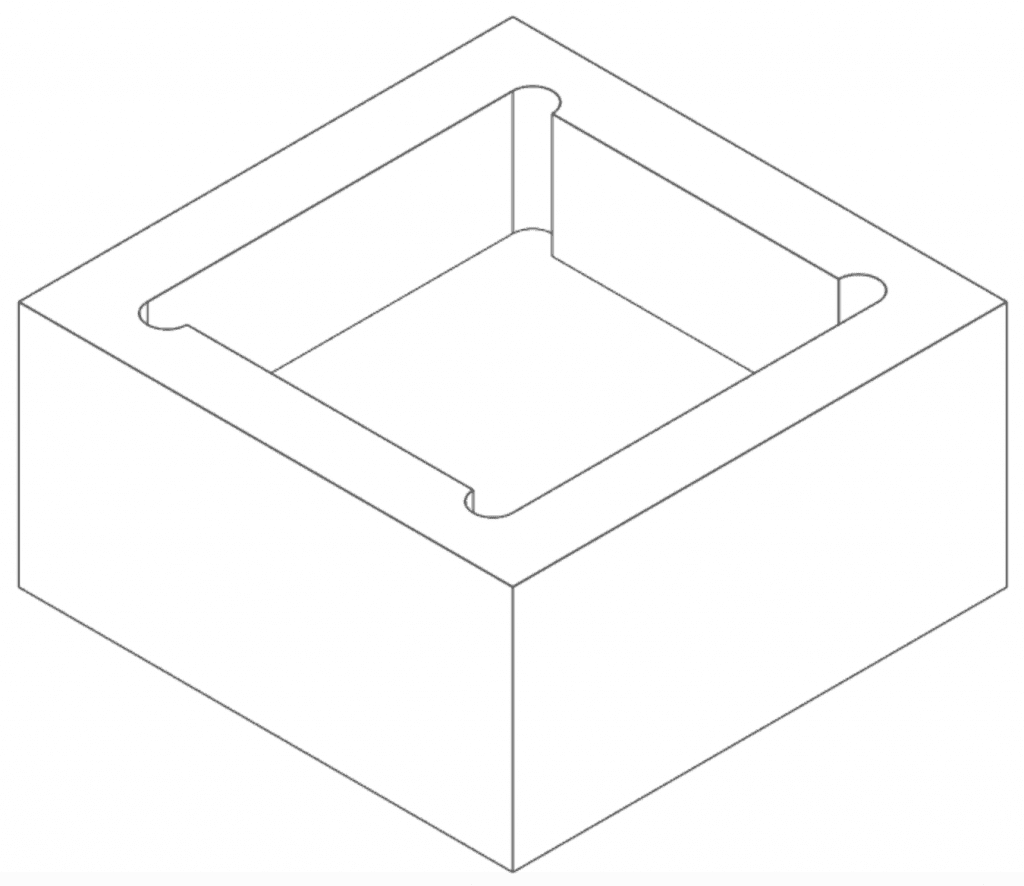
T-bone: Create a semicircular cutout tangent to one side of the pocket. When milling, for a square pocket, this would be like the cutting tool following the edge and cutting into the connecting edge by half the radius of the tool.
This fillet gives you the option of whether to extend the "horizontal" side or the "vertical" side (similarly for non-rectangular profiles).
-
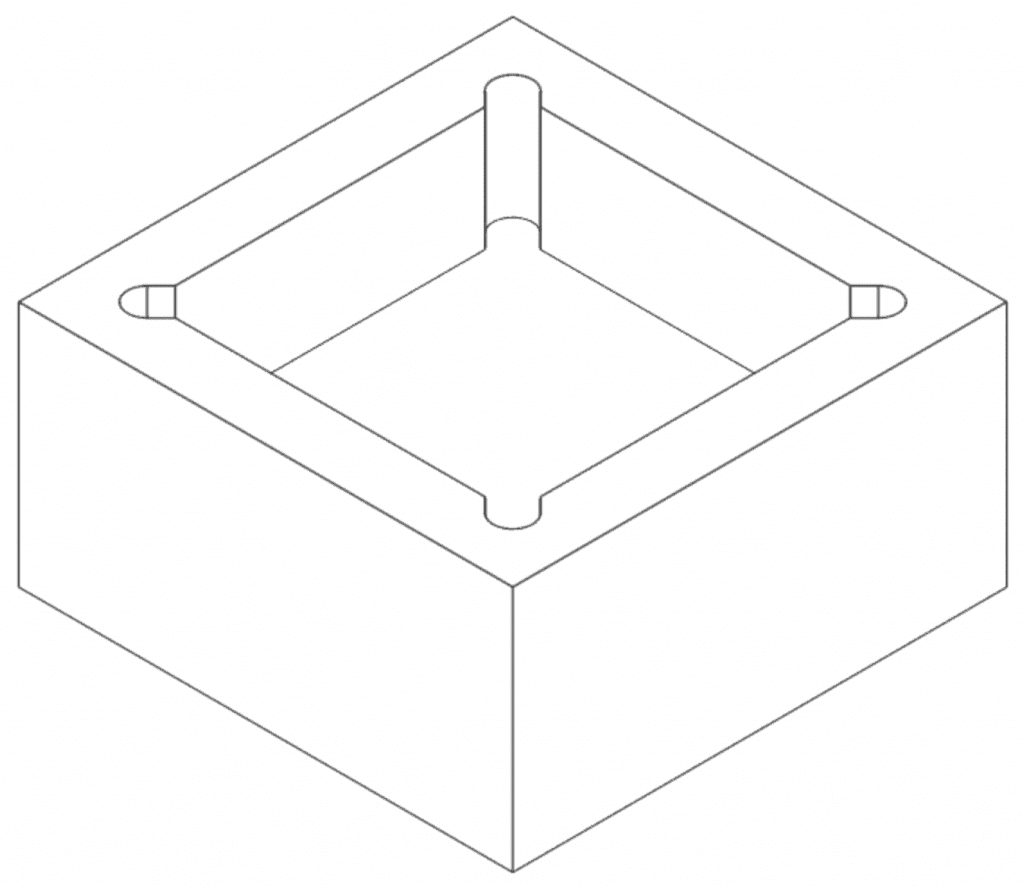
Simple dogbone: Create a slot intersecting the corner and extending outwards half the radius of the tool along both X and Y (similarly for non-rectangular profiles).
-
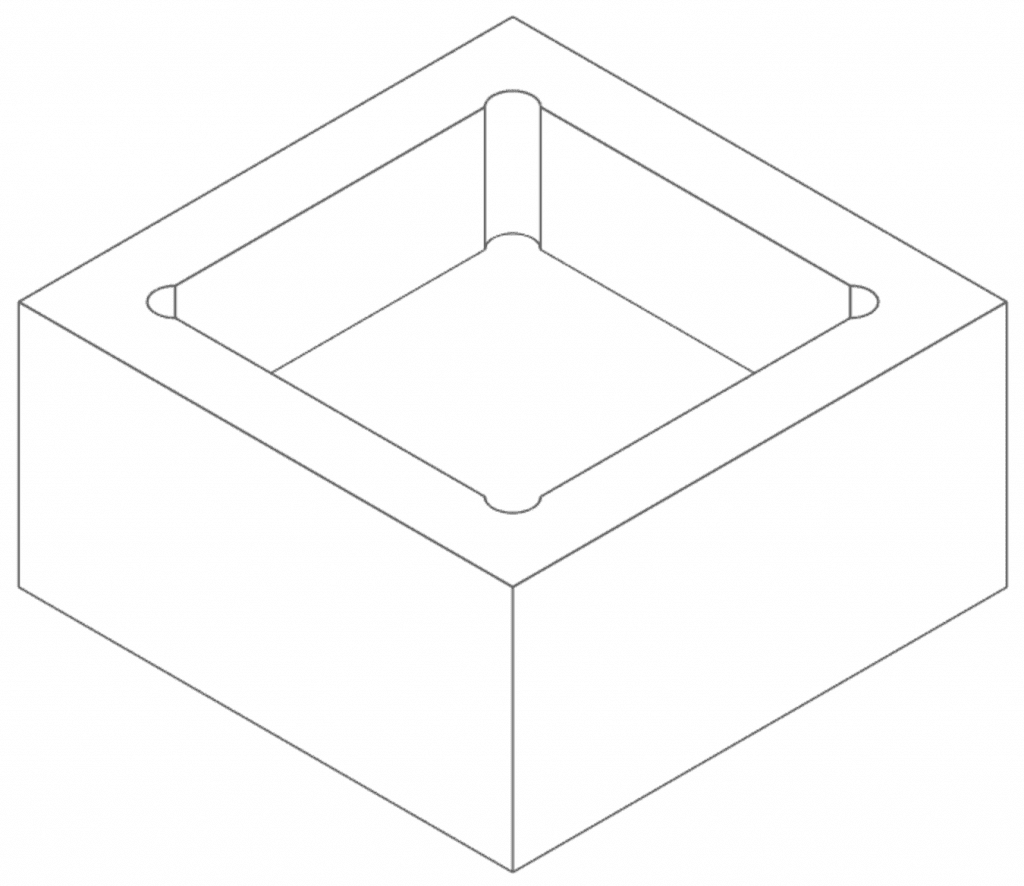
Minimal dogbone: Same as the above, but reduce the length of the slot so that the nominal corner point lies on the circle. This ensures that you "cut away" the least material needed.
Suggested behavior of the macro
I want to be able to select a planar face at the bottom of my pocket, optionally followed by the edges I want to apply the cutout to (if none are selected, pick all edges intersecting the plane). The edges do not need to be exactly perpendicular to the face: A cutout would make sense even for edges that intersect the face at an angle.
I should then be presented with a menu where I can select the style of the cutout (vertical t-bone, horizontal t-bone, simple dogbone, minimal dogbone), along with the radius of the cutout. For the sake of FDM printing, the minimal dogbone might cause some extra squish (due to the problem with most slicers not accounting for material pushout around small internal holes), so an extra parameter to slightly increase the radius of the cutout beyond the (previously intersecting) corner point could make sense.
The macro should then create pockets extending away from the selected face, in the direction of each selected edge, with the depth of the pocket equal to the length of the edge in question.
Comparison to the manual process
Here is an image of a model I created in the past:

Creating the cutouts manually wasn't hard, but it was time consuming, importing the external geometry of the edges of the pocket, creating and constraining circles based on those, and then pocketing them upwards. For a large number of pockets, or ones with more complicated profiles, this would be unfeasible.
Related problem
There is a related problem where one might want to undercut the bottom edges of a pocket. This is mostly an issue for milling, where no mill in the real world actually has a flat bottom, so you will always end up with a tiny radius between the bottom and the side of a pocket. This can be achieved by using small triangular sketch to cut out a subtractive pipe along the edge in question.
I don't think it's as critical for the FDM use-case, but it might be worth keeping in mind as an extra nice-to-have.
Here is a not-great screenshot of one of my previous models where I used this trick, with the undercut circled in red:
