Releases: huggingface/transformers
Release v4.53.0
Release v4.53.0
Gemma3n
Gemma 3n models are designed for efficient execution on low-resource devices. They are capable of multimodal input, handling text, image, video, and audio input, and generating text outputs, with open weights for pre-trained and instruction-tuned variants. These models were trained with data in over 140 spoken languages.
Gemma 3n models use selective parameter activation technology to reduce resource requirements. This technique allows the models to operate at an effective size of 2B and 4B parameters, which is lower than the total number of parameters they contain. For more information on Gemma 3n's efficient parameter management technology, see the Gemma 3n page.

from transformers import pipeline
import torch

pipe = pipeline(
    "image-text-to-text",
    torch_dtype=torch.bfloat16,
    model="google/gemma-3n-e4b",
    device="cuda",
)
output = pipe(
    "https://huggingface.co/datasets/huggingface/documentation-images/resolve/main/bee.jpg",
    text="<image_soft_token> in this image, there is"
)

print(output)
Dia

Dia is an opensource text-to-speech (TTS) model (1.6B parameters) developed by Nari Labs.
It can generate highly realistic dialogue from transcript including nonverbal communications such as laughter and coughing.
Furthermore, emotion and tone control is also possible via audio conditioning (voice cloning).
Model Architecture:
Dia is an encoder-decoder transformer based on the original transformer architecture. However, some more modern features such as
rotational positional embeddings (RoPE) are also included. For its text portion (encoder), a byte tokenizer is utilized while
for the audio portion (decoder), a pretrained codec model DAC is used - DAC encodes speech into discrete codebook
tokens and decodes them back into audio.
- Add Dia model by @buttercrab in #38405
Kyutai Speech-to-Text

Kyutai STT is a speech-to-text model architecture based on the Mimi codec, which encodes audio into discrete tokens in a streaming fashion, and a Moshi-like autoregressive decoder. Kyutai’s lab has released two model checkpoints:
- kyutai/stt-1b-en_fr: a 1B-parameter model capable of transcribing both English and French
- kyutai/stt-2.6b-en: a 2.6B-parameter model focused solely on English, optimized for maximum transcription accuracy
Read more about the model in the documentation
V-JEPA 2

V-JEPA 2 is a self-supervised approach to training video encoders developed by FAIR, Meta. Using internet-scale video data, V-JEPA 2 attains state-of-the-art performance on motion understanding and human action anticipation tasks. V-JEPA 2-AC is a latent action-conditioned world model post-trained from V-JEPA 2 (using a small amount of robot trajectory interaction data) that solves robot manipulation tasks without environment-specific data collection or task-specific training or calibration.
Read more about the model in the documentation.
Arcee

Arcee is a decoder-only transformer model based on the Llama architecture with a key modification: it uses ReLU² (ReLU-squared) activation in the MLP blocks instead of SiLU, following recent research showing improved training efficiency with squared activations. This architecture is designed for efficient training and inference while maintaining the proven stability of the Llama design.
The Arcee model is architecturally similar to Llama but uses x * relu(x) in MLP layers for improved gradient flow and is optimized for efficiency in both training and inference scenarios.
- Add Arcee model support by @Crystalcareai in #38621
Read more about the model in the documentation.
ColQwen2
ColQwen2 is a variant of the ColPali model designed to retrieve documents by analyzing their visual features. Unlike traditional systems that rely heavily on text extraction and OCR, ColQwen2 treats each page as an image. It uses the Qwen2-VL backbone to capture not only text, but also the layout, tables, charts, and other visual elements to create detailed multi-vector embeddings that can be used for retrieval by computing pairwise late interaction similarity scores. This offers a more comprehensive understanding of documents and enables more efficient and accurate retrieval.

Read more about the model in the documentation.
MiniMax

MiniMax is a powerful language model with 456 billion total parameters, of which 45.9 billion are activated per token. To better unlock the long context capabilities of the model, MiniMax adopts a hybrid architecture that combines Lightning Attention, Softmax Attention and Mixture-of-Experts (MoE). Leveraging advanced parallel strategies and innovative compute-communication overlap methods—such as Linear Attention Sequence Parallelism Plus (LASP+), varlen ring attention, Expert Tensor Parallel (ETP), etc., MiniMax's training context length is extended to 1 million tokens, and it can handle a context of up to 4 million tokens during the inference. On various academic benchmarks, MiniMax also demonstrates the performance of a top-tier model.
The architecture of MiniMax is briefly described as follows:
- Total Parameters: 456B
- Activated Parameters per Token: 45.9B
- Number Layers: 80
- Hybrid Attention: a softmax attention is positioned after every 7 lightning attention.
- Number of attention heads: 64
- Attention head dimension: 128
- Mixture of Experts:
- Number of experts: 32
- Expert hidden dimension: 9216
- Top-2 routing strategy
- Positional Encoding: Rotary Position Embedding (RoPE) applied to half of the attention head dimension with a base frequency of 10,000,000
- Hidden Size: 6144
- Vocab Size: 200,064
For more details refer to the release blog post.
Read more about the model in the documentation.
Encoder-Decoder Gemma

T5Gemma (aka encoder-decoder Gemma) was proposed in a research paper by Google. It is a family of encoder-decoder large langauge models, developed by adapting pretrained decoder-only models into encoder-decoder. T5Gemma includes pretrained and instruction-tuned variants. The architecture is based on transformer encoder-decoder design following T5, with improvements from Gemma 2: GQA, RoPE, GeGLU activation, RMSNorm, and interleaved local/global attention.
T5Gemma has two groups of model sizes: 1) Gemma 2 sizes (2B-2B, 9B-2B, and 9B-9B), which are based on the offical Gemma 2 models (2B and 9B); and 2) T5 sizes (Small, Base, Large, and XL), where are pretrained under the Gemma 2 framework following T5 configuration. In addition, we also provide a model at ML size (medium large, ~2B in total), which is in-between T5 Large and T5 XL.
The pretrained varaints are trained with two objectives: prefix language modeling with knowledge distillation (PrefixLM) and UL2, separately. We release both variants for each model size. The instruction-turned varaints was post-trained with supervised fine-tuning and reinforcement learning.
Read more about the model in the documentation.
GLM-4.1V
The GLM-4.1V model architecture is added to transformers; no models have yet been released with that architecture. Stay tuned for the GLM team upcoming releases!
- GLM-4.1V Model support by @zRzRzRzRzRzRzR in #38431
Read more about the model in the documentation.
Falcon H1

The FalconH1 model was developed by the TII Pretraining team. A comprehensive research paper covering the architecture, pretraining dynamics, experimental results, and conclusions is forthcoming. You can read more about this series in this website.
- [MODEL] Add Falcon H1 by @you...
Contributors
Assets 2
Kyutai-STT (based on v4.52.4)
A new model is added to transformers: Kyutai-STT
It is added on top of the v4.52.4 release, and can be installed from the following tag: v4.52.4-Kyutai-STT-preview.
In order to install this version, please install with the following command:
pip install git+https://github.com/huggingface/[email protected]
If fixes are needed, they will be applied to this release; this installation may therefore be considered as stable and improving.
As the tag implies, this tag is a preview of the Kyutai-STT model. This tag is a tagged version of the main branch and does not follow semantic versioning. This model will be included in the next minor release: v4.53.0.
Kyutai-STT
Kyutai STT is a speech-to-text model architecture based on the Mimi codec, which encodes audio into discrete tokens in a streaming fashion, and a Moshi-like autoregressive decoder. Kyutai’s lab has released two model checkpoints:
- kyutai/stt-1b-en_fr: a 1B-parameter model capable of transcribing both English and French
- kyutai/stt-2.6b-en: a 2.6B-parameter model focused solely on English, optimized for maximum transcription accuracy
Usage example
Kyutai-STT can be found on the Huggingface Hub.
Inference
import torch
from datasets import load_dataset, Audio
from transformers import KyutaiSpeechToTextProcessor, KyutaiSpeechToTextForConditionalGeneration

# 1. load the model and the processor
torch_device = "cuda" if torch.cuda.is_available() else "cpu"
model_id = "kyutai/stt-2.6b-en"

processor = KyutaiSpeechToTextProcessor.from_pretrained(model_id)
model = KyutaiSpeechToTextForConditionalGeneration.from_pretrained(model_id, device_map=torch_device)

# 2. load audio samples
ds = load_dataset(
    "hf-internal-testing/librispeech_asr_dummy", "clean", split="validation"
)
ds = ds.cast_column("audio", Audio(sampling_rate=24000))

# 3. prepare the model inputs
inputs = processor(
    ds[0]["audio"]["array"],
)
inputs.to(torch_device)

# 4. infer the model
output_tokens = model.generate(**inputs)

# 5. decode the generated tokens
print(processor.batch_decode(output_tokens, skip_special_tokens=True))
Batched Inference
import torch
from datasets import load_dataset, Audio
from transformers import KyutaiSpeechToTextProcessor, KyutaiSpeechToTextForConditionalGeneration

# 1. load the model and the processor
torch_device = "cuda" if torch.cuda.is_available() else "cpu"
model_id = "kyutai/stt-2.6b-en"

processor = KyutaiSpeechToTextProcessor.from_pretrained(model_id)
model = KyutaiSpeechToTextForConditionalGeneration.from_pretrained(model_id, device_map=torch_device)

# 2. load audio samples
ds = load_dataset(
    "hf-internal-testing/librispeech_asr_dummy", "clean", split="validation"
)
ds = ds.cast_column("audio", Audio(sampling_rate=24000))

# 3. prepare the model inputs
audio_arrays = [ds[i]["audio"]["array"] for i in range(4)]
inputs = processor(audio_arrays, return_tensors="pt", padding=True)
inputs = inputs.to(torch_device)

# 4. infer the model
output_tokens = model.generate(**inputs)

# 5. decode the generated tokens
decoded_outputs = processor.batch_decode(output_tokens, skip_special_tokens=True)
for output in decoded_outputs:
print(output)V-JEPA 2 (based on v4.52.4)
A new model is added to transformers: V-JEPA 2
It is added on top of the v4.52.4 release, and can be installed from the following tag: v4.52.4-VJEPA-2-preview.
In order to install this version, please install with the following command:
pip install git+https://github.com/huggingface/[email protected]
If fixes are needed, they will be applied to this release; this installation may therefore be considered as stable and improving.
As the tag implies, this tag is a preview of the VJEPA-2 model. This tag is a tagged version of the main branch and does not follow semantic versioning. This model will be included in the next minor release: v4.53.0.
VJEPA-2
V-JEPA 2 is a self-supervised approach to training video encoders developed by FAIR, Meta. Using internet-scale video data, V-JEPA 2 attains state-of-the-art performance on motion understanding and human action anticipation tasks. V-JEPA 2-AC is a latent action-conditioned world model post-trained from V-JEPA 2 (using a small amount of robot trajectory interaction data) that solves robot manipulation tasks without environment-specific data collection or task-specific training or calibration.
Usage example
VJEPA-2 can be found on the Huggingface Hub. V-JEPA 2 is intended to represent any video (and image) to perform video classification, retrieval, or as a video encoder for VLMs.
The snippet below shows how to load the V-JEPA 2 model using the AutoModel class.
import torch
from torchcodec.decoders import VideoDecoder
import numpy as np

processor = AutoVideoProcessor.from_pretrained("facebook/vjepa2-vitl-fpc64-256")
model = AutoModel.from_pretrained(
    "facebook/vjepa2-vitl-fpc64-256",
    torch_dtype=torch.float16,
    device_map="auto",
    attn_implementation="sdpa"
)

video_url = "https://huggingface.co/datasets/nateraw/kinetics-mini/resolve/main/val/archery/-Qz25rXdMjE_000014_000024.mp4"

vr = VideoDecoder(video_url)
frame_idx = np.arange(0, 64) # choosing some frames. here, you can define more complex sampling strategy
video = vr.get_frames_at(indices=frame_idx).data  # T x C x H x W
video = processor(video, return_tensors="pt").to(model.device)
outputs = model(**video)

# V-JEPA 2 encoder outputs, same as calling `model.get_vision_features()`
encoder_outputs = outputs.last_hidden_state

# V-JEPA 2 predictor outputs
predictor_outputs = outputs.predictor_output.last_hidden_stateColQwen2 (based on v4.52.4)
A new model is added to transformers: ColQwen2
It is added on top of the v4.52.4 release, and can be installed from the following tag: v4.52.4-ColQwen2-preview.
In order to install this version, please install with the following command:
pip install git+https://github.com/huggingface/[email protected]
If fixes are needed, they will be applied to this release; this installation may therefore be considered as stable and improving.
As the tag implies, this tag is a preview of the ColQwen2 model. This tag is a tagged version of the main branch and does not follow semantic versioning. This model will be included in the next minor release: v4.53.0.
ColQwen2

ColQwen2 is a variant of the ColPali model designed to retrieve documents by analyzing their visual features. Unlike traditional systems that rely heavily on text extraction and OCR, ColQwen2 treats each page as an image. It uses the Qwen2-VL backbone to capture not only text, but also the layout, tables, charts, and other visual elements to create detailed multi-vector embeddings that can be used for retrieval by computing pairwise late interaction similarity scores. This offers a more comprehensive understanding of documents and enables more efficient and accurate retrieval.
Usage example
ColQwen2 can be found on the Huggingface Hub.
import requests
import torch
from PIL import Image

from transformers import ColQwen2ForRetrieval, ColQwen2Processor
from transformers.utils.import_utils import is_flash_attn_2_available

# Load the model and the processor
model_name = "vidore/colqwen2-v1.0-hf"

model = ColQwen2ForRetrieval.from_pretrained(
    model_name,
    torch_dtype=torch.bfloat16,
    device_map="auto",  # "cpu", "cuda", or "mps" for Apple Silicon
    attn_implementation="flash_attention_2" if is_flash_attn_2_available() else "sdpa",
)
processor = ColQwen2Processor.from_pretrained(model_name)

# The document page screenshots from your corpus
url1 = "https://upload.wikimedia.org/wikipedia/commons/8/89/US-original-Declaration-1776.jpg"
url2 = "https://upload.wikimedia.org/wikipedia/commons/thumb/4/4c/Romeoandjuliet1597.jpg/500px-Romeoandjuliet1597.jpg"

images = [
    Image.open(requests.get(url1, stream=True).raw),
    Image.open(requests.get(url2, stream=True).raw),
]

# The queries you want to retrieve documents for
queries = [
    "When was the United States Declaration of Independence proclaimed?",
    "Who printed the edition of Romeo and Juliet?",
]

# Process the inputs
inputs_images = processor(images=images).to(model.device)
inputs_text = processor(text=queries).to(model.device)

# Forward pass
with torch.no_grad():
    image_embeddings = model(**inputs_images).embeddings
    query_embeddings = model(**inputs_text).embeddings

# Score the queries against the images
scores = processor.score_retrieval(query_embeddings, image_embeddings)

print("Retrieval scores (query x image):")
print(scores)
If you have issue with loading the images with PIL, you can use the following code to create dummy images:
images = [
    Image.new("RGB", (128, 128), color="white"),
    Image.new("RGB", (64, 32), color="black"),
]
Quantization reduces the memory burden of large models by representing the weights in a lower precision. Refer to the Quantization overview for more available quantization backends.
The example below uses bitsandbytes to quantize the weights to int4.
import requests
import torch
from PIL import Image

from transformers import BitsAndBytesConfig, ColQwen2ForRetrieval, ColQwen2Processor

model_name = "vidore/colqwen2-v1.0-hf"

# 4-bit quantization configuration
bnb_config = BitsAndBytesConfig(
    load_in_4bit=True,
    bnb_4bit_use_double_quant=True,
    bnb_4bit_quant_type="nf4",
    bnb_4bit_compute_dtype=torch.float16,
)

model = ColQwen2ForRetrieval.from_pretrained(
    model_name,
    quantization_config=bnb_config,
    device_map="cuda",
).eval()

processor = ColQwen2Processor.from_pretrained(model_name)

url1 = "https://upload.wikimedia.org/wikipedia/commons/8/89/US-original-Declaration-1776.jpg"
url2 = "https://upload.wikimedia.org/wikipedia/commons/thumb/4/4c/Romeoandjuliet1597.jpg/500px-Romeoandjuliet1597.jpg"

images = [
    Image.open(requests.get(url1, stream=True).raw),
    Image.open(requests.get(url2, stream=True).raw),
]

queries = [
    "When was the United States Declaration of Independence proclaimed?",
    "Who printed the edition of Romeo and Juliet?",
]

# Process the inputs
inputs_images = processor(images=images, return_tensors="pt").to(model.device)
inputs_text = processor(text=queries, return_tensors="pt").to(model.device)

# Forward pass
with torch.no_grad():
    image_embeddings = model(**inputs_images).embeddings
    query_embeddings = model(**inputs_text).embeddings

# Score the queries against the images
scores = processor.score_retrieval(query_embeddings, image_embeddings)

print("Retrieval scores (query x image):")
print(scores)Patch release: v4.52.4
The following commits are included in that patch release:
- [qwen-vl] Look for vocab size in text config (#38372)
- Fix convert to original state dict for VLMs (#38385)
- [video utils] group and reorder by number of frames (#38374)
- [paligemma] fix processor with suffix (#38365)
- Protect get_default_device for torch<2.3 (#38376)
- [OPT] Fix attention scaling (#38290)
Patch release v4.52.3
Patch release v4.52.3
We had to protect the imports again, a series of bad events.
Here are the two prs for the patch:
- Fix tp error when torch distributed is already initialized (#38294) by @SunMarc
- Protect ParallelInterface (#38262) by @ArthurZucker and @LysandreJik
Contributors
Assets 2
Patch release v4.52.2
237c7c3Patch release v4.52.2
We had to revert #37877 because of a missing flag that was overriding the device map. We re-introduced the changes because they allow native 3D parallel training in Transformers. Sorry everyone for the troubles! 🤗
- Clearer error on import failure (#38257) by @LysandreJik
- Verified tp plan should not be NONE (#38255) by @NouamaneTazi and @ArthurZucker
Contributors
Assets 2
v4.52.1: Qwen2.5-Omni, SAM-HQ, GraniteMoeHybrid, D-FINE, CSM, BitNet, LlamaGuard, TimesFM, MLCD, Janus, InternVL
New models
Qwen2.5-Omni

The Qwen2.5-Omni model is a unified multiple modalities model proposed in Qwen2.5-Omni Technical Report from Qwen team, Alibaba Group.
The abstract from the technical report is the following:
We present Qwen2.5-Omni, an end-to-end multimodal model designed to perceive diverse modalities, including text, images, audio, and video, while simultaneously generating text and natural speech responses in a streaming manner. To enable the streaming of multimodal information inputs, both audio and visual encoders utilize a block-wise processing approach. This strategy effectively decouples the handling of long sequences of multimodal data, assigning the perceptual responsibilities to the multimodal encoder and entrusting the modeling of extended sequences to a large language model.
Such a division of labor enhances the fusion of different modalities via the shared attention mechanism. To synchronize the timestamps of video inputs with audio, we organized the audio and video sequentially in an interleaved manner and propose a novel position embedding approach, named TMRoPE (Time-aligned Multimodal RoPE). To concurrently generate text and speech while avoiding interference between the two modalities, we propose Thinker-Talker architecture.
In this framework, Thinker functions as a large language model tasked with text generation, while Talker is a dual-track autoregressive model that directly utilizes the hidden representations from the Thinker to produce audio tokens as output. Both the Thinker and Talker models are designed to be trained and inferred in an end-to-end manner. For decoding audio tokens in a streaming manner, we introduce a sliding-window DiT that restricts the receptive field, aiming to reduce the initial package delay. Qwen2.5-Omni outperforms the similarly sized Qwen2-VL and Qwen2-Audio in both image and audio capabilities. Furthermore, Qwen2.5-Omni achieves state-of-the-art performance on multimodal benchmarks like Omni-Bench.
Notably, Qwen2.5-Omni is the first open-source model to achieve a level of performance in end-to-end speech instruction following that is comparable to its capabilities with text inputs, as evidenced by benchmarks such as MMLU and GSM8K. As for speech generation, Qwen2.5-Omni’s streaming Talker outperform most existing streaming and non-streaming alternatives in robustness and naturalness.
SAM-HQ
SAM-HQ (High-Quality Segment Anything Model) was proposed in Segment Anything in High Quality by Lei Ke, Mingqiao Ye, Martin Danelljan, Yifan Liu, Yu-Wing Tai, Chi-Keung Tang, Fisher Yu.
The model is an enhancement to the original SAM model that produces significantly higher quality segmentation masks while maintaining SAM's original promptable design, efficiency, and zero-shot generalizability.
SAM-HQ introduces several key improvements over the original SAM model:
- High-Quality Output Token: A learnable token injected into SAM's mask decoder for higher quality mask prediction
- Global-local Feature Fusion: Combines features from different stages of the model for improved mask details
- Training Data: Uses a carefully curated dataset of 44K high-quality masks instead of SA-1B
- Efficiency: Adds only 0.5% additional parameters while significantly improving mask quality
- Zero-shot Capability: Maintains SAM's strong zero-shot performance while improving accuracy
The abstract from the paper is the following:
The recent Segment Anything Model (SAM) represents a big leap in scaling up segmentation models, allowing for powerful zero-shot capabilities and flexible prompting. Despite being trained with 1.1 billion masks, SAM's mask prediction quality falls short in many cases, particularly when dealing with objects that have intricate structures. We propose HQ-SAM, equipping SAM with the ability to accurately segment any object, while maintaining SAM's original promptable design, efficiency, and zero-shot generalizability. Our careful design reuses and preserves the pre-trained model weights of SAM, while only introducing minimal additional parameters and computation. We design a learnable High-Quality Output Token, which is injected into SAM's mask decoder and is responsible for predicting the high-quality mask. Instead of only applying it on mask-decoder features, we first fuse them with early and final ViT features for improved mask details. To train our introduced learnable parameters, we compose a dataset of 44K fine-grained masks from several sources. HQ-SAM is only trained on the introduced dataset of 44k masks, which takes only 4 hours on 8 GPUs.
Tips:
- SAM-HQ produces higher quality masks than the original SAM model, particularly for objects with intricate structures and fine details
- The model predicts binary masks with more accurate boundaries and better handling of thin structures
- Like SAM, the model performs better with input 2D points and/or input bounding boxes
- You can prompt multiple points for the same image and predict a single high-quality mask
- The model maintains SAM's zero-shot generalization capabilities
- SAM-HQ only adds ~0.5% additional parameters compared to SAM
- Fine-tuning the model is not supported yet
GraniteMoeHybrid

The GraniteMoeHybrid model builds on top of GraniteMoeSharedModel and Bamba. Its decoding layers consist of state space layers or MoE attention layers with shared experts. By default, the attention layers do not use positional encoding.
D-FINE

The D-FINE model was proposed in D-FINE: Redefine Regression Task in DETRs as Fine-grained Distribution Refinement by
Yansong Peng, Hebei Li, Peixi Wu, Yueyi Zhang, Xiaoyan Sun, Feng Wu
The abstract from the paper is the following:
We introduce D-FINE, a powerful real-time object detector that achieves outstanding localization precision by redefining the bounding box regression task in DETR models. D-FINE comprises two key components: Fine-grained Distribution Refinement (FDR) and Global Optimal Localization Self-Distillation (GO-LSD).
FDR transforms the regression process from predicting fixed coordinates to iteratively refining probability distributions, providing a fine-grained intermediate representation that significantly enhances localization accuracy. GO-LSD is a bidirectional optimization strategy that transfers localization knowledge from refined distributions to shallower layers through self-distillation, while also simplifying the residual prediction tasks for deeper layers. Additionally, D-FINE incorporates lightweight optimizations in computationally intensive modules and operations, achieving a better balance between speed and accuracy. Specifically, D-FINE-L / X achieves 54.0% / 55.8% AP on the COCO dataset at 124 / 78 FPS on an NVIDIA T4 GPU. When pretrained on Objects365, D-FINE-L / X attains 57.1% / 59.3% AP, surpassing all existing real-time detectors. Furthermore, our method significantly enhances the performance of a wide range of DETR models by up to 5.3% AP with negligible extra parameters and training costs. Our code and pretrained models: this https URL.
CSM
The Conversational Speech Model (CSM) is the first open-source contextual text-to-speech model released by Sesame. It is designed to generate natural-sounding speech with or without conversational context. This context typically consists of multi-turn dialogue between speakers, represented as sequences of text and corresponding spoken audio.
Model Architecture:
CSM is composed of two LLaMA-style auto-regressive transformer decoders: a backbone decoder that predicts the first codebook token and a depth decoder that generates the remaining tokens. It uses the pretrained codec model Mimi, introduced by Kyutai, to encode speech into discrete codebook tokens and decode them back into audio.
The original csm-1b checkpoint is available under the Sesame organization on Hugging Face.

BitNet

Trained on a corpus of 4 trillion tokens, this model demonstrates that native 1-bit LLMs can achieve performance comparable to leading open-weight, full-precision models of similar size, while offering substantial advantages in computational efficiency (memory, energy, latency).
LlamaGuard

Llama Guard 4 is a new multimodal model designed to detect inappropriate content in images and text, whether used as input or generated as output by the model. It’s a dense 12B model pruned from Llama 4 Scout model, and it can run on a single GPU (24 GBs of VRAM). It can evaluate both text-only and image+text inputs, making it suitable for filtering both inputs and outputs of large language models. This enables flexible moderation pipelines where prompts are analyzed before reaching the model, and generated responses are reviewed afterwards for safety. It can al...
Contributors
Assets 2
SAM-HQ (based on v4.51.3)
A new model is added to transformers: SAM-HQ
It is added on top of the v4.51.3 release, and can be installed from the following tag: v4.51.3-SAM-HQ-preview.
In order to install this version, please install with the following command:
pip install git+https://github.com/huggingface/[email protected]
If fixes are needed, they will be applied to this release; this installation may therefore be considered as stable and improving.
As the tag implies, this tag is a preview of the SAM-HQ model. This tag is a tagged version of the main branch and does not follow semantic versioning. This model will be included in the next minor release: v4.52.0.
SAM-HQ
SAM-HQ (High-Quality Segment Anything Model) was proposed in Segment Anything in High Quality by Lei Ke, Mingqiao Ye, Martin Danelljan, Yifan Liu, Yu-Wing Tai, Chi-Keung Tang, Fisher Yu.
The model is an enhancement to the original SAM model that produces significantly higher quality segmentation masks while maintaining SAM's original promptable design, efficiency, and zero-shot generalizability.
SAM-HQ introduces several key improvements over the original SAM model:
- High-Quality Output Token: A learnable token injected into SAM's mask decoder for higher quality mask prediction
- Global-local Feature Fusion: Combines features from different stages of the model for improved mask details
- Training Data: Uses a carefully curated dataset of 44K high-quality masks instead of SA-1B
- Efficiency: Adds only 0.5% additional parameters while significantly improving mask quality
- Zero-shot Capability: Maintains SAM's strong zero-shot performance while improving accuracy
The abstract from the paper is the following:
The recent Segment Anything Model (SAM) represents a big leap in scaling up segmentation models, allowing for powerful zero-shot capabilities and flexible prompting. Despite being trained with 1.1 billion masks, SAM's mask prediction quality falls short in many cases, particularly when dealing with objects that have intricate structures. We propose HQ-SAM, equipping SAM with the ability to accurately segment any object, while maintaining SAM's original promptable design, efficiency, and zero-shot generalizability. Our careful design reuses and preserves the pre-trained model weights of SAM, while only introducing minimal additional parameters and computation. We design a learnable High-Quality Output Token, which is injected into SAM's mask decoder and is responsible for predicting the high-quality mask. Instead of only applying it on mask-decoder features, we first fuse them with early and final ViT features for improved mask details. To train our introduced learnable parameters, we compose a dataset of 44K fine-grained masks from several sources. HQ-SAM is only trained on the introduced dataset of 44k masks, which takes only 4 hours on 8 GPUs.
Tips:
- SAM-HQ produces higher quality masks than the original SAM model, particularly for objects with intricate structures and fine details
- The model predicts binary masks with more accurate boundaries and better handling of thin structures
- Like SAM, the model performs better with input 2D points and/or input bounding boxes
- You can prompt multiple points for the same image and predict a single high-quality mask
- The model maintains SAM's zero-shot generalization capabilities
- SAM-HQ only adds ~0.5% additional parameters compared to SAM
- Fine-tuning the model is not supported yet
Usage example
SAM-HQ can be found on the Huggingface Hub.
import torch
from PIL import Image
import requests
from transformers import SamHQModel, SamHQProcessor
device = "cuda" if torch.cuda.is_available() else "cpu"
model = SamHQModel.from_pretrained("sushmanth/sam_hq_vit_b").to(device)
processor = SamHQProcessor.from_pretrained("sushmanth/sam_hq_vit_b")
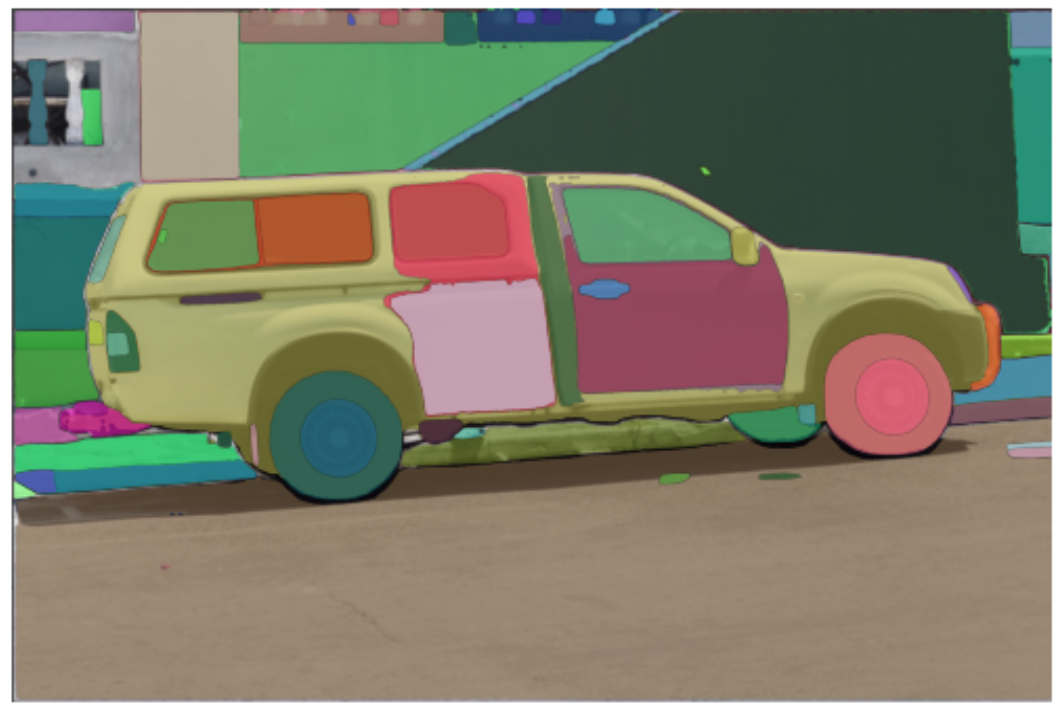
img_url = "https://huggingface.co/ybelkada/segment-anything/resolve/main/assets/car.png"
raw_image = Image.open(requests.get(img_url, stream=True).raw).convert("RGB")
input_points = [[[450, 600]]] # 2D location of a window in the image
inputs = processor(raw_image, input_points=input_points, return_tensors="pt").to(device)
with torch.no_grad():
outputs = model(**inputs)
masks = processor.image_processor.post_process_masks(
outputs.pred_masks.cpu(), inputs["original_sizes"].cpu(), inputs["reshaped_input_sizes"].cpu()
)
scores = outputs.iou_scoresYou can also process your own masks alongside the input images in the processor to be passed to the model:
import torch
from PIL import Image
import requests
from transformers import SamHQModel, SamHQProcessor

device = "cuda" if torch.cuda.is_available() else "cpu"
model = SamHQModel.from_pretrained("sushmanth/sam_hq_vit_b").to(device)
processor = SamHQProcessor.from_pretrained("sushmanth/sam_hq_vit_b")

img_url = "https://huggingface.co/ybelkada/segment-anything/resolve/main/assets/car.png"
raw_image = Image.open(requests.get(img_url, stream=True).raw).convert("RGB")
mask_url = "https://huggingface.co/ybelkada/segment-anything/resolve/main/assets/car.png"
segmentation_map = Image.open(requests.get(mask_url, stream=True).raw).convert("1")
input_points = [[[450, 600]]]  # 2D location of a window in the image

inputs = processor(raw_image, input_points=input_points, segmentation_maps=segmentation_map, return_tensors="pt").to(device)
with torch.no_grad():
    outputs = model(**inputs)

masks = processor.image_processor.post_process_masks(
    outputs.pred_masks.cpu(), inputs["original_sizes"].cpu(), inputs["reshaped_input_sizes"].cpu()
)
scores = outputs.iou_scoresGraniteMoeHybrid (based on v4.51.3)
A new model is added to transformers: GraniteMoeHybrid
It is added on top of the v4.51.3 release, and can be installed from the following tag: v4.51.3-GraniteMoeHybrid-preview.
In order to install this version, please install with the following command:
pip install git+https://github.com/huggingface/[email protected]
If fixes are needed, they will be applied to this release; this installation may therefore be considered as stable and improving.
As the tag implies, this tag is a preview of the GraniteMoeHybrid model. This tag is a tagged version of the main branch and does not follow semantic versioning. This model will be included in the next minor release: v4.52.0.
GraniteMoeHybrid

The GraniteMoeHybrid model builds on top of GraniteMoeSharedModel and Bamba. Its decoding layers consist of state space layers or MoE attention layers with shared experts. By default, the attention layers do not use positional encoding.
Usage example
GraniteMoeHybrid can be found on the Huggingface Hub.
from transformers import AutoModelForCausalLM, AutoTokenizer

model_path = "ibm-granite/granite-4.0-tiny-preview"
tokenizer = AutoTokenizer.from_pretrained(model_path)

# drop device_map if running on CPU
model = AutoModelForCausalLM.from_pretrained(model_path, device_map="auto")
model.eval()

# change input text as desired
prompt = "Write a code to find the maximum value in a list of numbers."

# tokenize the text
input_tokens = tokenizer(prompt, return_tensors="pt")
# generate output tokens
output = model.generate(**input_tokens, max_new_tokens=100)
# decode output tokens into text
output = tokenizer.batch_decode(output)
# loop over the batch to print, in this example the batch size is 1
for i in output:
    print(i)