This article will lead you to create modernx app quickly, and learn all new concepts.
Final App.
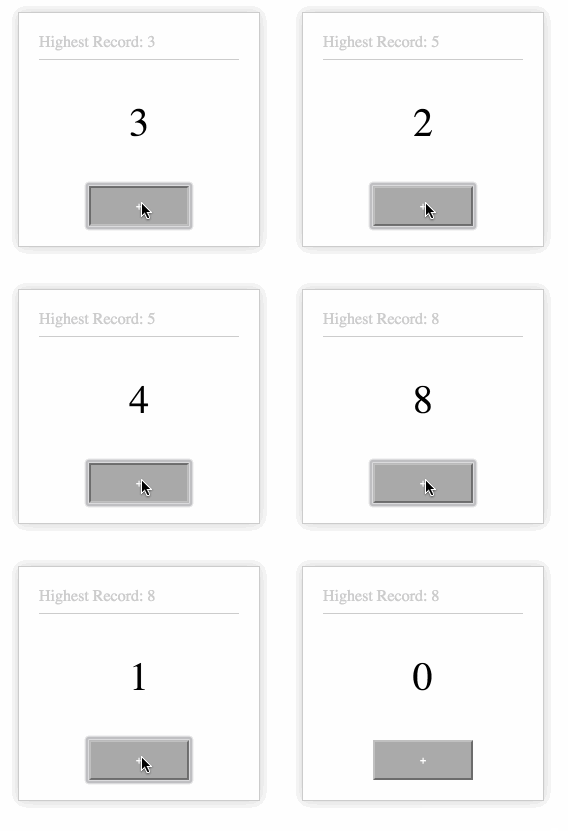
This app is used to test click speed, by collecting click count within 1 second.
Some questions you may ask:
- How to create the app?
- How to organize the code after creating the app?
- How to build, deploy and publish after development?
And somethings about code organization.
- How to write the Component?
- How to write CSS?
- How to write the Model?
- How to connect the Model and the Component?
- How to update State after user interaction?
- How to handle async logic?
- How to config the router?
Also:
- If I want to use localStorage to save Highest Record, what do I have to do?
- If we want to support keyboard click rate tests, what do I have to do?
We can takes these questions to read this article. But don't worry, all the code we need is about 70 lines.
modernx-cli is the cli tool for modernx, include init, new.
$ npm install -g modernx-cliAfter installed, you can check the version with modernx -v, and view help info with modernx -h.
After installing modernx-cli, we can create a new app with it, called myapp.
$ modernx new myapp --demoNotice: the --demo option is only used for creating demo level apps. If you want to create a normal project, don't add this option.
cd myapp, and start it.
$ cd myapp
$ npm start
After a few seconds, you will get the following output:
Compiled successfully!

The app is running at:

  http://localhost:8000/

Note that the development build is not optimized.
To create a production build, use npm run build.
(Press Ctrl-C if you want to close server)
Open http://localhost:8000/ in browser. If successful, you will see a page with "Hello ModernX".
When you get the task, you should not write code immediately. But it is recommended to do state design in god mode.
- design models
- design components
- connect models and components
With this task, we define the model as this:
app.model({
  namespace: 'count',
  state: {
    record : 0,
    current: 0,
  },
});
namespace is the key where model state is in global state. state is the default data for the model. Then record presents highest record,and current presents current click speed.
After designing the model, we begin to write the component. We recommend organizing the Component with stateless functions because we don't need state almost at all in modernx architecture.
import styles from './index.less';
const CountApp = ({count, dispatch}) => {
  return (
    <div className={styles.normal}>
      <div className={styles.record}>Highest Record: {count.record}</div>
      <div className={styles.current}>{count.current}</div>
      <div className={styles.button}>
        <button onClick={() => { dispatch({type: 'count/add'}); }}>+</button>
      </div>
    </div>
  );
};
Notice:
import styles from './index.less';, and then usestyles.xxxto define css classname is the solution of css-modules- Two props are passed in,
countanddispatch.countis the state in the model, which is bound with connect.dispatchis used to trigger an action. dispatch({type: 'count/add'})means trigger an action{type: 'count/add'}. View Actions@redux.js.org on what an action is.
reducer is the only one that can update state. This makes our app stable, as all data modifications are traceable. reducer is a pure function, and accepts two arguments - state and an action, and returns a new state.
(state, action) => newStateWe need two reducers, add and minus. Please note that add will only be recorded if it is the highest.
Note:
addandminusdon't need to add namespace prefixes incountmodel. But if it is outside the model, the action must prefix the namespace separated with/. e.g.count/add.
app.model({
  namespace: 'count',
  state: {
    record: 0,
    current: 0,
  },
+ reducers: {
+   add(state) {
+     const newCurrent = state.current + 1;
+     return { ...state,
+       record: newCurrent > state.record ? newCurrent : state.record,
+       current: newCurrent,
+     };
+   },
+   minus(state) {
+     return { ...state, current: state.current - 1};
+   },
+ },
});
Note:
- Confused with the
...spread operator? It's used to extend an Object, similar toObject.extend add(state) {}is equal toadd: function(state) {}
Remember
countanddispatchprops used in the Component before? Where do they come from?
After defining Model and Component, we need to connect them together. After connecting them, the Component can use the data from Model, and Model can receive actions dispatched from Component.
In this task, we only need to bind count .
function mapStateToProps(state) {
  return { count: state.count };
}
const HomePage = connect(mapStateToProps)(CountApp);
Note: connect is from react-redux。
Which Component should be rendered after receiving a url? It's defined by the router.
This app has only one page, so we don't need to modify the router part.
app.router(({history}) =>
  <Router history={history}>
    <Route path="/" component={HomePage} />
  </Router>
);
Note:
historyis default hashHistory with_kparams. It can be changed to browserHistory, or remove_kparams with extra configuration.
Refresh page in browser, if success, you will see page below.
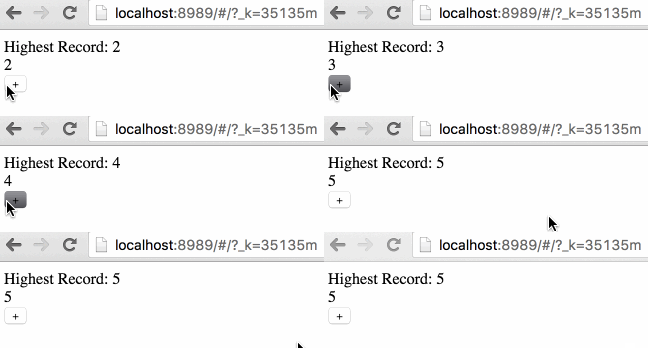
We define stylesheet in css modules, which doesn't have many differences from normal css. Because we have already hooked up the className in Component, at this moment, we only need to replace index.less with the follow content:
.normal {
  width: 200px;
  margin: 100px auto;
  padding: 20px;
  border: 1px solid #ccc;
  box-shadow: 0 0 20px #ccc;
}

.record {
  border-bottom: 1px solid #ccc;
  padding-bottom: 8px;
  color: #ccc;
}

.current {
  text-align: center;
  font-size: 40px;
  padding: 40px 0;
}

.button {
  text-align: center;
  button {
    width: 100px;
    height: 40px;
    background: #aaa;
    color: #fff;
  }
}
Result.
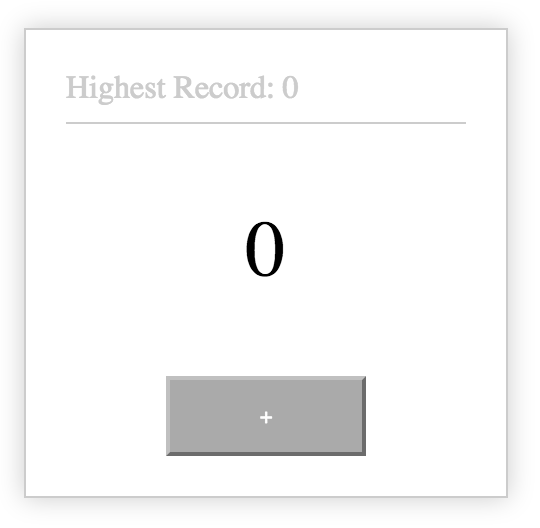
Prior to this, all of our operations were synchronous. When clicking on the + button, the value is incremented by 1.
Now we have to deal with async logic. modernx processes side effects ( async logic ) with effects on model, which is executed based on redux-saga, with generator syntax. MDN documentation for generators.
In this app, when the user clicks the + button, the value will increase by 1 and trigger a side effect, that is, subtract (decrease by) 1 after 1 second.
app.model({
  namespace: 'count',
+ effects: {
+   *addThenMinus(action, { call, put }) {
+     yield put({ type: 'add' });
+     yield call(delay, 1000);
+     yield put({ type: 'minus' });
+   },
+ },
...
+function delay(timeout){
+  return new Promise(resolve => {
+    setTimeout(resolve, timeout);
+  });
+}
import styles from './index.less';
const CountApp = ({count, dispatch}) => {
return (
<div className={styles.normal}>
<div className={styles.record}>Highest Record: {count.record}</div>
<div className={styles.current}>{count.current}</div>
<div className={styles.button}>
- <button onClick={() => { dispatch({type: 'count/add'}); }}>+</button>
+ <button onClick={() => { dispatch({type: 'count/addThenMinus'}); }}>+</button>
</div>
</div>
);
};Note:
*add() {}is equal toadd: function*(){}callandputare effect commands from redux-saga.callis for async logic, andputis for dispatching actions. Besides these, there are commands such asselect,take,fork,cancel, and so on. View more on redux-saga documatation
Refresh you browser, and if successful, it should have all the effects of the beginning gif.
After implementing the mouse click speed test, how do you implement the keyboard click speed test?
There is a concept called Subscription from modernx, which is from elm 0.17.
Subscription is used to subscribe to a data source, then dispatch an action if needed. The data source could be current time, a websocket connection from server, a keyboard input, a geolocation change, a history router change, etc.
The subscription takes place in the model.
+import key from 'keymaster';
...
app.model({
  namespace: 'count',
+ subscriptions: {
+   keyboardWatcher({ dispatch }) {
+     key('⌘+up, ctrl+up', () => { dispatch({type:'addThenMinus'}) });
+   },
+ },
});
Here, we don't need to install the keymaster dependency manually. When we write import key from 'keymaster'; and save, modernx-cli will install keymaster and save to package.json. The output looks like this:
use npm: tnpm
Installing `keymaster`...
[keymaster@*] installed at node_modules/.npminstall/keymaster/1.6.2/keymaster (1 packages, use 745ms, speed 24.06kB/s, json 2.98kB, tarball 15.08kB)
All packages installed (1 packages installed from npm registry, use 755ms, speed 23.93kB/s, json 1(2.98kB), tarball 15.08kB)
📦  2/2 build modules
webpack: bundle build is now finished.index.js
import modernx, { connect } from 'modernx';
import { Router, Route } from 'modernx/router';
import React from 'react';
import styles from './index.less';
import key from 'keymaster';

const app = modernx();

app.model({
  namespace: 'count',
  state: {
    record: 0,
    current: 0,
  },
  reducers: {
    add(state) {
      const newCurrent = state.current + 1;
      return { ...state,
        record: newCurrent > state.record ? newCurrent : state.record,
        current: newCurrent,
      };
    },
    minus(state) {
      return { ...state, current: state.current - 1};
    },
  },
  effects: {
    *addThenMinus(action, { call, put }) {
      yield put({ type: 'add' });
      yield call(delay, 1000);
      yield put({ type: 'minus' });
    },
  },
  subscriptions: {
    keyboardWatcher({ dispatch }) {
      key('⌘+up, ctrl+up', () => { dispatch({type:'addThenMinus'}) });
    },
  },
});

const CountApp = ({count, dispatch}) => {
  return (
    <div className={styles.normal}>
      <div className={styles.record}>Highest Record: {count.record}</div>
      <div className={styles.current}>{count.current}</div>
      <div className={styles.button}>
        <button onClick={() => { dispatch({type: 'count/addThenMinus'}); }}>+</button>
      </div>
    </div>
  );
};

function mapStateToProps(state) {
  return { count: state.count };
}
const HomePage = connect(mapStateToProps)(CountApp);

app.router(({history}) =>
  <Router history={history}>
    <Route path="/" component={HomePage} />
  </Router>
);

app.start('#root');


// ---------
// Helpers

function delay(timeout){
  return new Promise(resolve => {
    setTimeout(resolve, timeout);
  });
}Now that we've written our application and verified that it works in development, it's time to get it ready to deploy to our users. To do so, run the following command:
$ npm run buildOutput.
> @ build /private/tmp/modernx-quickstart
> atool-build

Child
    Time: 6891ms
        Asset       Size  Chunks             Chunk Names
    common.js    1.18 kB       0  [emitted]  common
     index.js     281 kB    1, 0  [emitted]  index
    index.css  353 bytes    1, 0  [emitted]  index
After build success, you can find compiled files in dist directory.
After completing this app, do you have answers to all of the questions in the beginning? Do you understand the concepts in modernx, like model, router, reducers, effects and subscriptions ?
Next, you can view modernx official library for more information.