Works with v1.0+
Follow these steps to get started with Supabase using the PostgreSQL Data Connector.
- Supabase project.
- Spice is installed (see the Getting Started documentation).
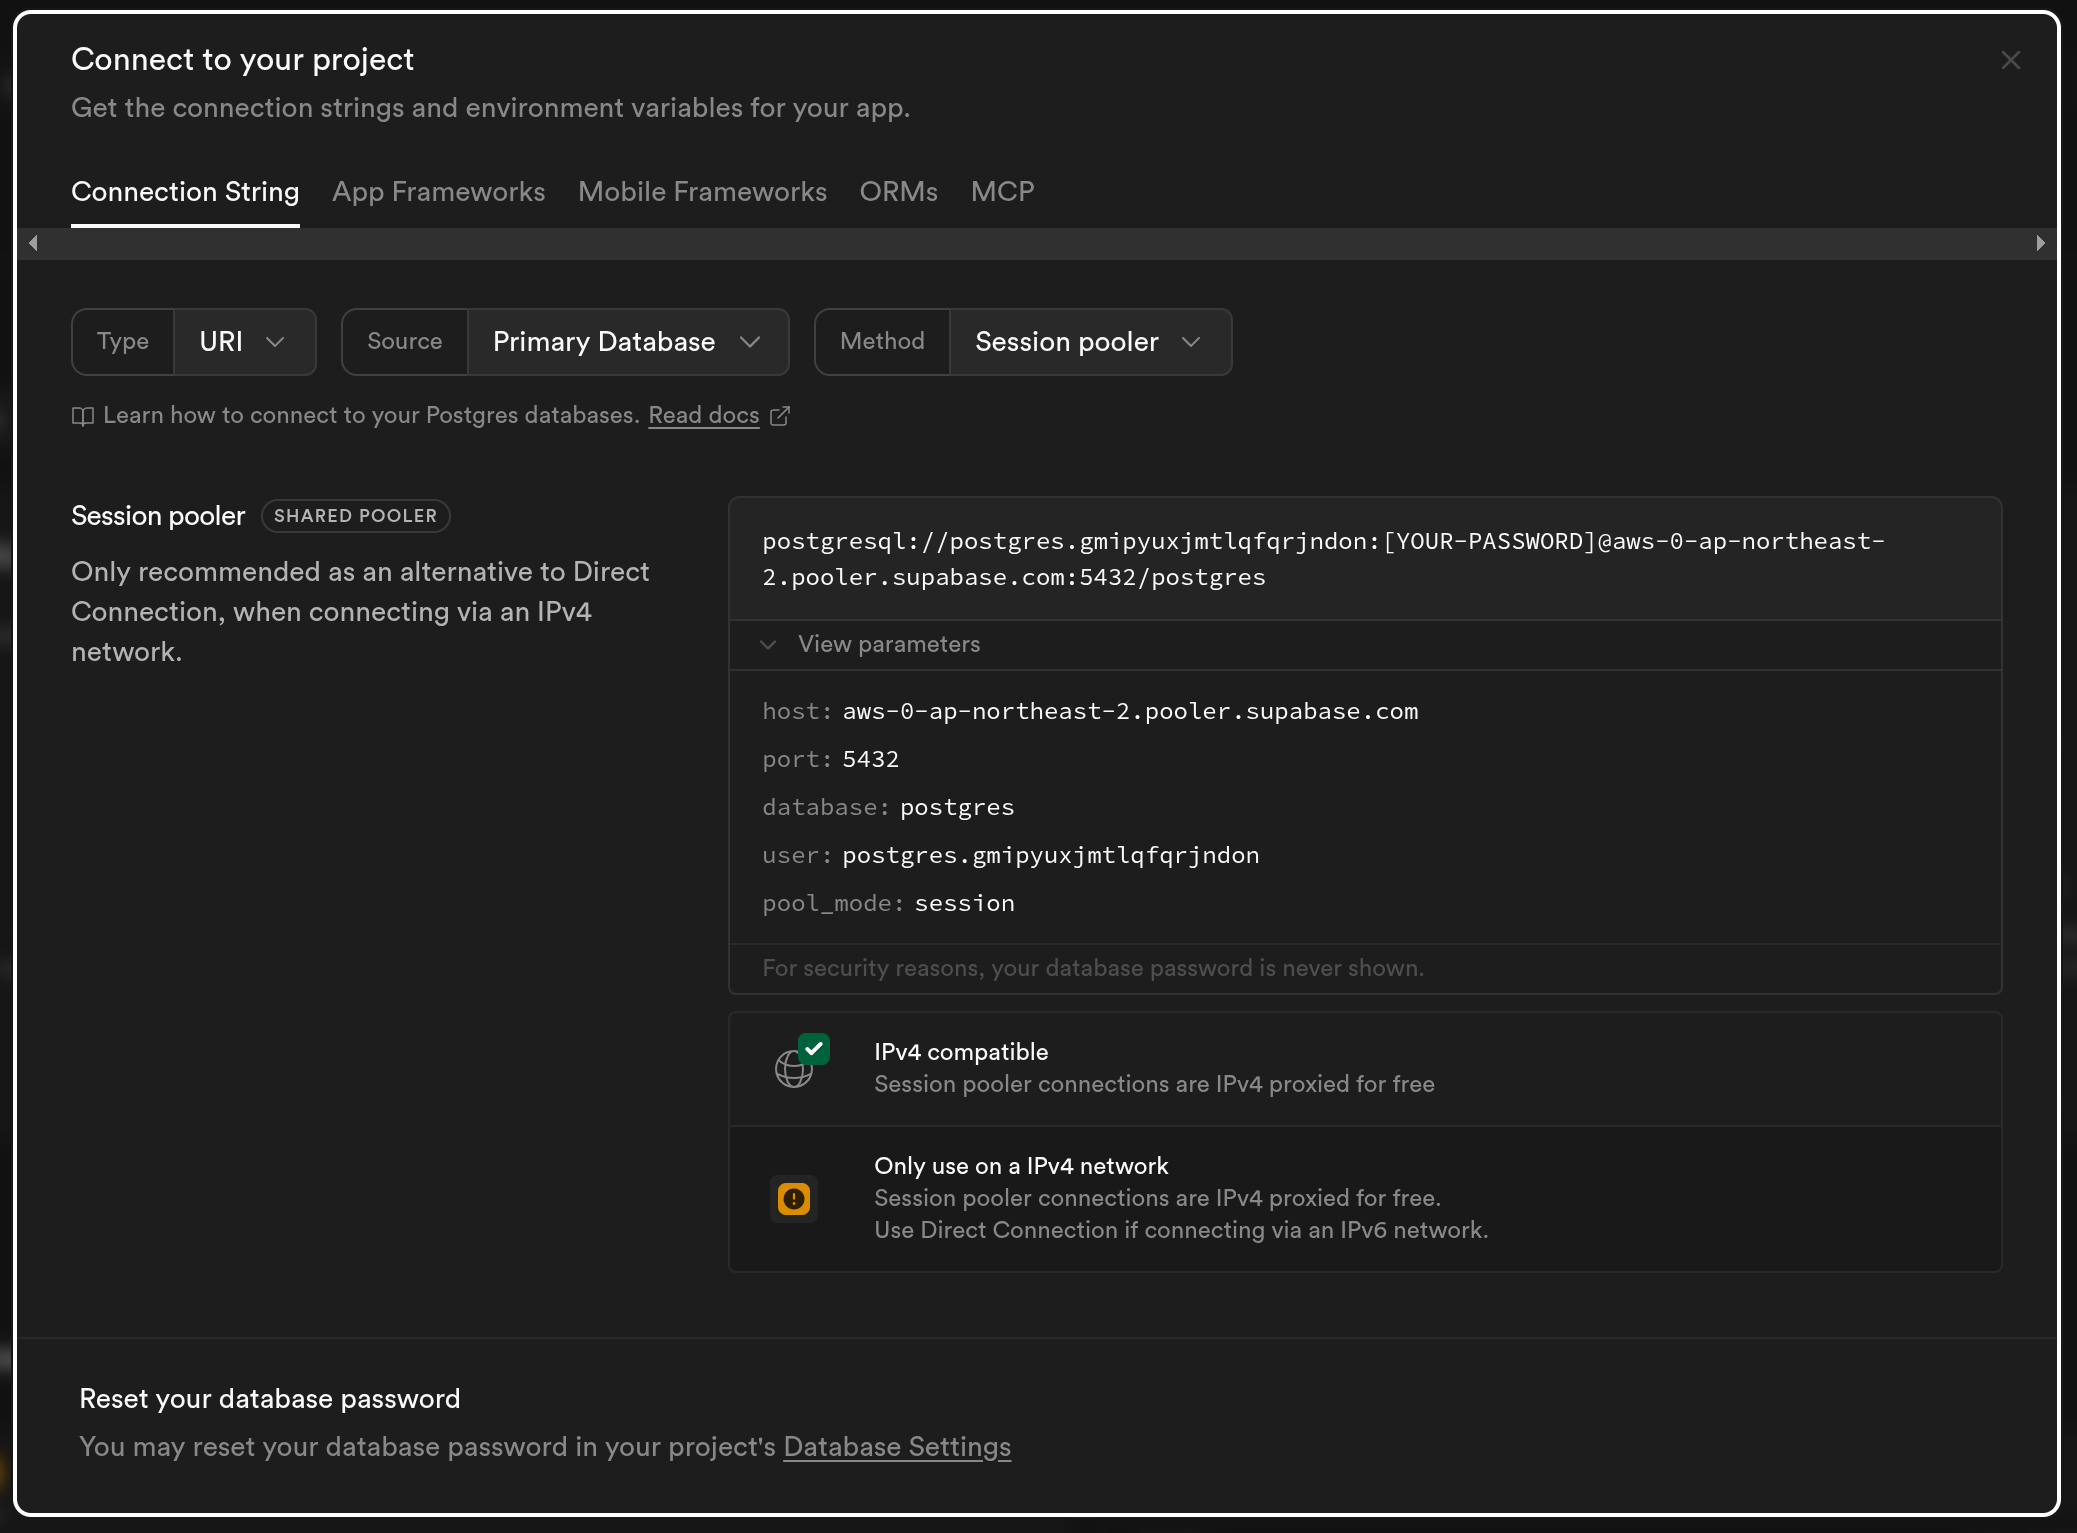
Step 1. From a Supabase project select Connect from the top navigation bar.
Step 2. Change Method from Direct connection to Session pooler.
Step 3. Click the View parameters button.
Step 4. (Optional) Create a new table in your Supabase database and add some data to it. You can use the SQL editor in the Supabase dashboard to run the following commands:
create table spice_test (id serial primary key, value integer);
insert into spice_test (value) values (10), (20), (30), (40), (50);
Step 5. Edit the spicepod.yaml file in this directory and replace spice_test with the path to the Supabase table to be accelerated and add the following params section with the connection parameters from the Supabase project.
- from: postgres:spice_test # Replace `spice_test` with your table name if not using the example table
  name: spice_test
  params:
    pg_host: [Host] # replace from `host` field in Supabase connection parameters
    pg_db: postgres # replace from `database` field, usually `postgres`
    pg_port: 5432 # replace from `port` field, usually `5432`
    pg_user: postgres.<project_ref> # replace from `user` field
    pg_pass: ${env:PG_PASS}
    pg_sslmode: require
See the datasets reference for more dataset configuration options and PostgreSQL Data Connector for more options on configuring a PostgreSQL Data Connector.
Ensure the PG_PASS environment variable is set to the password for your Supabase instance. Environment variables can be specified on the command line when running the Spice runtime, or in a .env file in the same directory as spicepod.yaml.
echo "PG_PASS=<password>" > .envTo securely store the Supabase password, see Secret Stores
Step 6. Run the Spice runtime with spice run from this directory.
Follow the getting started guide to get started with the Spice runtime.
Step 7. Run spice sql in a new terminal to start an interactive SQL query session against the Spice runtime.
For more information on using spice sql, see the CLI reference.
Step 8. Execute the query select * from spice_test; to see the Supabase table accelerated locally.
sql> select * from spice_test;
+----+-------+
| id | value |
+----+-------+
| 1  | 10    |
| 2  | 20    |
| 3  | 30    |
| 4  | 40    |
| 5  | 50    |
+----+-------+

Time: 0.00243102 seconds. 5 rows.