aka Creating a new Project Resource Path under UMCCR program
- Login to Gen3 portal > Go to
umccrsubmission program at https://gen3.dev.umccr.org/umccr - Click "Use Form Submission"
- Select "project"
- Must fill as follows, for example:
- code: vic
- dbgap_accession_number: phs001110.v2.p1111
- name: vic
- Click "Upload submission json from form"
- You should see generate JSON (you may edit those JSON there if you wish)
- Once finalise, click Submit
-
Login > Go to Query menu i.e https://gen3.dev.umccr.org/query
-
Switch to Graph Model (If it is in Graph mode, you shall see "Switch to Flat Model")
-
Clear left panel and enter as follows to list all projects:
{ project { project_id name code dbgap_accession_number } } -
List all programs:
{
  program {
    name
    dbgap_accession_number
    project_id
  }
}
-
Gen3 Resource Paths are access controlled by Fence and Arborist AuthZ services. e.g. UMCCR program with
vicproject resource path as follows:/programs/umccr/projects/vic -
All further resource (file upload, metadata, samples, analysis reports, etc) will be submitted into a particular project, hence all AuthZ permission bind under a project path.
-
User ACL on resource path is configured in
user.yaml(Fence service) on how / who should have access at what permissions or role. Please seeuser.yamlguide to get the idea.
Resource node creation (graph model) on given default Data Dictionary (DD)
🙋♂️ Please follow along the following video tutorial:
Please create all resources as Jim does in Step 1, under the project you created from ☝️ New Project section.
Step 1: Jim Henegan tutorial: Submitting Data to a Gen3 Commons
Click to expand!
Step 2: Gen3 Data Commons - Data Upload Tutorial
This video goes along with the following sections next. Specifically, please follow up to creating
core_metadata_collectionresource as described in the video. You can skip (or just watch through) the rest, so that to connect with the custom Upload Flow section explain in next.
Click to expand!
- Download and install the CLI, e.g.
wget https://github.com/uc-cdis/cdis-data-client/releases/download/2020.07/dataclient_osx.zip
unzip dataclient_osx.zip
mv gen3-client /usr/local/bin
chmod +x /usr/local/bin/gen3-client
gen3-client --help
-
Go to your Profile > Create API key > download
credentials.json -
Configure
gen3-client configure --profile=gen3 --cred=~/Download/credentials.json --apiendpoint=https://gen3.dev.umccr.org/
- Check auth
gen3-client auth --profile=gen3
2020/08/19 14:27:20
You have access to the following project(s) at https://gen3.dev.umccr.org:
...
...
...
-
We will need
Python >= 3.6environment. Optionally, you may wish to use Conda environment. Please create one and activate it.conda create python=3.8 -n gen3 conda activate gen3 -
Install
g3poas followspip install g3po g3po version -
Prepare staging location for uploading task
mkdir -p /tmp/gen3 cd /tmp/gen3 -
Copy over the downloaded
credentials.jsonto staging locationmv ~/Download/credentials.json /tmp/gen3 -
Copy and prepare your data file to staging location, e.g. create text file with some content
touch victor_test1.txt echo "LOREM IPSUM" > victor_test1.txt -
Upload file using
gen3-clientas follows:gen3-client upload --profile=gen3 --upload-path=vic_test1.txt 2020/10/02 04:17:00 Finish parsing all file paths for "/tmp/gen3/submit-data/upload_flow/vic_test1.txt" The following file(s) has been found in path "/tmp/gen3/submit-data/upload_flow/vic_test1.txt" and will be uploaded: /gen3/submit-data/upload_flow/vic_test1.txt 2020/10/02 04:17:00 Uploading data ... vic_test1.txt 35 B / 35 B [==============================================================================] 100.00% 0s 2020/10/02 04:17:01 Successfully uploaded file "/tmp/gen3/submit-data/upload_flow/vic_test1.txt" to GUID f5f52160-d995-4c8b-8131-a149e5a12069. 2020/10/02 04:17:01 Local succeeded log file updated Submission Results Finished with 0 retries | 1 Finished with 1 retry | 0 Finished with 2 retries | 0 Finished with 3 retries | 0 Finished with 4 retries | 0 Finished with 5 retries | 0 Failed | 0 TOTAL | 1 -
Generate md5 checksum
md5sum vic_test1.txt 64503f07db17f16d48cfb9d8e0553d7b vic_test1.txt -
Determine file size in bytes
wc -c vic_test1.txt 35 vic_test1.txt -
Query Gen3 indexd service using GUID (from output of
gen3-client uploadstep ☝️)g3po index get f5f52160-d995-4c8b-8131-a149e5a12069 | jq { "acl": [], "authz": [], "baseid": "6f6f27fa-f81c-40b8-bb0e-751b9c425f52", "created_date": "2020-10-01T18:17:00.797405", "did": "f5f52160-d995-4c8b-8131-a149e5a12069", "file_name": "vic_test1.txt", "form": null, "hashes": {}, "metadata": {}, "rev": "88a8688b", "size": null, "updated_date": "2020-10-01T18:17:00.797411", "uploader": "san.lin@umccr.org", "urls": [], "urls_metadata": {}, "version": null } -
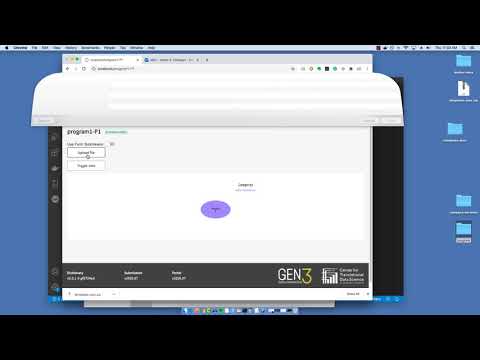
Please go to https://gen3.dev.umccr.org/submission/files i.e. Login > Submit Data > Map My Files
-
There, you should see the uploaded file with status "Generating..."
-
Use
g3poto update hash, size and urls to the blank record using the GUIDg3po index blank update \ --guid f5f52160-d995-4c8b-8131-a149e5a12069 \ --rev 88a8688b \ --hash_type md5 \ --hash_value 64503f07db17f16d48cfb9d8e0553d7b \ --size 35 \ --urls s3://umccr-gen3-dev/f5f52160-d995-4c8b-8131-a149e5a12069/vic_test1.txt \ --authz /programs/umccr/projects/vic \ | jq { "baseid": "6f6f27fa-f81c-40b8-bb0e-751b9c425f52", "did": "f5f52160-d995-4c8b-8131-a149e5a12069", "rev": "a546bf88" } -
Please refresh the https://gen3.dev.umccr.org/submission/files
-
Now the uploaded file should change to Ready status. Select and continue with Map Files in WindMill Data Portal UI there.
-
Please refer to
g3poREADME for more ad-hoc CLI commands to work with Gen3 services, such as out-of-band data ingesting using manifest indexing and mapping to graph data dictionary model, and so on. Also, refer its wiki entry for technical details about blank index record update and why the need of this. -
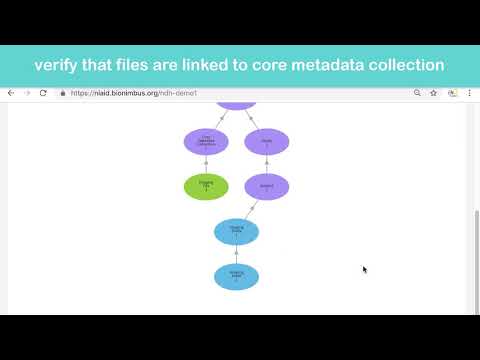
Now please review and contrast all ☝️ steps with: