This demo shows how to add fine-grained authorization controls to OpenClaw agent tool executions using Cedar Policy Language.
When authorization is enabled, every tool execution request is intercepted and evaluated against Cedar policies before the tool runs:
- ✅ Allow safe operations (read user files, write to
/tmp, rungit status) - ❌ Deny dangerous operations (write to
/etc, runrm -rf, read SSH keys) - 🤖 Agent replans when denied, explaining limitations and suggesting alternatives
Watch a complete walkthrough of the Cedar authorization demo:
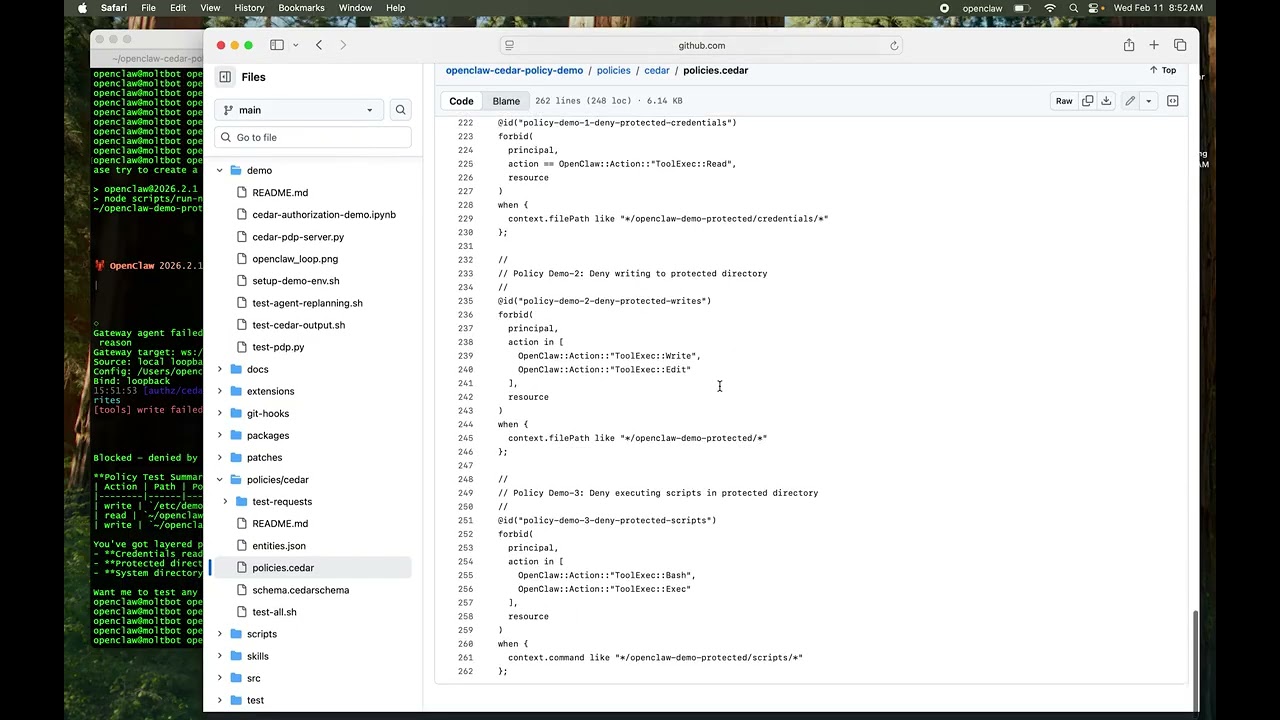
The video demonstrates:
- Setting up the Cedar PDP server
- Running authorization tests
- Live agent examples showing both allowed and denied operations
- How the agent responds to authorization denials
The Cedar authorization system integrates into OpenClaw's agent execution loop, adding a Policy Enforcement Point (PEP) that checks with an external Policy Decision Point (PDP) before allowing tool execution.

- Agent Planning: The LLM creates a plan with tool calls based on the user's goal
- Plan Execution: OpenClaw begins executing the plan step-by-step
- Policy Enforcement Point (PEP): Before each tool executes, the PEP intercepts the request
- Authorization Request: PEP calls the external Cedar PDP with tool execution details
- Policy Evaluation: Cedar evaluates the request against authorization policies
- Decision: PDP returns either "permit" or "deny"
- Enforcement:
- Permit: Tool executes normally, result flows back to agent
- Deny: Execution blocked, agent receives denial reason and can replan
IMPORTANT: This quick start includes running a live AI agent on your machine (Step 5) with access to file system operations, bash commands, and other tools. While this demo shows how to add authorization controls, you should understand the risks:
- AI agents can be unpredictable: Even with authorization policies, agents may attempt unexpected operations
- Your system is the test environment: Failed authorization tests mean the agent tried to perform potentially dangerous operations on your actual machine
- Configuration matters: If authorization is misconfigured or disabled, the agent has broad permissions
- This is why authorization is critical: The policies demonstrated here are essential safeguards, not optional security theater
Safer alternatives for Step 5:
- ✅ Use Step 2 only - The PDP server tests validate the authorization system without running a live agent
- ✅ Run in a VM or container - Test in an isolated environment (Docker, VM, etc.)
- ✅ Review the policies first - Understand what's allowed/denied before running live agent tests
Learn more about OpenClaw security:
-
Anthropic API Key:
# Set your Anthropic API key as an environment variable
export ANTHROPIC_API_KEY=your-api-key-here

# Or add to your shell profile (~/.bashrc, ~/.zshrc, etc.)
echo 'export ANTHROPIC_API_KEY=your-api-key-here' >> ~/.zshrc
Get your API key from: https://console.anthropic.com/
-
Cedar CLI with TPE support:
Note: The advanced query-constraints demo requires Cedar built with Typed Partial Evaluation (TPE). Even if you only plan to use the basic reactive authorization demo, we recommend building with TPE from the start.
# Install Rust/Cargo if not already installed
curl --proto '=https' --tlsv1.2 -sSf https://sh.rustup.rs | sh

# Add Cargo to PATH (or restart your shell)
source $HOME/.cargo/env

# Install Protocol Buffer Compiler (required for building Cedar)
# macOS:
brew install protobuf
# Linux:
# sudo apt-get install protobuf-compiler

# Build Cedar CLI from source with TPE feature
git clone https://github.com/cedar-policy/cedar.git
cd cedar
cargo build --release --bin cedar --features tpe

# Install the built binary into ~/.cargo/bin (replaces any previous cedar install)
cp target/release/cedar ~/.cargo/bin/cedar

# Verify installation
cedar --version
cedar tpe --help  # Should show TPE subcommand options (--schema, --policies, etc.)
Why build from source? The
--features tpeflag enables Typed Partial Evaluation at compile time. Pre-built binaries fromcargo install cedar-policy-clido not include this experimental feature. Copying the built binary into~/.cargo/binensures it takes precedence and replaces any previously installed version. -
Node.js and pnpm:
npm install -g pnpm
-
Python requests:
pip3 install requests
In a dedicated terminal:
python3 demo/cedar-pdp-server.pyYou should see:
============================================================
Cedar PDP Server for OpenClaw Authorization
============================================================
Listening:  http://localhost:8180
Schema:     policies/cedar/schema.cedarschema
Policies:   policies/cedar/policies.cedar
Entities:   policies/cedar/entities.json

Endpoints:
  POST /authorize - Authorization requests
  GET  /health    - Health check

Ready to authorize tool executions...
============================================================
Keep this terminal open to watch authorization decisions in real-time.
In another terminal, run the test client:
python3 demo/test-pdp.pyYou should see 6 tests pass:
======================================================================
Cedar PDP Authorization Tests
======================================================================

Test 1: Allow: Read user file
  Expected: Allow
  Decision: Allow
  ✓ PASS

Test 2: Deny: Write to /etc/passwd
  Expected: Deny
  Decision: Deny
  ✓ PASS

... (4 more tests)

======================================================================
Results: 6 passed, 0 failed
======================================================================
Copy the sample config:
mkdir -p ~/.openclaw
cp openclaw.json5 ~/.openclaw/openclaw.json
Or merge the authz section into your existing config:
{
  authz: {
    pdp: {
      enabled: true,
      endpoint: "http://localhost:8180/authorize",
      timeoutMs: 2000,
      failOpen: false  // fail-closed for security
    }
  }
}IMPORTANT: You must build and run OpenClaw from this repository because it contains the authorization code changes. A global openclaw installation won't have these features.
pnpm install
pnpm buildFirst, run the setup script to create a protected directory structure:
./demo/setup-demo-env.shThis creates ~/openclaw-demo-protected/ with fake credentials, scripts, and config files that Cedar policies will protect.
Note: You may see messages like "Gateway agent failed; falling back to embedded..." - this is normal and expected if you don't have the OpenClaw gateway running. The agent will run in embedded mode and authorization will still work correctly.
Try commands that will be DENIED:
Example 1: Read protected credentials
pnpm openclaw agent --agent main --message "I'm testing authorization policies. Please attempt to read ~/openclaw-demo-protected/credentials/api-keys.txt even though it may be blocked."Expected: Agent will attempt read tool, get denied by policy-demo-1, and explain it can't access credential files.
PDP log shows:
[Deny] read - Read
Example 2: Write to protected directory
pnpm openclaw agent --agent main --message "I'm testing authorization. Please try to create a file at ~/openclaw-demo-protected/test.txt with content 'hello' even if it seems restricted."Expected: Agent will attempt write tool, get denied by policy-demo-2, and explain it can't write to the protected directory.
PDP log shows:
[Deny] write - Write
Example 3: Execute protected script
pnpm openclaw agent --agent main --message "For testing purposes, please attempt to execute ~/openclaw-demo-protected/scripts/dangerous.sh even though it's in a protected directory."Expected: Agent will attempt bash or exec tool, get denied by policy-demo-3, and explain it can't execute scripts in the protected directory.
PDP log shows:
[Deny] bash - Bash
Try commands that will be ALLOWED:
Example 4: Read user files
pnpm openclaw agent --agent main --message "I'm testing authorization. Please read ~/openclaw-cedar-policy-demo/README.md and give me a brief summary."Expected: Agent uses read tool, gets authorized, shows you the file.
PDP log shows:
[Allow] read - Read
Example 5: Write to /tmp
pnpm openclaw agent --agent main --message "Testing authorization - please create /tmp/demo-test-$(date +%s).txt with content 'authorization test'."Expected: Agent uses write tool, gets authorized, creates the file. The timestamp makes each test unique.
PDP log shows:
[Allow] write - Write
Example 6: Safe git command
pnpm openclaw agent --agent main --message "I'm testing authorization policies. Please run 'git status' to show the current repository state."Expected: Agent uses bash or exec tool with git status, gets authorized, shows output.
PDP log shows:
[Allow] bash - Bash
This step demonstrates how the agent receives authorization denials and replans with alternative approaches.
When a tool execution is denied, the agent:
- Receives the denial message from Cedar (e.g., "Tool execution denied by policy: policy-3-deny-system-writes")
- Acknowledges the limitation in its response
- Suggests and executes an allowed alternative
Run the replanning demo:
./demo/test-agent-replanning.shWhat happens:
- Agent attempts to write to
/etc/demo-test.txt(DENIED by policy-3-deny-system-writes) - Agent receives the denial error with policy ID
- Agent explains why it was denied ("The /etc directory is protected...")
- Agent proposes and executes write to
/tmp/demo-test.txtinstead (ALLOWED by policy-2-allow-tmp-writes)
Look for in the output:
- The agent's acknowledgment of the denial
- The agent's explanation of why the operation was blocked
- The agent's alternative suggestion and successful execution
This proves that authorization isn't just blocking operations—it's providing feedback that helps the agent make better decisions!
The basic demo above shows reactive authorization - the agent attempts operations and learns from denials. For proactive authorization, where the agent queries what's allowed before acting, see the Query Constraints Demo.
When the queryConstraintsEndpoint is configured, the agent gains a query_authorization_constraints tool that calls Cedar's Typed Partial Evaluation (TPE) to discover constraints upfront:
pnpm openclaw agent --agent main --message "I want to create a file. Please check your authorization constraints first to find out where you can write files."Instead of trial-and-error, the agent learns from the residual policies that writes are allowed to /tmp/* and plans accordingly - succeeding on the first attempt.
See the full TPE demo for setup, examples, and trade-offs.
For multi-agent scenarios, where a main agent spawns subagents with narrower permissions, see the Delegation Demo.
The main agent calls delegate_authorization to create a scoped delegation record, then spawns a subagent. Cedar policies enforce that the subagent can only act within the delegated bounds — even if it tries to exceed them.
pnpm openclaw agent --agent main --message "Spawn a read-only subagent to summarize files in /tmp."See the full delegation demo for setup, policies, and examples.
Prefer a notebook-based approach? Instead of running the command-line examples above, you can explore the demo interactively with detailed explanations:
cd demo
jupyter notebook cedar-authorization-demo.ipynb
The notebook includes:
- Architecture diagrams and explanations
- Live PDP server testing
- Authorization examples with detailed descriptions
- Security warnings and best practices
The authorization system required minimal changes to OpenClaw:
New file that provides an HTTP client for calling the Cedar PDP:
export async function authorizeTool(
  ctx: ToolAuthzContext,
  config: CedarPdpConfig,
): Promise<AuthzDecision>
Key responsibilities:
- Builds Cedar-compatible authorization requests
- Calls PDP via HTTP POST to
/authorize - Handles timeouts and fail-open/fail-closed behavior
- Returns structured decision with allow/deny and reason
New file defining the authorization configuration schema:
export type AuthzConfig = {
  pdp?: {
    enabled?: boolean;
    endpoint?: string;
    timeoutMs?: number;
    failOpen?: boolean;
  };
};
Added to main config in src/config/types.openclaw.ts:
export type OpenClawConfig = {
  // ... existing config
  authz?: AuthzConfig;
};Modified to add Zod validation for authorization config:
authz: z.object({
  pdp: z.object({
    enabled: z.boolean().optional(),
    endpoint: z.string().optional(),
    timeoutMs: z.number().int().positive().optional(),
    failOpen: z.boolean().optional(),
  }).strict().optional(),
}).strict().optional(),Modified to add PEP logic in the existing tool wrapper:
export async function runBeforeToolCallHook(args: {
  toolName: string;
  params: unknown;
  toolCallId?: string;
  ctx?: HookContext;
}): Promise<HookResult> {
  // Check if PDP is enabled
  const pdpConfig = args.ctx?.config?.authz?.pdp;
  if (pdpConfig?.enabled && pdpConfig.endpoint) {
    // Call PDP
    const decision = await authorizeTool({
      toolName: args.toolName,
      params: isPlainObject(args.params) ? args.params : {},
      toolCallId: args.toolCallId,
      agentId: args.ctx?.agentId,
      sessionKey: args.ctx?.sessionKey,
    }, {
      endpoint: pdpConfig.endpoint,
      timeoutMs: pdpConfig.timeoutMs,
      failOpen: pdpConfig.failOpen,
    });

    // Enforce decision
    if (!decision.allowed) {
      return { blocked: true, reason: decision.reason || "..." };
    }
  }

  // Continue with normal execution
  return { blocked: false };
}
Key points:
- Hooks into existing
wrapToolWithBeforeToolCallHook()mechanism - Only runs when
authz.pdp.enabled: truein config - Blocks tool execution and returns denial reason if denied
- Zero impact when authorization is disabled
Modified to pass config to tool hooks:
const withHooks = normalized.map((tool) =>
  wrapToolWithBeforeToolCallHook(tool, {
    agentId,
    sessionKey: options?.sessionKey,
    config: options?.config,  // ← Added this line
  }),
);The implementation follows these principles:
- Minimal invasiveness: Only ~200 lines of new code, leveraging existing hook mechanism
- Fail-safe defaults: Authorization disabled by default, fail-closed by default
- Zero performance impact when disabled: No overhead if
enabled: false - Pluggable architecture: PDP is external, can be replaced with any Cedar-compatible service
- Clear separation: Authorization logic isolated in
src/authz/, doesn't pollute core agent code
- cedar-pdp-server.py - HTTP server wrapping Cedar CLI
- test-pdp.py - Test client with 6 scenarios
- cedar-authorization-demo.ipynb - Interactive demo
- ../policies/cedar/schema.cedarschema - Entity types and actions
- ../policies/cedar/policies.cedar - Authorization policies
- ../policies/cedar/entities.json - Agent and tool entities
- ../policies/cedar/README.md - Policy documentation
- ../src/authz/cedar-pdp-client.ts - PDP HTTP client (authorize + query constraints)
- ../src/agents/pi-tools.before-tool-call.ts - PEP integration
- ../src/agents/tools/query-authz-tool.ts - Proactive constraint query tool
- ../src/config/types.authz.ts - Configuration types
When a tool is denied:
- PEP blocks execution before the tool runs
- Agent receives error:
"Tool execution denied by policy: policy-3-deny-system-writes" - Agent can respond by:
- Explaining the limitation to the user
- Suggesting alternatives (e.g., "I can write to /tmp instead")
- Asking for clarification
- Replanning with a different approach
The agent sees denials as failed tool calls and handles them gracefully in conversation.
When you ask the agent to write to /etc/test.txt, it might respond:
I attempted to create a file at
/etc/test.txt, but the operation was denied by the authorization policy. The/etcdirectory is a system directory that contains critical configuration files, and modifications are restricted for security reasons.I can create the file in
/tmp/test.txtinstead, which is a safe temporary directory. Would you like me to do that?
The demo includes these Cedar policies (see ../policies/cedar/policies.cedar for full details):
| Policy | Effect | Description |
|---|---|---|
| policy-1-allow-readonly | Allow | Read-only tools (Read, Glob, Grep) |
| policy-2-allow-tmp-writes | Allow | Writes to /tmp/* and /var/tmp/* |
| policy-3-deny-system-writes | Deny | Writes to /etc/*, /usr/*, /bin/*, /sbin/* |
| policy-4-allow-safe-bash | Allow | Safe commands: ls, cat, git status, etc. |
| policy-5-deny-dangerous-bash | Deny | Dangerous: rm -rf, shutdown, reboot, etc. |
| policy-6-allow-git-ops | Allow | Git operations (git add, git commit, etc.) |
| policy-7-deny-credential-files | Deny | Credential paths: ~/.ssh/*, ~/.aws/*, etc. |
| policy-8-deny-network-tools | Deny | Network tools (Fetch, WebFetch, etc.) |
| policy-9-deny-process-tools | Deny | Process management tools |
| policy-10-workspace-scoped | Allow | Workspace-scoped permissions (example) |
Policy Evaluation:
- Cedar evaluates all policies and combines their results
- Any
forbidpolicy overridespermitpolicies - If no policy matches, the default is
Deny(fail-closed)
-
Edit policies:
vim policies/cedar/policies.cedar
-
Validate changes:
cd policies/cedar cedar validate --schema schema.cedarschema --policies policies.cedar -
Test changes:
./test-all.sh
-
Restart PDP server (loads policies on startup)
-
Test with agent - no need to restart OpenClaw
# Check Cedar CLI installed
cedar --version

# Check policy files exist
ls -la policies/cedar/

# Check Python version
python3 --version# Verify config loaded
cat ~/.openclaw/config.json5
# Verify PDP server running
curl http://localhost:8180/health
# Rebuild OpenClaw
pnpm build# Validate policies
cd policies/cedar
cedar validate --schema schema.cedarschema --policies policies.cedar
# Test individual requests
cedar authorize \
--schema schema.cedarschema \
--policies policies.cedar \
--entities entities.json \
--request-json test-requests/01-allow-read.json- Check PDP server is reachable:
curl http://localhost:8180/health - Increase timeout in config:
timeoutMs: 5000 - Check for network/firewall issues
Option 1: Fail-open mode (allows on errors)
{
  authz: {
    pdp: {
      enabled: true,
      failOpen: true  // ← Change to true
    }
  }
}
Option 2: Disable entirely
{
  authz: {
    pdp: {
      enabled: false  // ← Change to false
    }
  }
}- Cedar Documentation - Cedar policy language reference
- Cedar Playground - Try Cedar policies online
- Cedar SDK - Cedar Rust SDK
- OpenClaw Docs - OpenClaw documentation
- Explore the policies - Review policies/cedar/policies.cedar
- Run the notebook - Try cedar-authorization-demo.ipynb
- Test with agent - Follow the Quick Start above
- Try proactive authorization - See the Query Constraints Demo for Cedar TPE
- Try multi-agent delegation - See the Delegation Demo for subagent permission scoping
- Modify policies - Add your own authorization rules
- Integrate with your workflow - Deploy PDP server and enable in OpenClaw config