How It Works
Note: This page explains the inner workings of the library and is meant for engineers who want to contribute to the library. If you will like to find out how to use the library, please visit the storybook site.
In a nutshell, the Frontend Engine renders the form according to the JSON schema passed through the data prop. It will iterate through the fields key to render each field / element in the form.
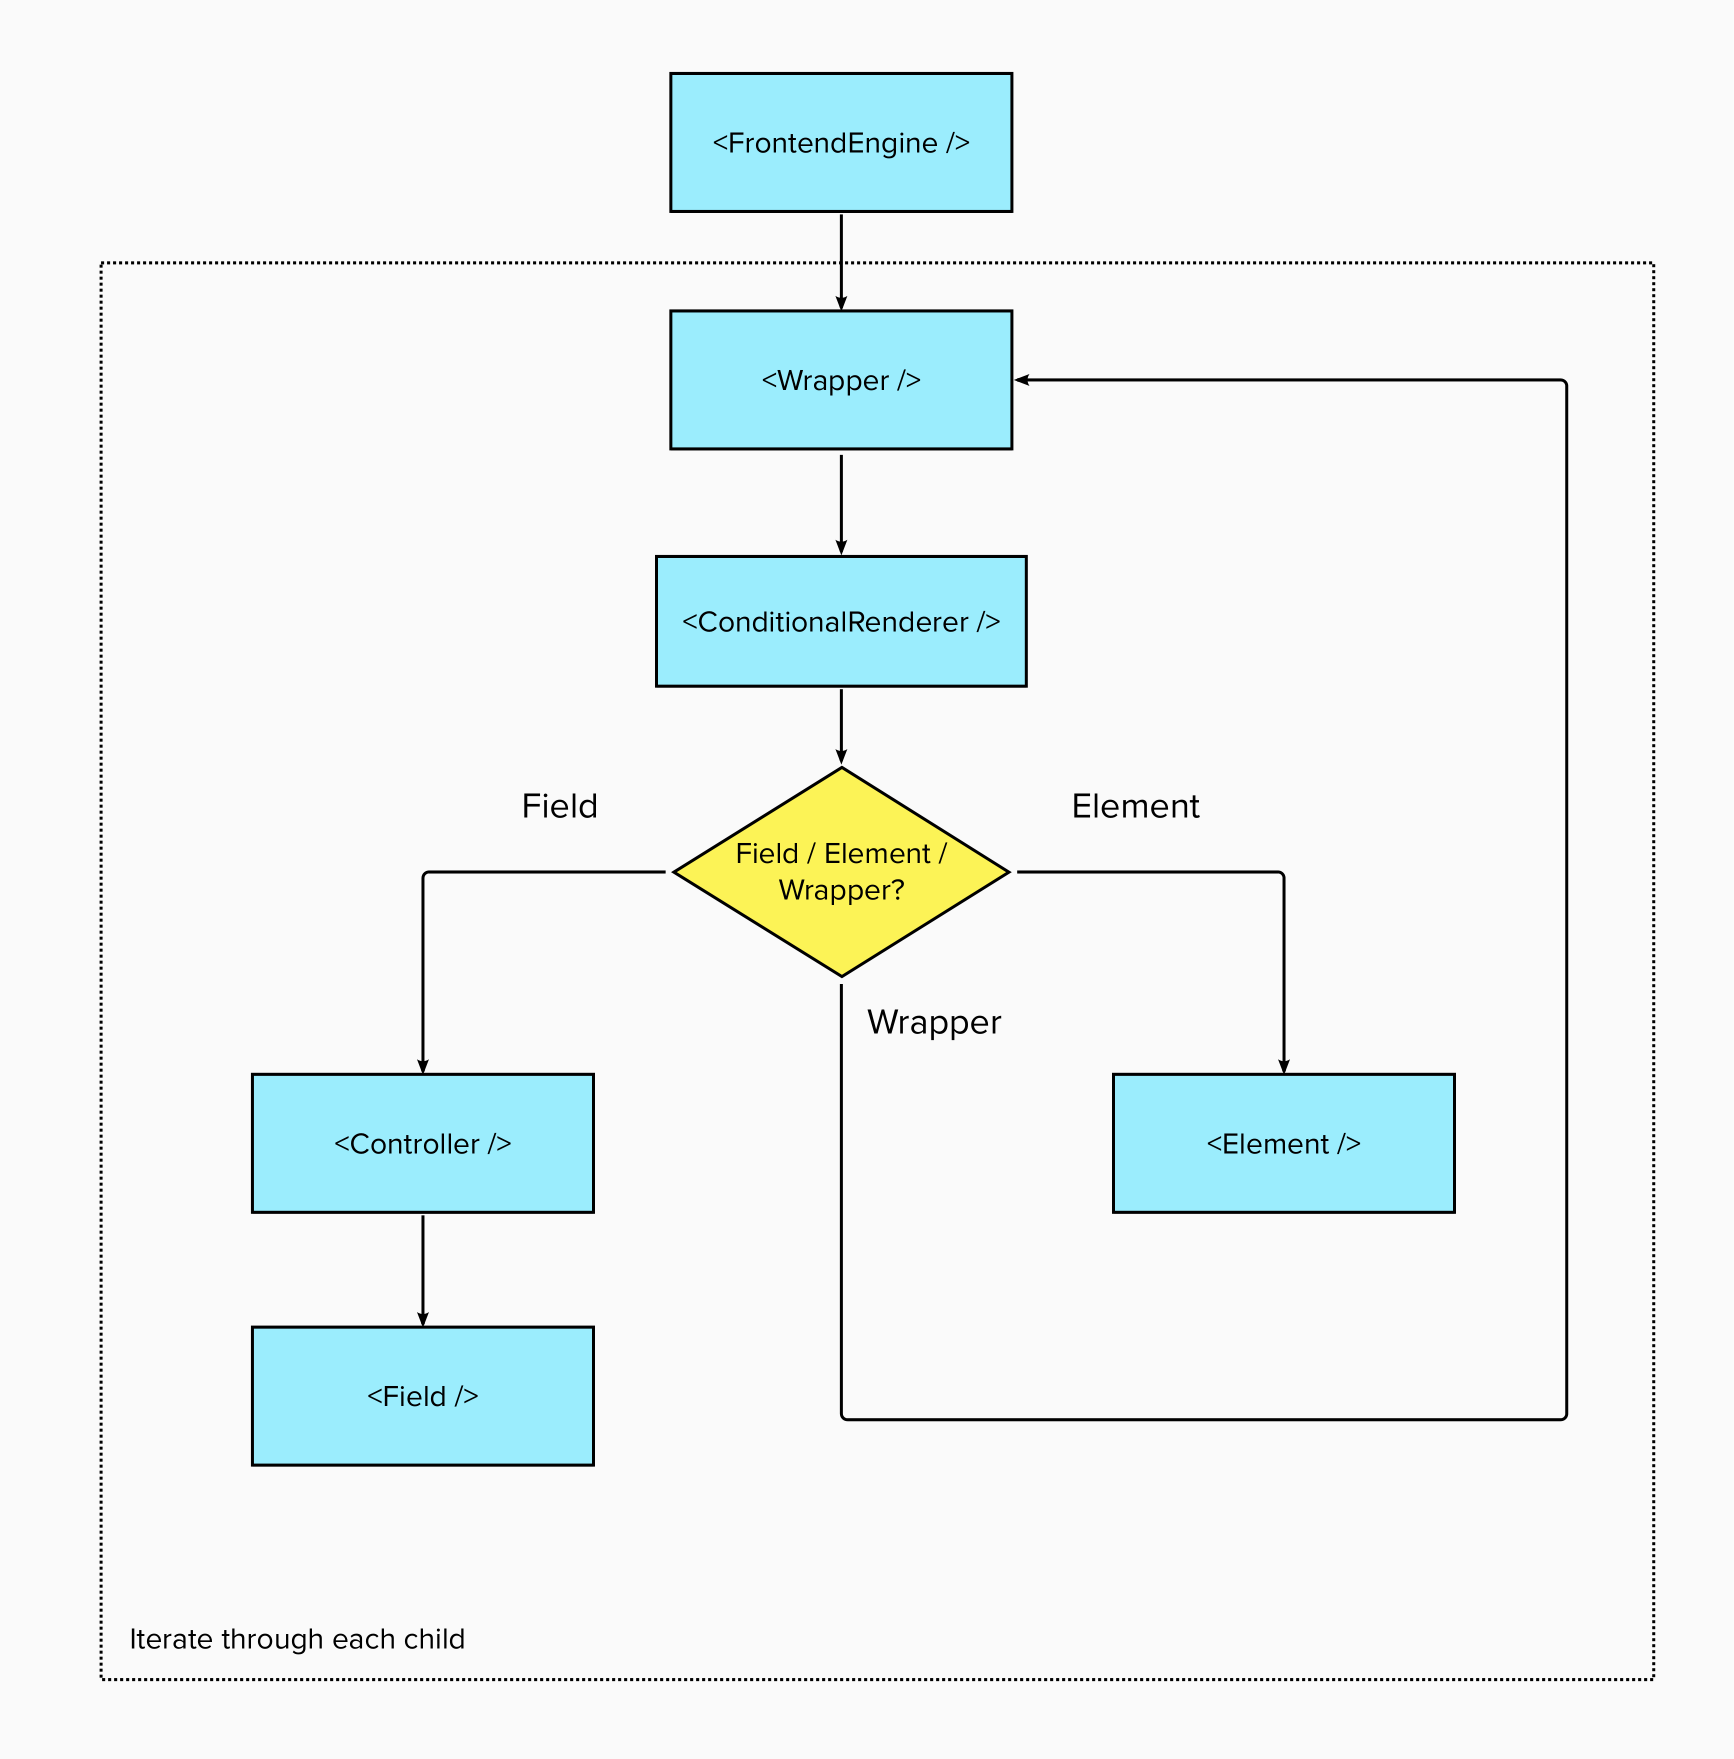
The bulk of the rendering logic is in the Wrapper component. The child is wrapped within a ConditionalRender which handles the conditional rendering logic.
Next the wrapper identifies if the child is a field or an element:
- Fields are components that add values to the form
- i.e. they accept values that will get submitted.
- e.g.
textarea,selectandradio-button. - These fields are wrapped within react-hook-form's
Controllerfield to integrate the field lifecycle events into the form.
- Elements, on the other hand, do not have values and are typically used for layouts and messages.
- e.g.
div,h1andalert. - Hence they are rendered as it is.
- Note:
Wrapperis also considered anelement
- e.g.
If the child is a Wrapper, it will go through the rendering flow again by iterating through its children.
Frontend Engine relies on Yup to generates the validation schema for react-hook-form to use. For Frontend Engine's JSON schema, each field comes with the validation config which is converted to the Yup schema.
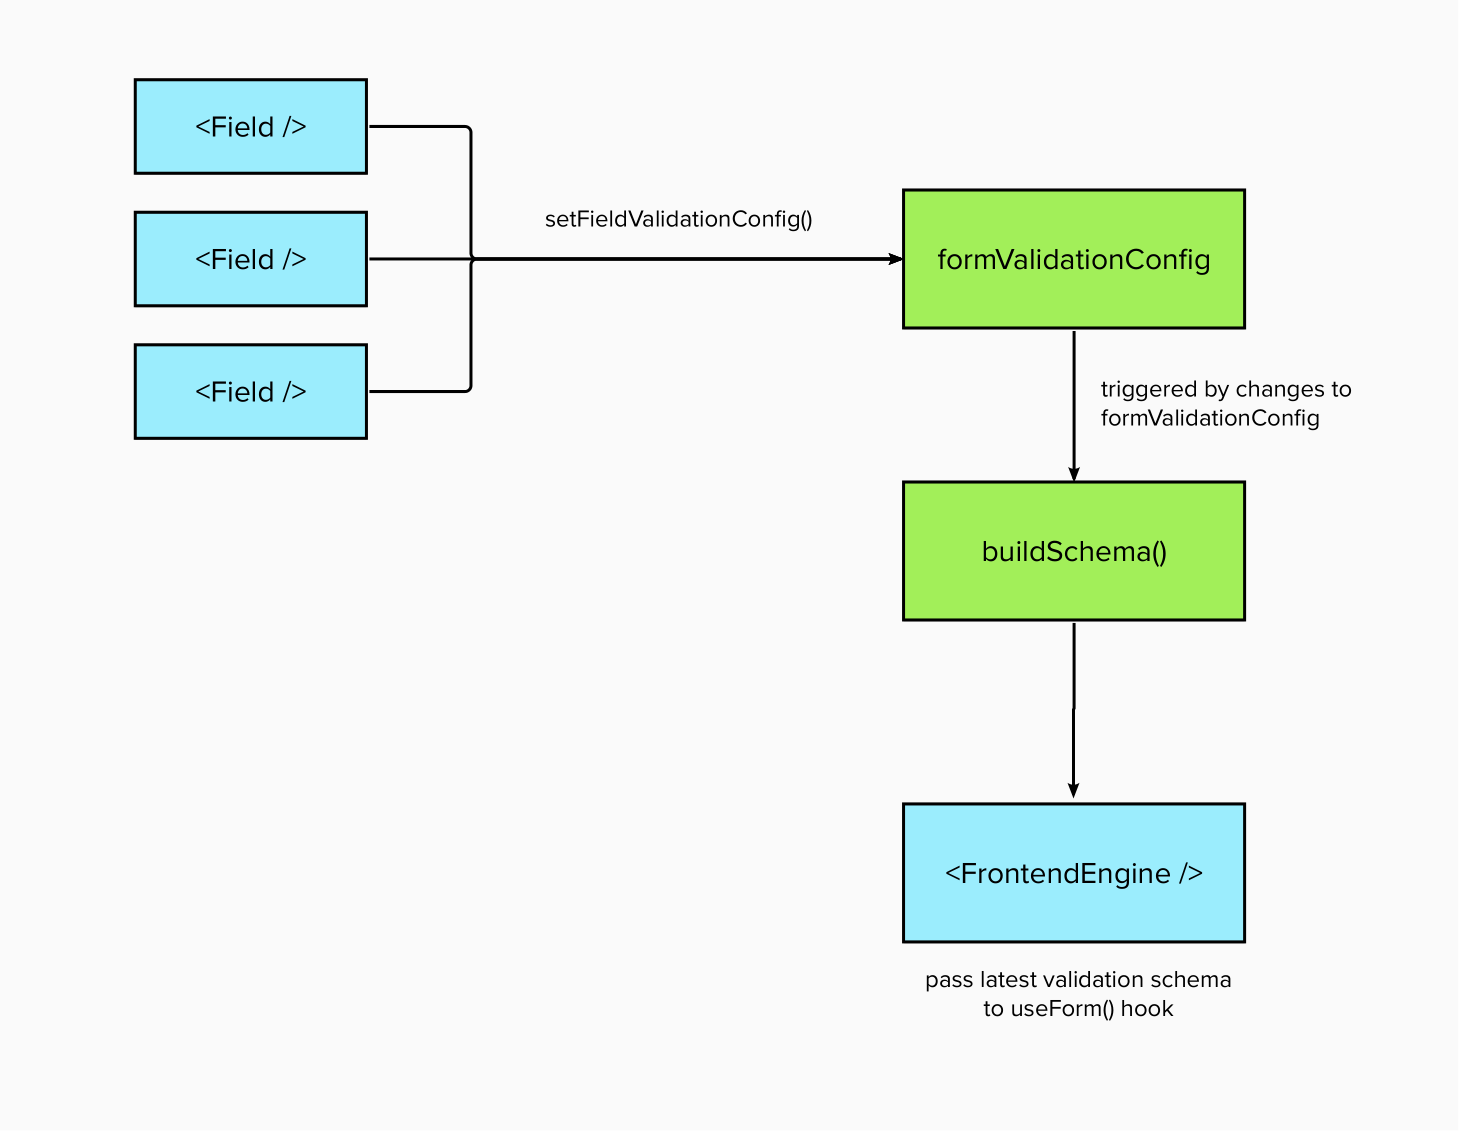
The YupProvider is what holds and manipulates the formValidationConfig. The formValidationConfig is a key-value object that contains the Yup type and validation rules of each field.
// sample formValidationConfig
// these are added through setFieldValidationConfig()
{
	myField1: {
		schema: Yup.string(),
		validationRules: [ { required: true }, { max: 5, errorMessage: "Max. 5 characters" } ]
	},
	myField2: {
		schema: Yup.number(),
		validationRules: [ { required: true }, { min: 5, errorMessage: "Min. value of 5" } ]
	}
}
The config and methods are exposed through the useValidationSchema hook for each field to use. Every time a field is added, it will add to the validation config.
setFieldValidationConfig("myField1", Yup.string(), [{ required: true }, { max: 5, errorMessage: "Max. 5 characters" }]);Every time the formValidationConfig changes, useValidationSchema will refresh the Yup validation schema by calling buildSchema(), which will loop through the validation config to generate the Yup validation schema accordingly. Thereafter, the schema is passed to react-hook-form to be used for validation.
Conditional rendering is managed by the ConditionalRenderer component. Each component in Frontend Engine is wrapped within one. The way the ConditionalRenderer handles conditional rendering is similar to how validation is handled:
- Format the
showIfkey. (which is structured the same way as thevalidation) - Convert it to a Yup schema via
buildSchema() - Runs the Yup schema through validation to determine whether to render the component or not.
The image upload component is able to handle inputs, annotation and upload to an endpoint specified. The underlying components are separated in a few groups:
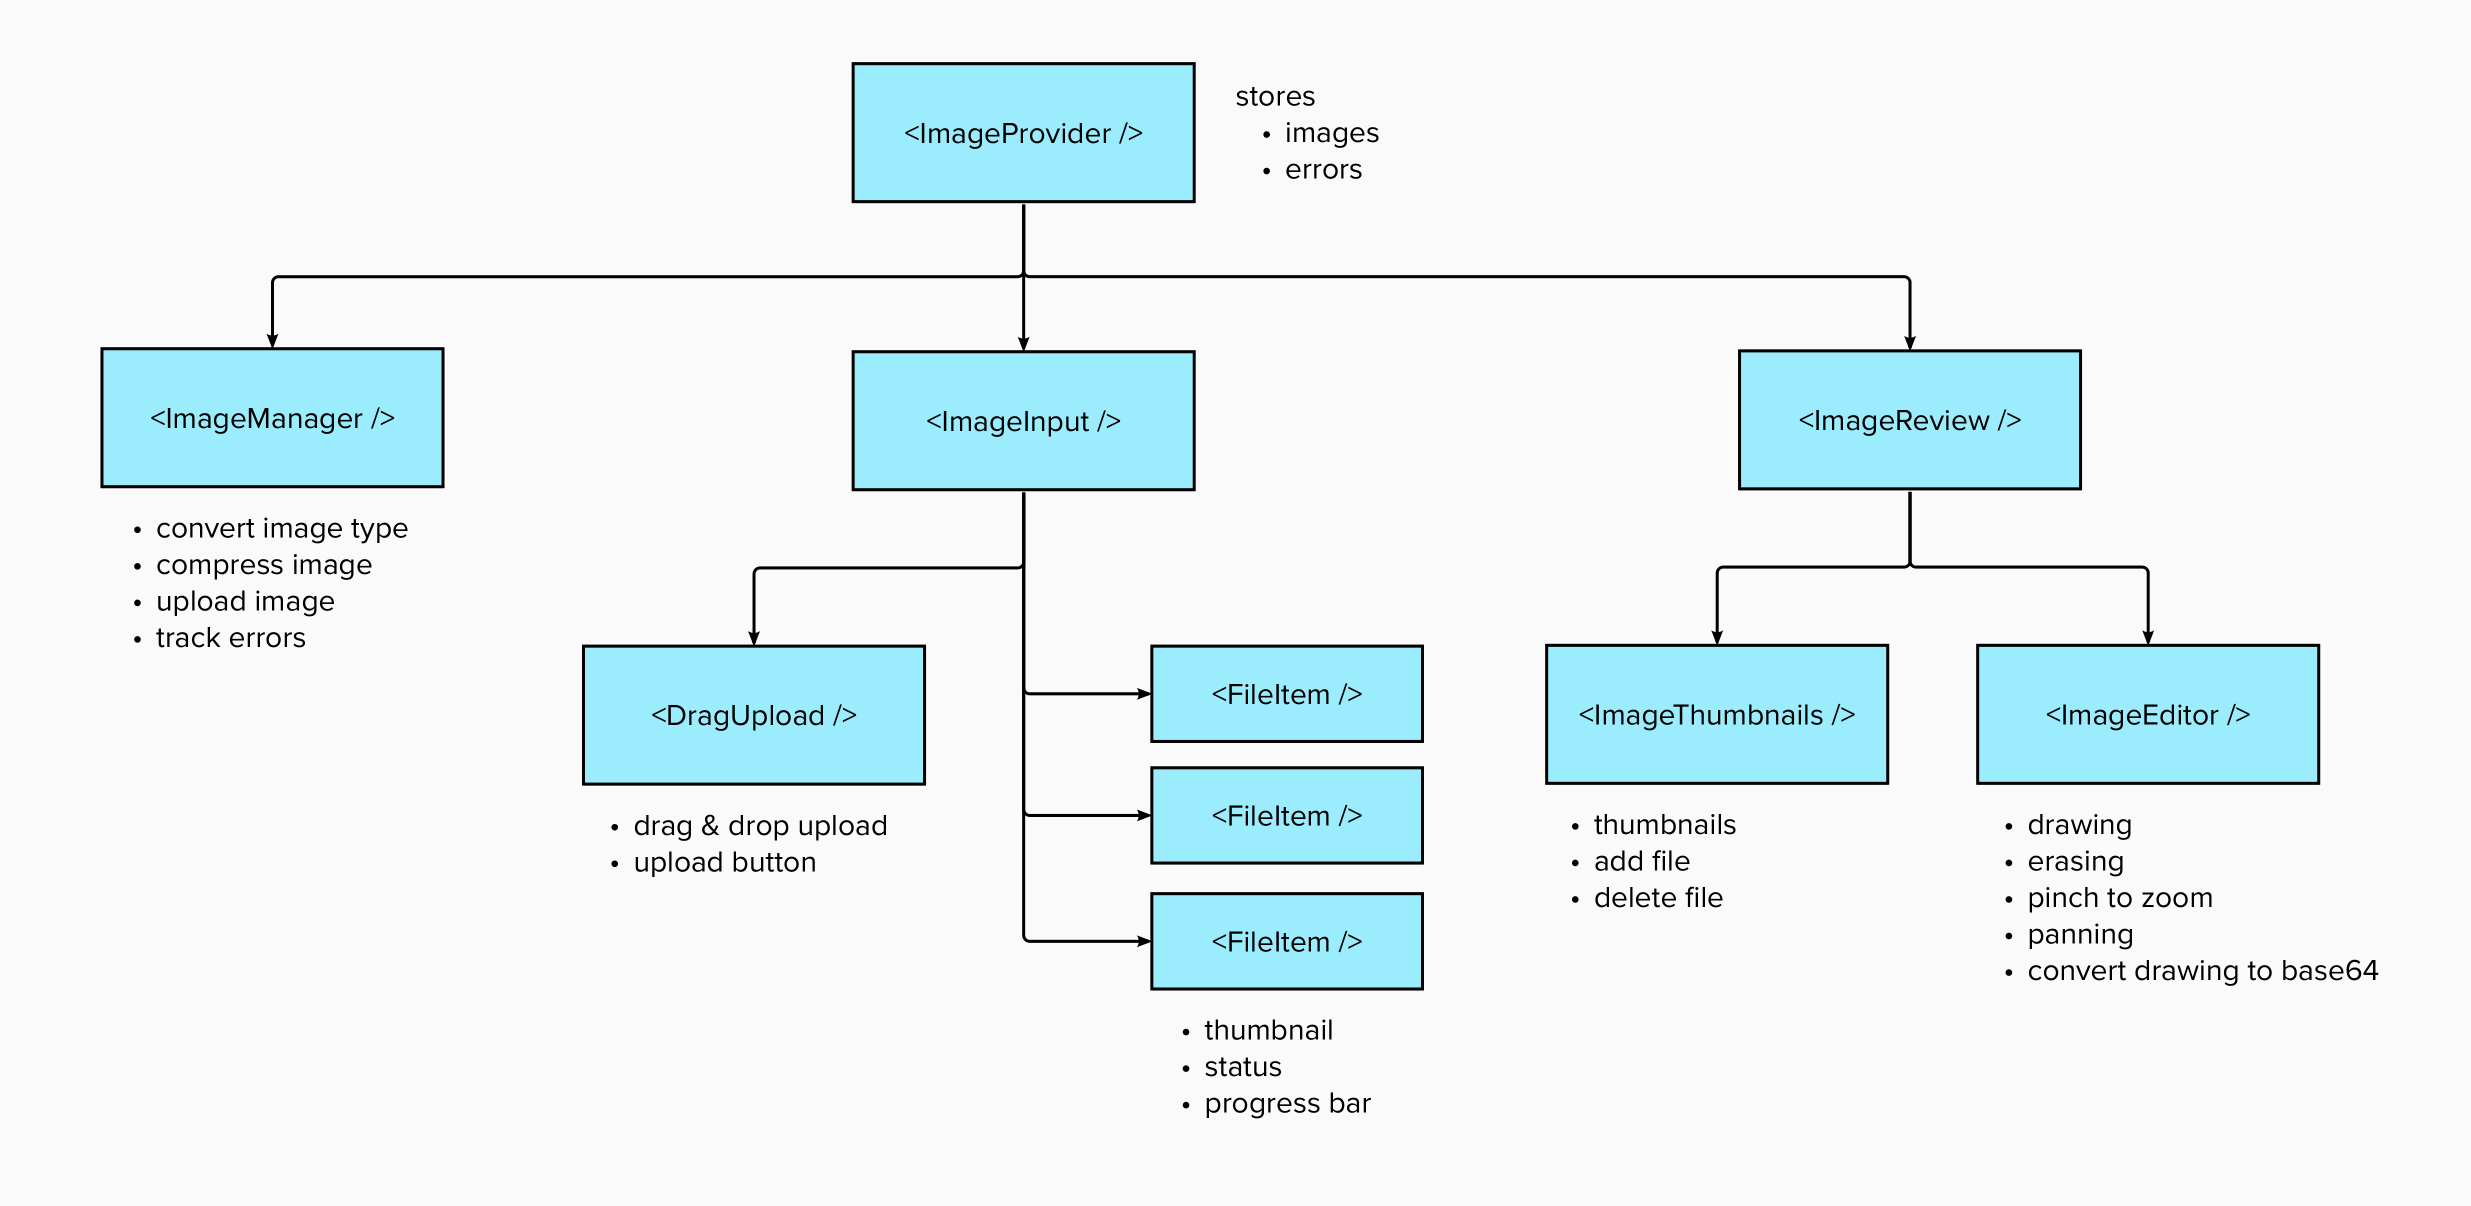
Shares images and error states and its respective methods between all the children.
A render-less component to manage all the images, its purpose is to ensures the images progress through the various statuses up till uploaded.
Offers drag & drop insertion of images as well as allow user to bring up the file dialog to select images to add. It also renders all the added images and their details.
It is the modal that will appear after adding an image (if editImage=true), this component handles everything the modal offers like adding / editing / deleting of images.
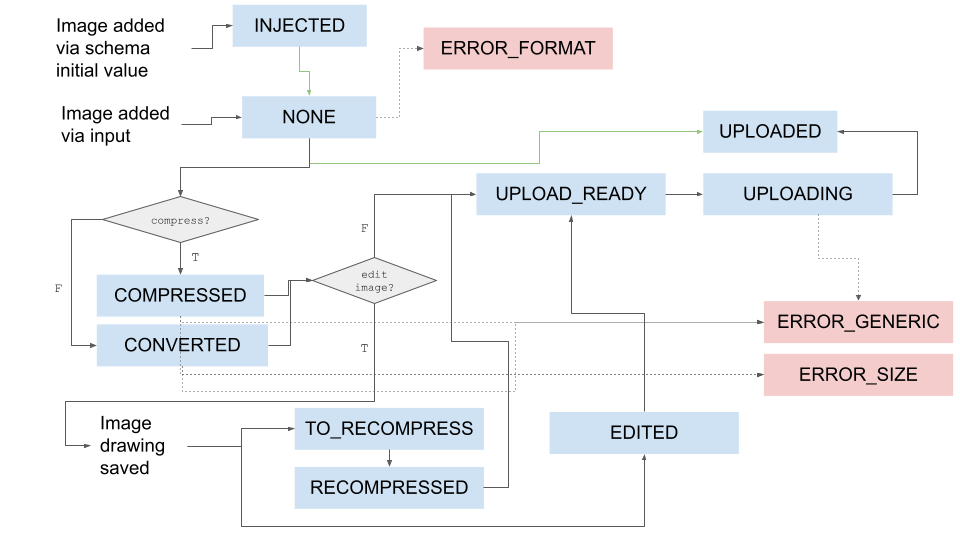
The diagram above illustrates how the various image statuses will transition.
- Most of the handling of image statuses are carried out in the
ImageManagercomponent - Images can be added via input or injected through schema
- Depending on the
compresskey, images will be resampled/converted or compressed - Depending on the
editImagekey, images can be recompressed