



Google Chat is a communication platform from Google, designed for teams and businesses as part of Google Workspace.
The ballerinax/googleapis.chat package provides both:
- A REST client (
chat:Client) for the Google Chat API — create spaces, send messages, manage memberships, upload attachments, etc. - A webhook listener (
chat:Listener) that receives Google Chat interaction events (messages, slash commands, card clicks, dialog submissions, app-home opens) over HTTP and dispatches them to typedremote functions on achat:ChatService.
The listener runs as a plain HTTPS endpoint that Google Chat POSTs events to directly. It supports three authentication mechanisms: service account (recommended for bots), OAuth 2.0 (for user-scoped actions such as attachment uploads), and short-lived bearer tokens (for quick tests).
To use the Google Chat connector, you must have access to the Google Chat API through a Google Cloud Platform (GCP) account with a project under it. If you do not have a GCP account, you can sign up for one here.
-
Open the Google Cloud Platform Console.
-
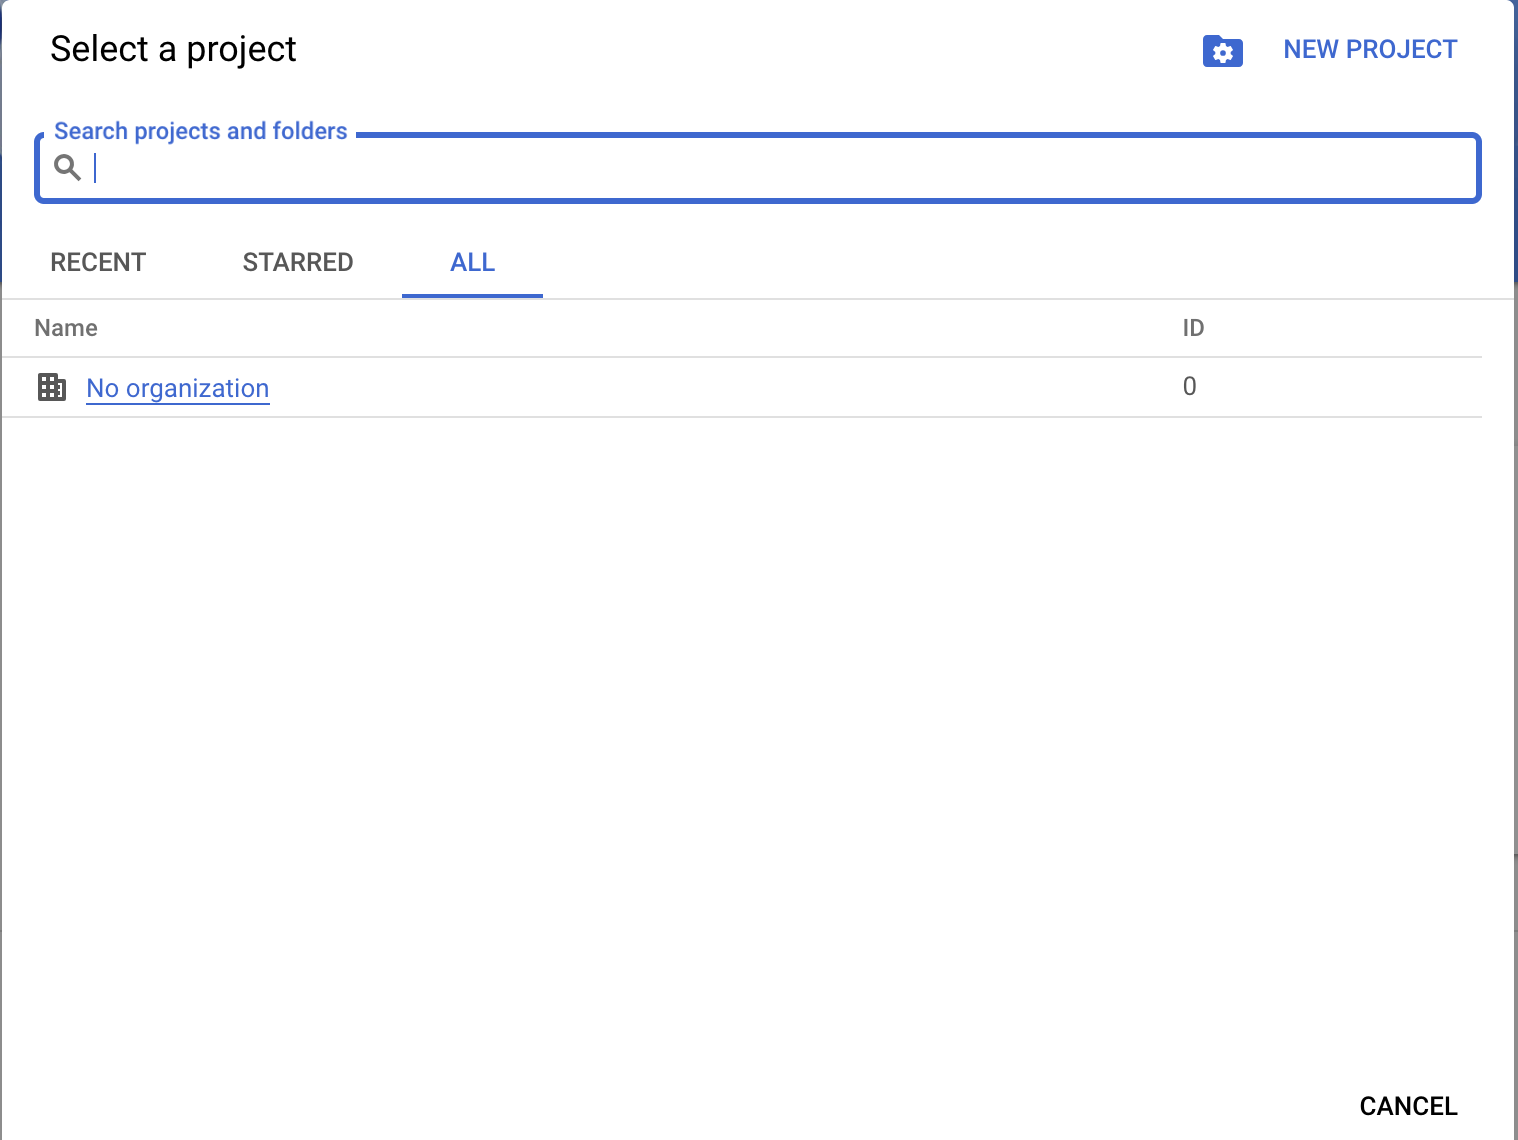
Click the project drop-down menu and select an existing project, or create a new one for your Chat app.
-
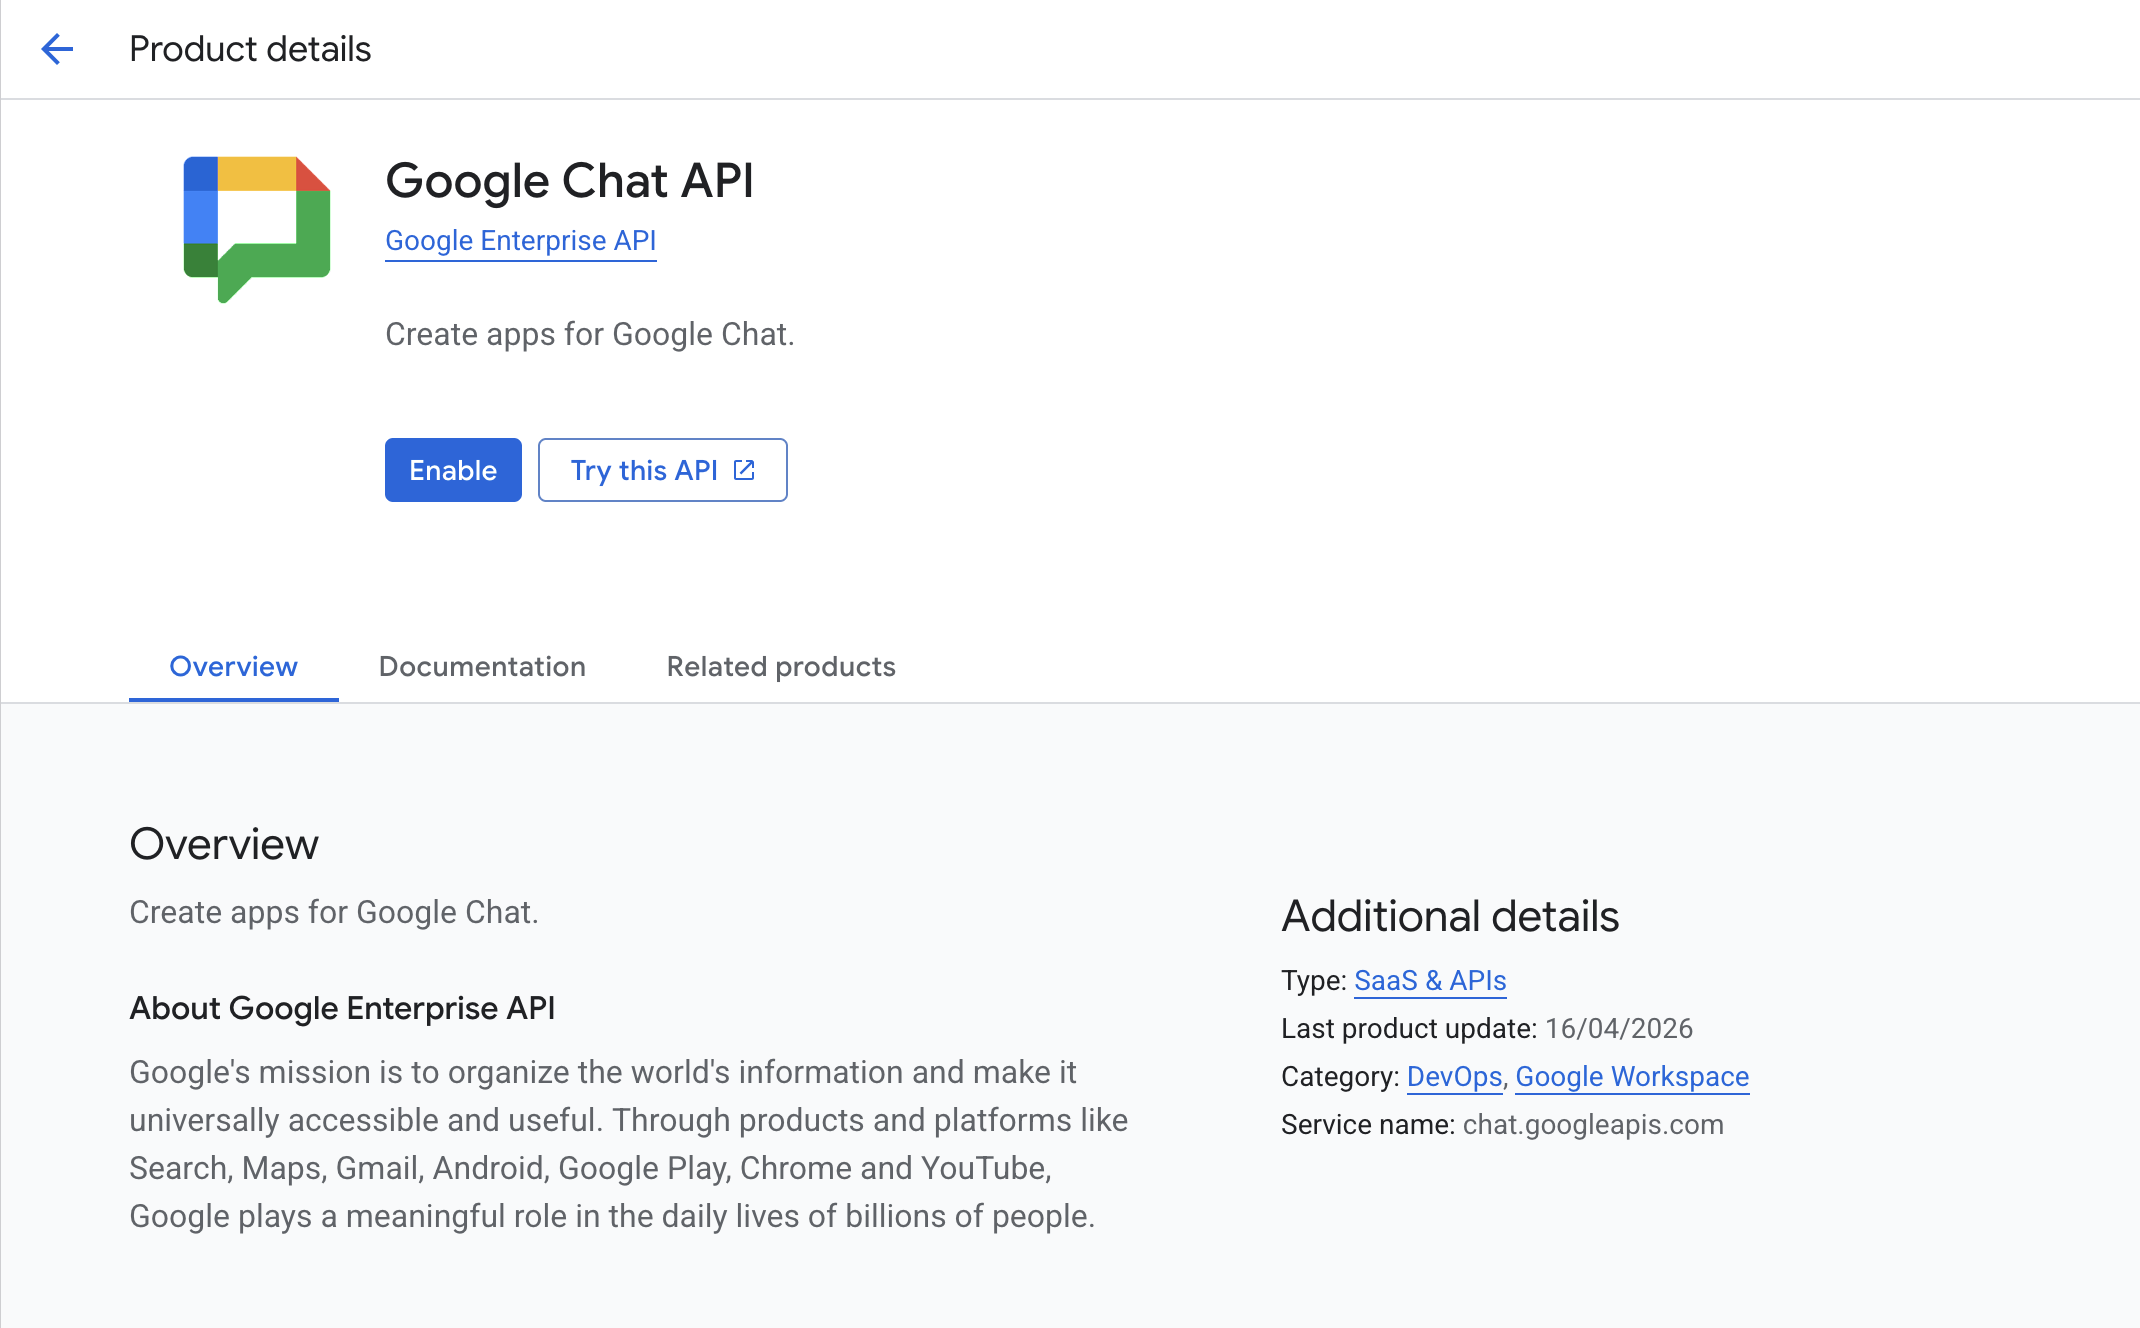
Navigate to APIs & Services → Library and enable the Google Chat API.
Google Chat must reach the listener over a public HTTPS URL. For local development the easiest option is ngrok:
ngrok http 8000Copy the https://<sub>.ngrok-free.app URL it prints — you will use this both in the next step and as the listener's endpointUrl in code.
For production, deploy the listener behind any HTTPS-terminating load balancer or reverse proxy; what matters is that Google Chat can reach a stable HTTPS URL.
-
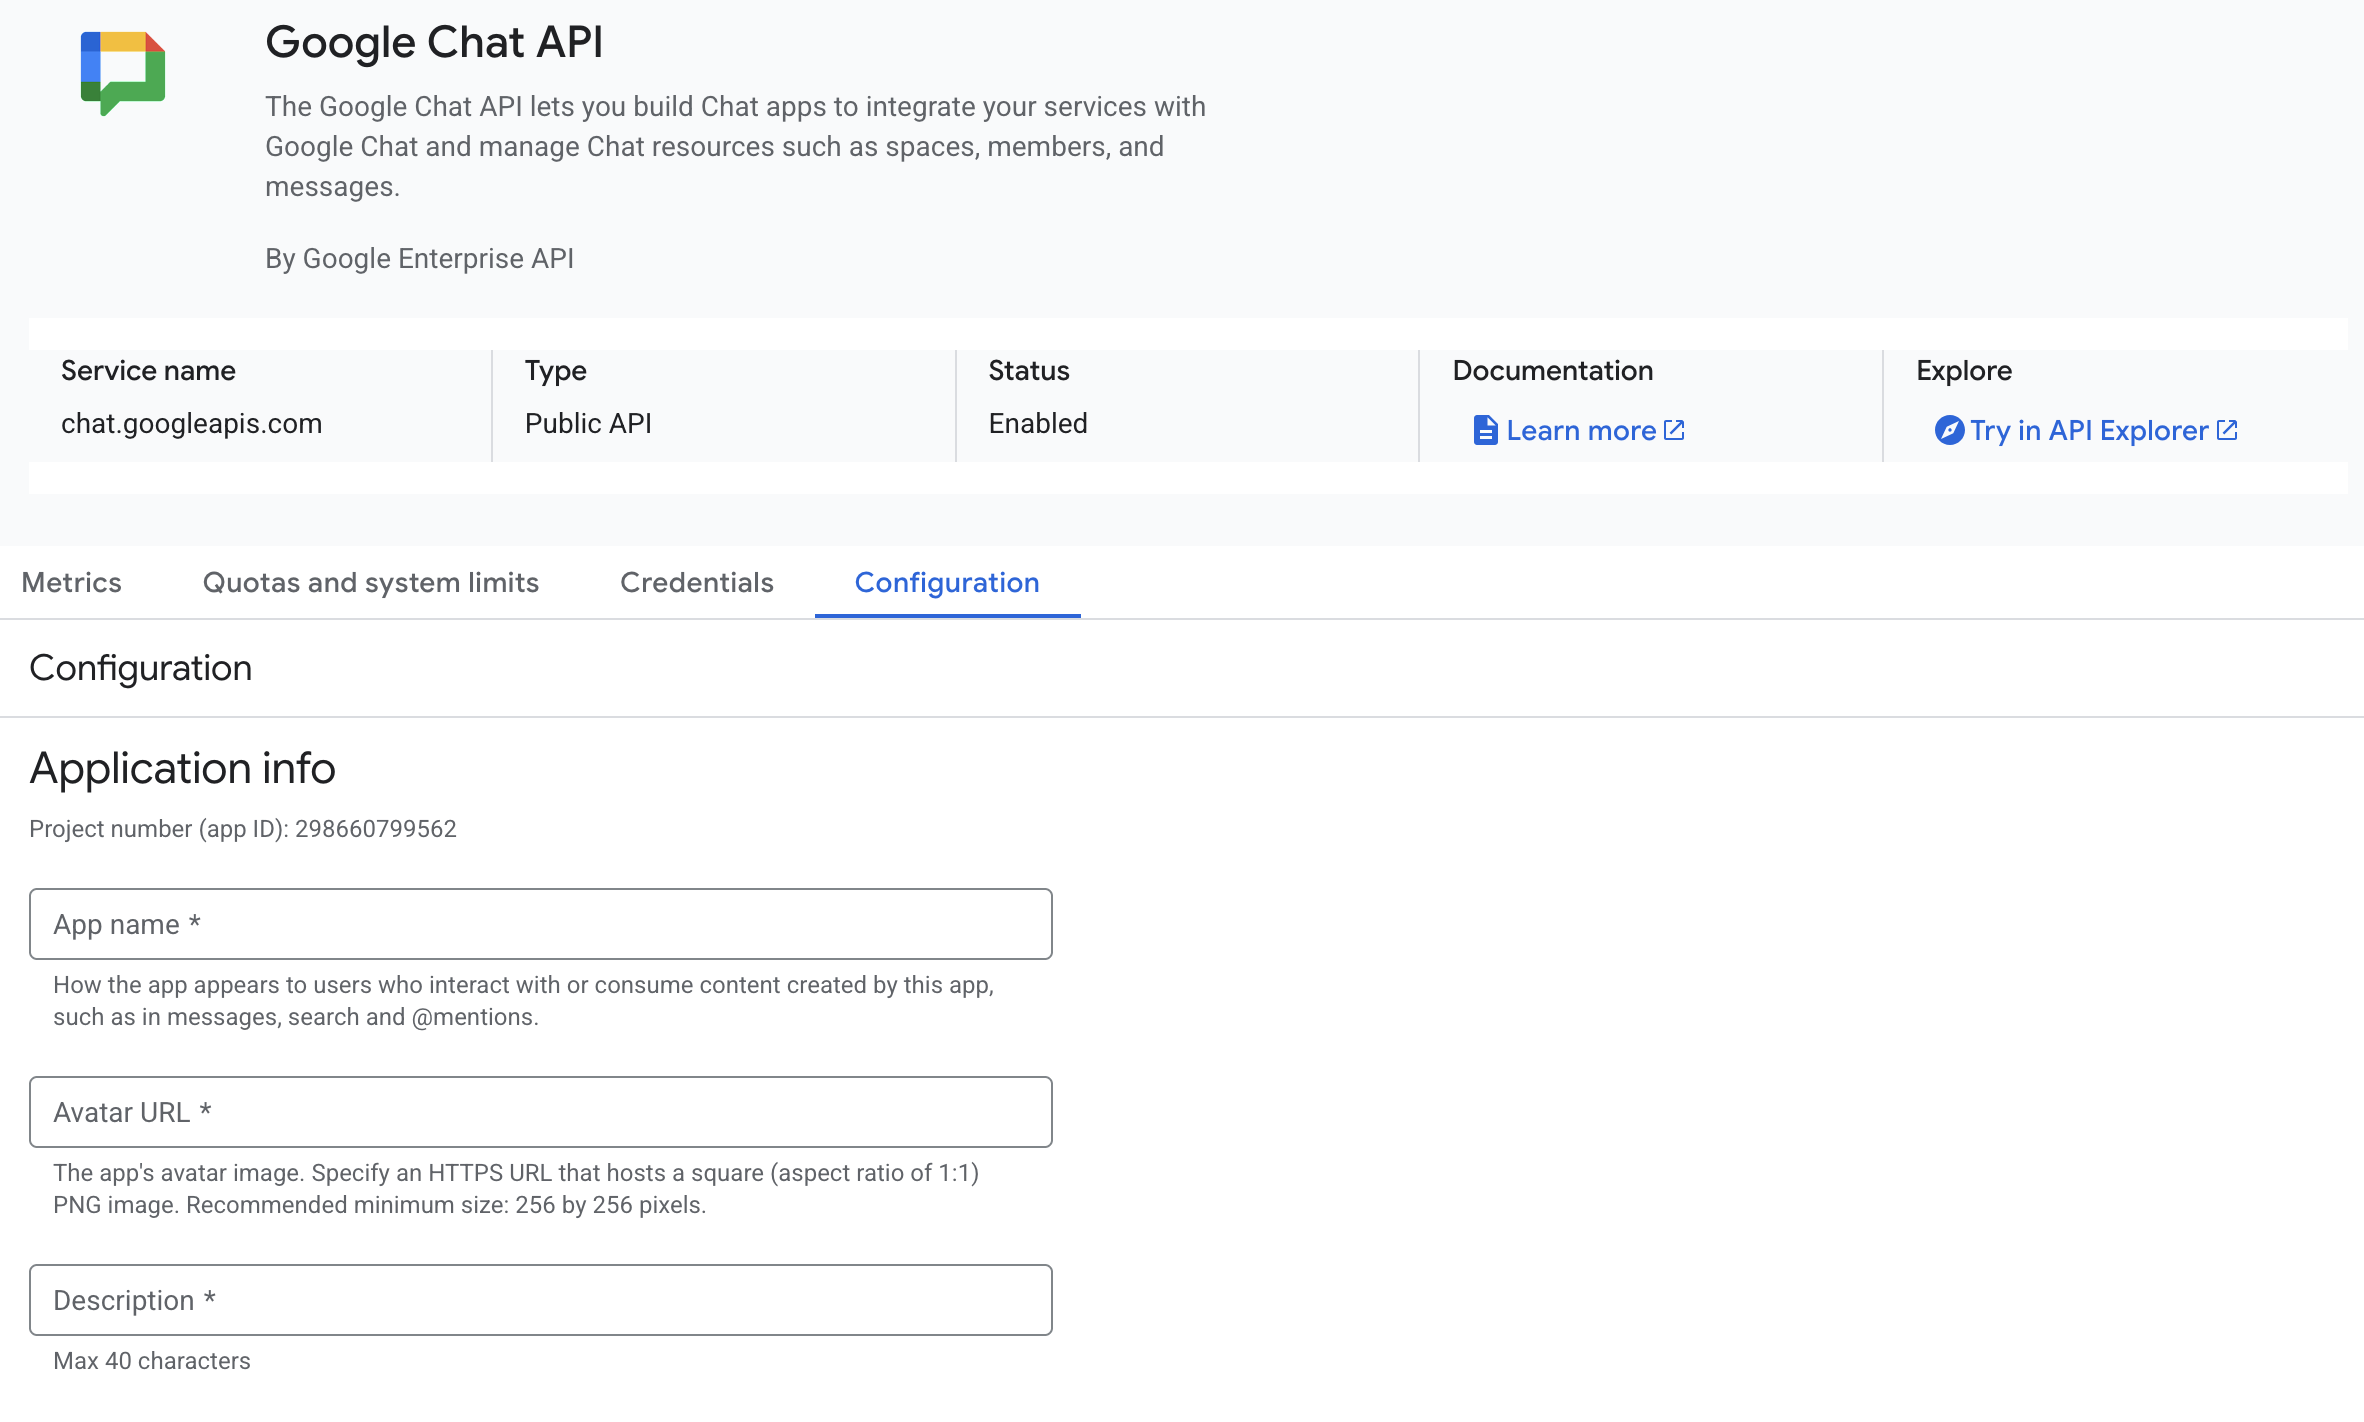
In the Google Cloud Console, open the Google Chat API page and select the Configuration tab.
-
Provide the App name, Avatar URL and Description.
-
Make sure "Build this Chat app as a Workspace add-on" is unchecked — this connector handles interaction events directly over HTTP, not as a Workspace add-on.
-
Under Interactive features, enable the features your app needs (receive 1:1 messages, join spaces, slash commands, etc.).
-
Under Connection settings, choose HTTP endpoint URL and paste the ngrok (or production) HTTPS URL from Step 3.
-
Set Authentication audience to either:
- the same HTTP endpoint URL (use
HttpEndpointUrlConfig/endpointUrlin the listener), or - your Project number (use
ProjectNumberConfig/projectNumberin the listener).
The value you choose here must match what your service annotation declares — the listener uses it to validate the
audclaim of the Google-signed bearer token on every incoming request.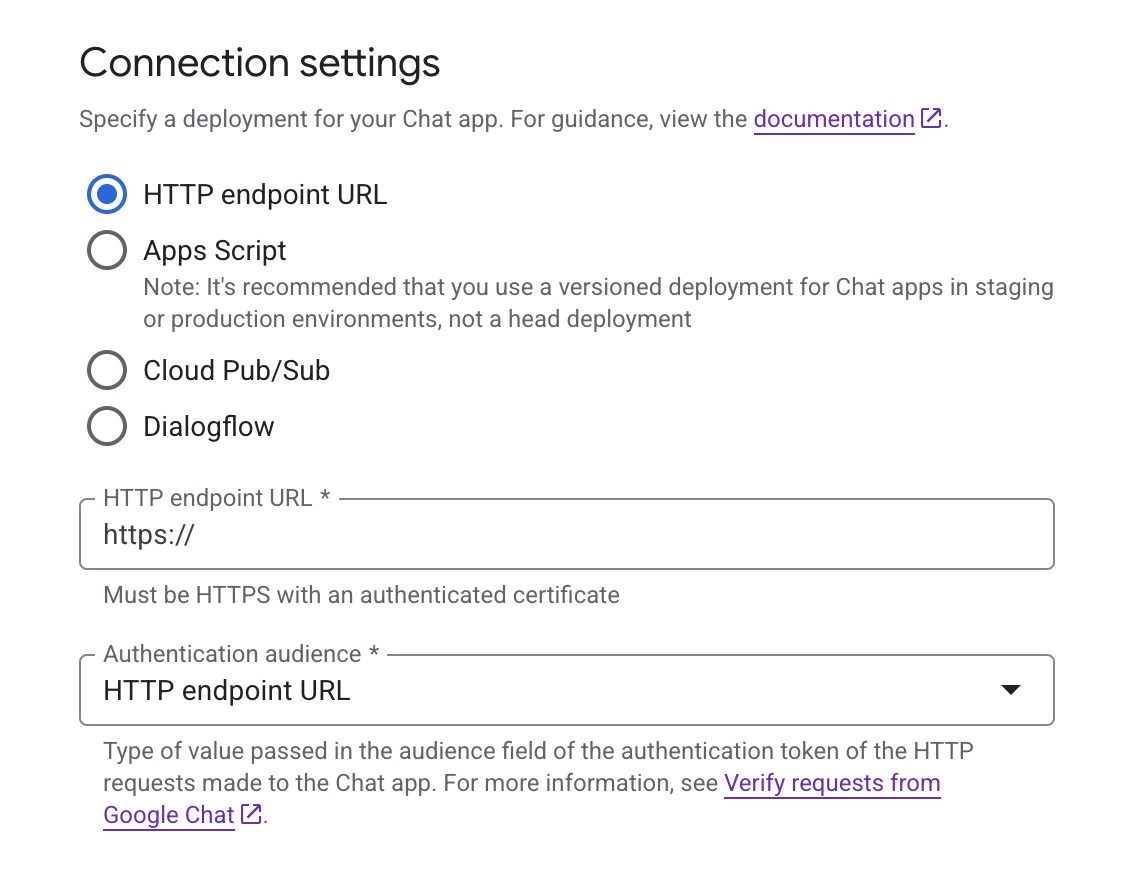
- the same HTTP endpoint URL (use
-
Under Visibility, add the email addresses of users or Google Workspace domains that can install your app.
The connector supports three authentication modes. Pick the one that matches your use case.
A service account lets your app act as itself — ideal for bots that post messages, manage memberships, or run continuously.
-
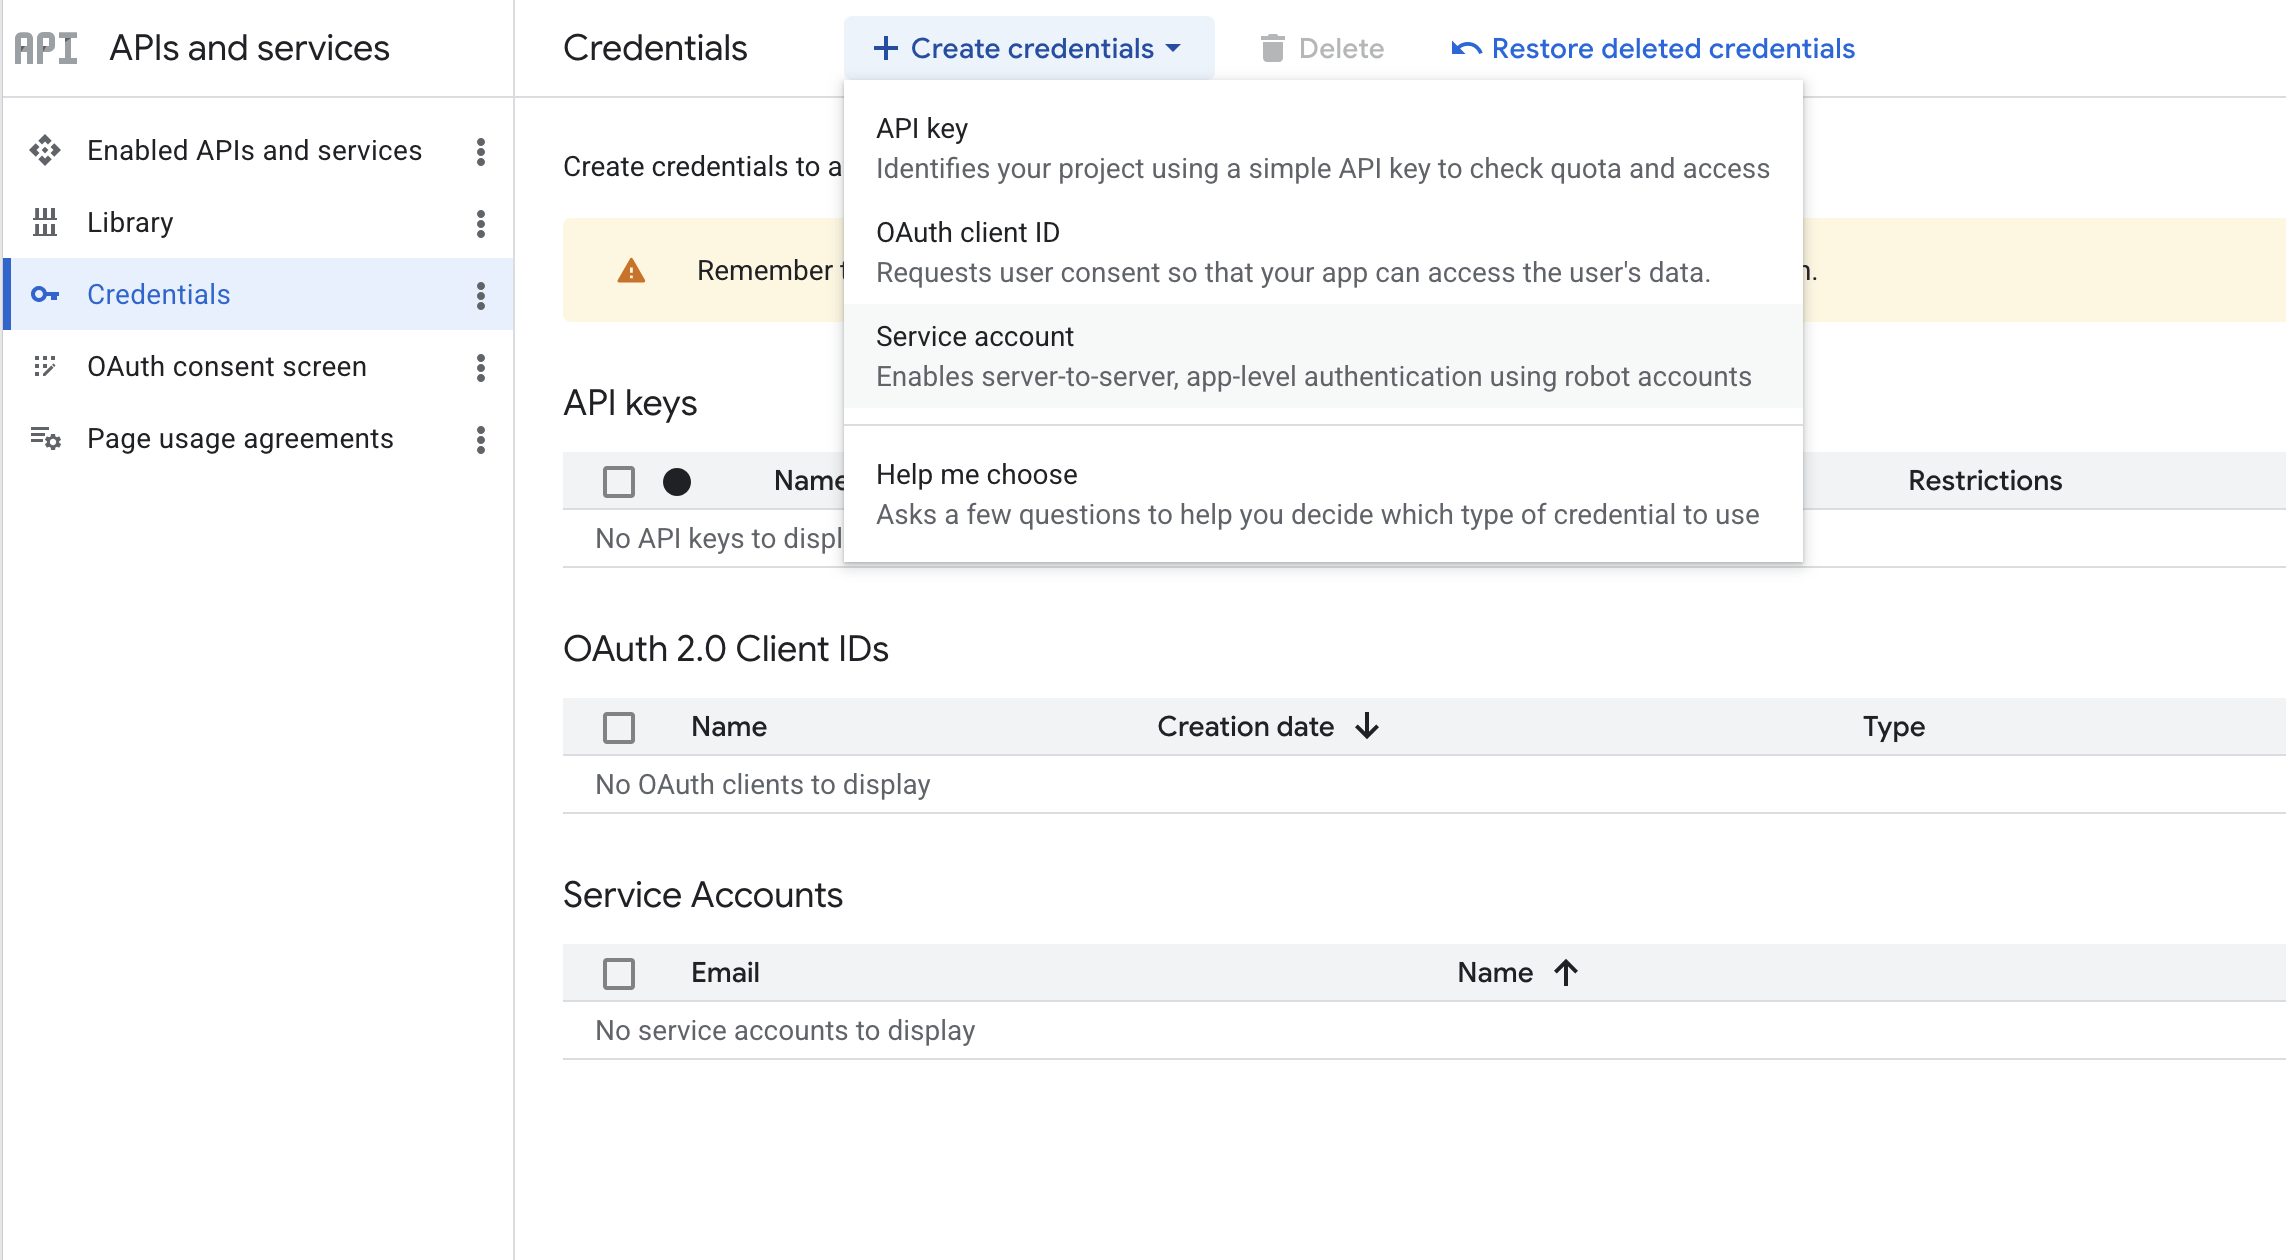
Navigate to APIs & Services → Credentials, open the + Create credentials dropdown, and select Service account.
-
Give it a name, click Done, then open the created service account and go to the Keys tab.
-
Click Add key → Create new key → JSON and save the downloaded JSON file securely. You will reference its path from
Config.toml.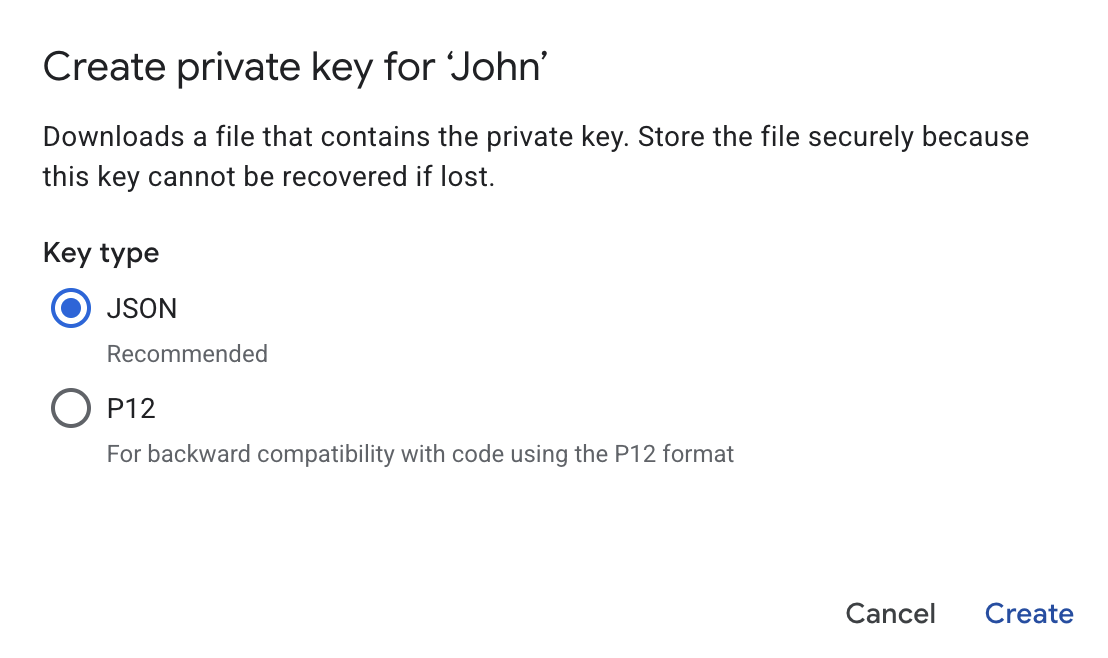
OAuth 2.0 lets your app act on behalf of a signed-in user — required for operations like attachment uploads that need user scopes.
-
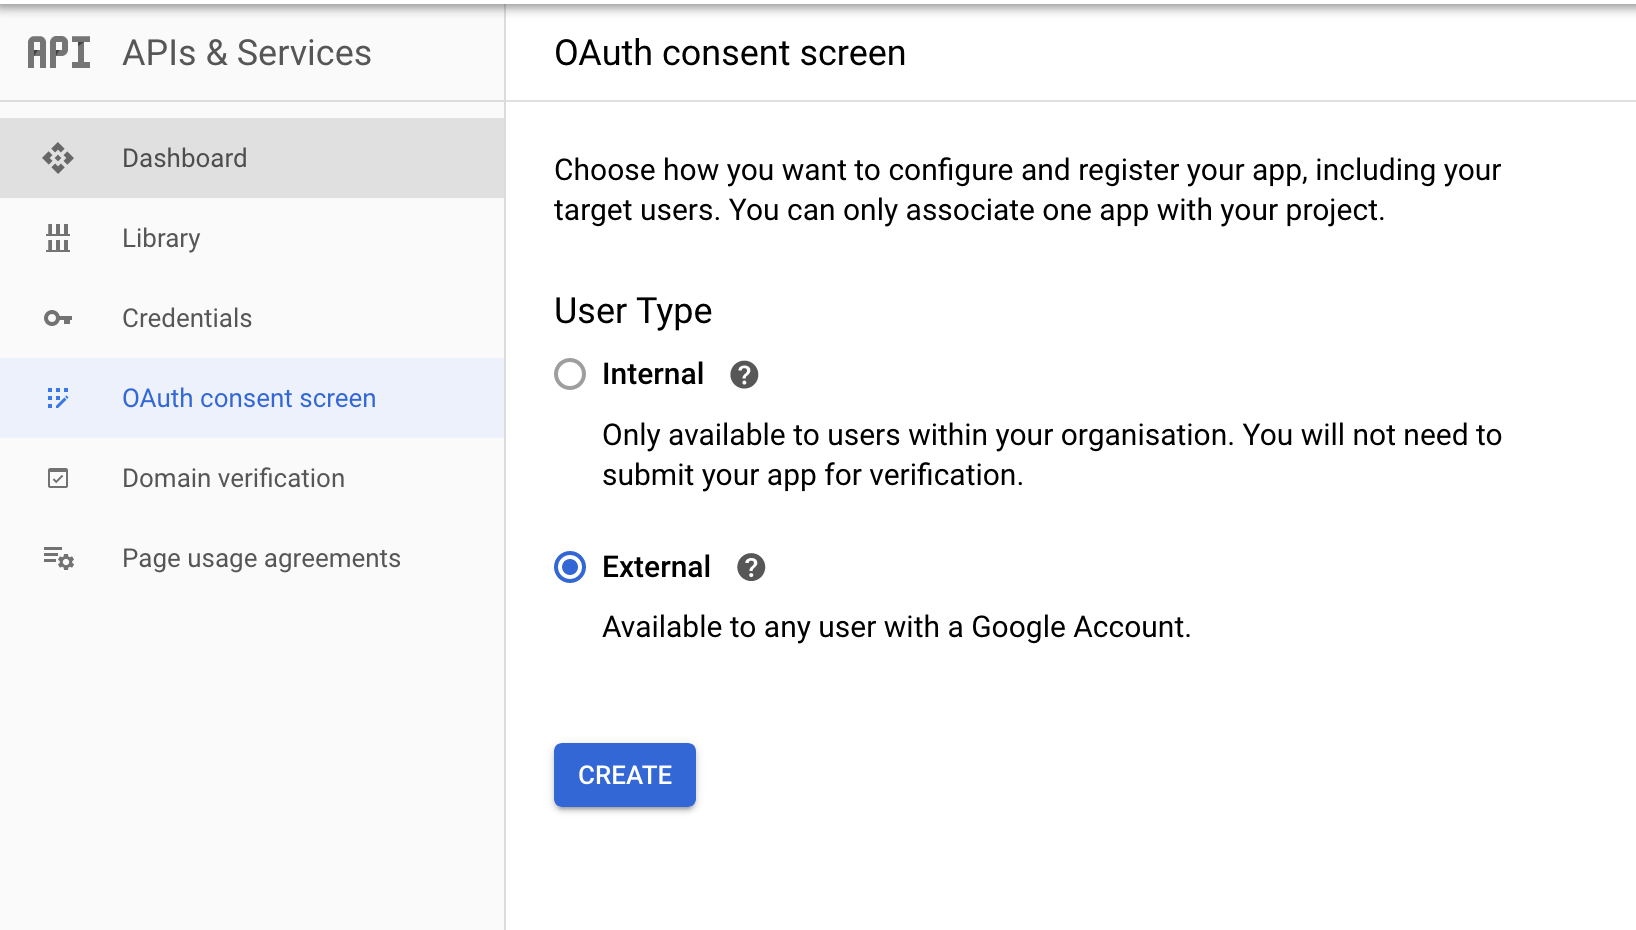
Open APIs & Services → OAuth consent screen and configure your consent screen (provide an app name and support email). You do not need to add scopes here — they are requested at authorisation time in the OAuth Playground.
-
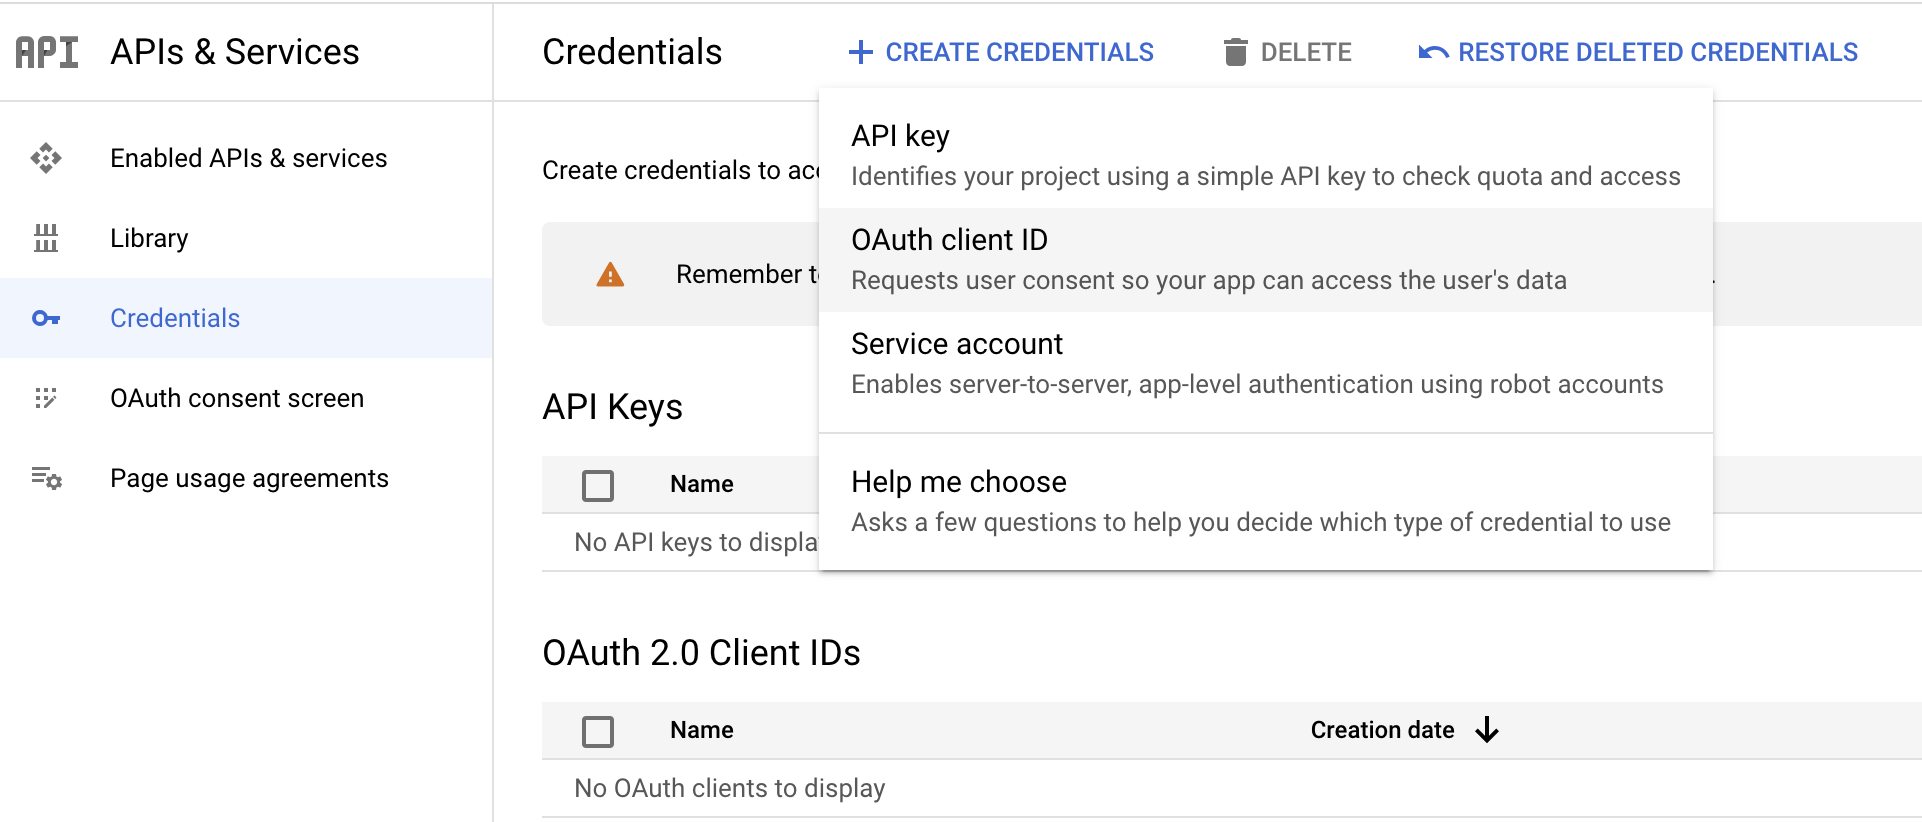
Open APIs & Services → Credentials → Create credentials → OAuth client ID.
-
Fill in the form:
Field Value Application type Web Application Name ChatConnector Authorized Redirect URIs https://developers.google.com/oauthplayground -
Save the Client ID and Client secret.
-
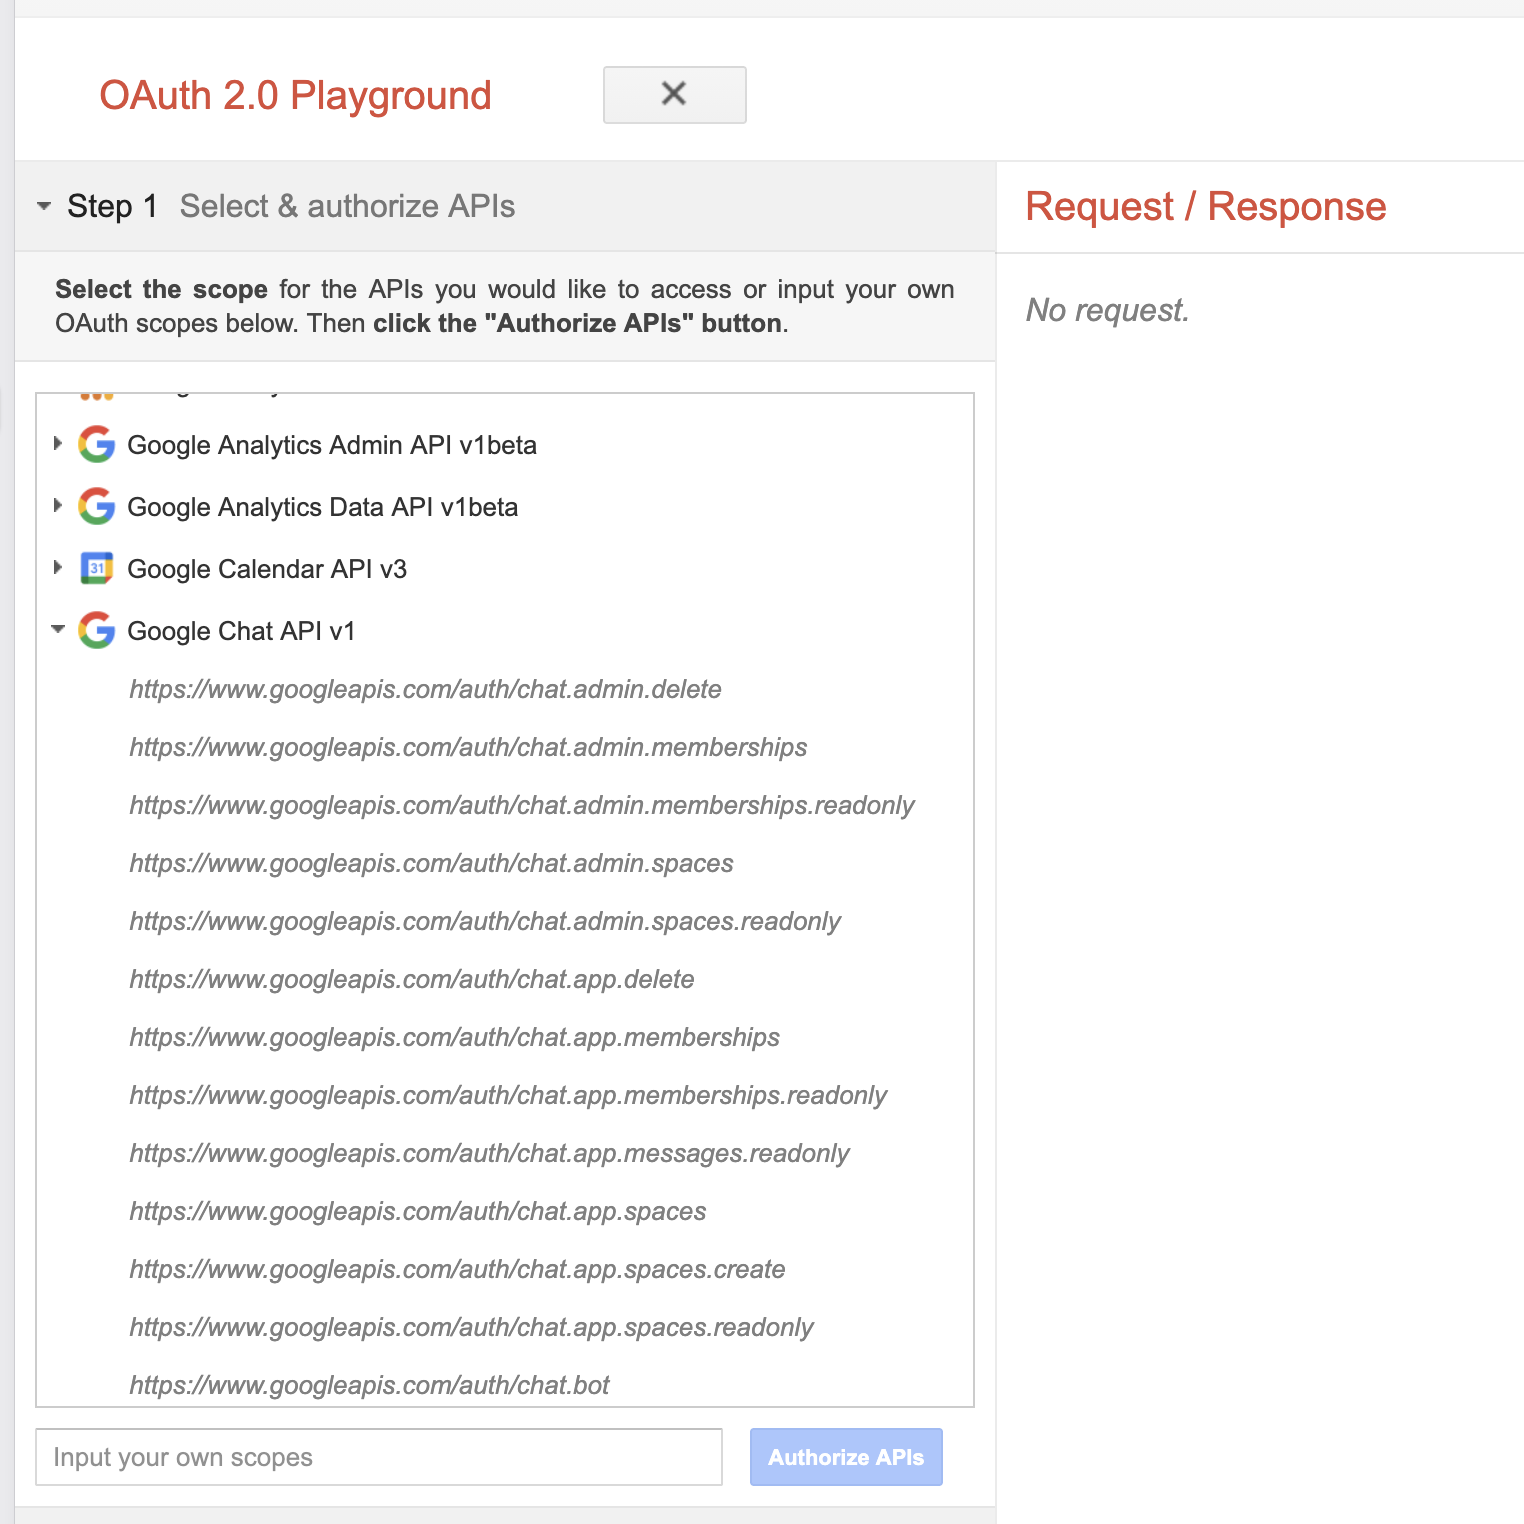
Use the OAuth 2.0 Playground to obtain a refresh token: open the gear icon → "Use your own OAuth credentials" → enter the client ID and secret → authorise the Chat scopes you need → exchange the authorisation code for tokens.
For short-lived experiments you can use a Google access token directly:
gcloud auth print-access-tokenNote: Google access tokens expire in roughly one hour. Bearer-token auth is best for short-lived processes (CI jobs, scripts, manual tests). For long-running services, use service account or OAuth 2.0 — both auto-refresh tokens.
The connector has two independent entry points — a REST client for calling the Chat API and a listener for handling interaction events. Follow the track that matches your use case.
Use this if your app only calls the Chat REST API (no event handling).
import ballerinax/googleapis.chat;Create a chat:ConnectionConfig with the credentials obtained during setup.
configurable chat:OAuth2Config oauthAuth = ?;

final chat:Client chatClient = check new ({auth: oauthAuth});// List spaces the app has access to.
chat:ListSpacesResponse spaces = check chatClient->/spaces();
// Send a message to a space.
chat:Message sent = check chatClient->/spaces/["space-id"]/messages.post({
text: "Hello from Ballerina!"
});bal runUse this if your app needs to handle interaction events from Google Chat (messages, card clicks, slash commands, etc.). The listener exposes an HTTP endpoint that Google Chat POSTs events to; it provides an internal Chat API client used by the injected caller — no separate client needed for replies.
import ballerinax/googleapis.chat;listener chat:Listener chatListener = new (8000, {
auth: {path: "./service-account-key.json"}
});
@chat:ServiceConfig {
endpointUrl: "https://<your-subdomain>.ngrok-free.app"
}
service chat:ChatService on chatListener {
remote function onMessage(chat:MessageEvent event, chat:MessageCaller caller) returns error? {
check caller->respond({text: "Echo: " + (event.message.text ?: "")});
}
}The endpointUrl must exactly match the HTTP endpoint URL configured in your Chat app (Setup Step 4). The listener uses it to validate the aud claim of the incoming Google-signed bearer token. If you configured the Authentication audience as your project number instead, use projectNumber: "<your-project-number>" in the annotation in place of endpointUrl.
chat:ChatService exposes one optional remote function per Chat event type. Implement only the ones you need:
| Function | Triggered by |
|---|---|
onMessage |
A user sends a message, @mentions the app, or invokes a slash command. |
onAddedToSpace |
The app is added to a space. |
onRemovedFromSpace |
The app is removed from a space. |
onCardClicked |
A user clicks a button or interactive element on a card. |
onSubmitForm |
A user submits a dialog or form. |
onAppHome |
A user opens the app's home page. |
onWidgetUpdated |
A widget requests an autocomplete or similar update. |
Each handler receives the event and (optionally) an event-specific caller (chat:MessageCaller, chat:CardClickedCaller, chat:AppHomeCaller, etc.) pre-configured with the event's space context. Use the caller to respond (synchronously, within the event window) or to call Chat APIs asynchronously (sendMessage, updateMessage, etc.).
bal runIn a separate terminal, expose the listener to Google Chat with ngrok (see Setup Step 3):
ngrok http 8000The googleapis.chat connector provides practical examples illustrating usage in various scenarios. Explore these examples.
- Echo bot — A minimal Google Chat app that replies to every message with the same text, demonstrating the listener's HTTP delivery mode and replying via the injected
chat:MessageCaller.
The Issues and Projects tabs are disabled for this repository as this is part of the Ballerina library. To report bugs, request new features, start new discussions, view project boards, etc., visit the Ballerina library parent repository.
This repository only contains the source code for the package.
-
Download and install Java SE Development Kit (JDK) version 21. You can download it from either of the following sources:
Note: After installation, remember to set the
JAVA_HOMEenvironment variable to the directory where JDK was installed. -
Download and install Ballerina Swan Lake.
-
Download and install Docker.
Note: Ensure that the Docker daemon is running before executing any tests.
Execute the commands below to build from the source.
-
To build the package:
./gradlew clean build
-
To run the tests:
./gradlew clean test -
To build without the tests:
./gradlew clean build -x test -
To debug the package with a remote debugger:
./gradlew clean build -Pdebug=<port>
-
Publish the generated artifacts to the local Ballerina Central repository:
./gradlew clean build publishToLocalCentral
As an open-source project, Ballerina welcomes contributions from the community.
For more information, go to the contribution guidelines.
All the contributors are encouraged to read the Ballerina Code of Conduct.
- For more information go to the
googleapis.chatpackage. - For example demonstrations of the usage, go to Ballerina By Examples.
- Chat live with us via our Discord server.
- Post all technical questions on Stack Overflow with the #ballerina tag.