Installation
... TODO ...
See README for now.
One can combine ssh-ing and starting the container on some node.
Additional tip: The terminal in vscode might use a wrong python (if you have anaconda installed, as the start bash script on the note might change it). An easy fix for this is to just execute the following command: alias python='/usr/bin/python'.
Most information relating to this can be found on the Docker section of the BerensWiki. There are however some specifics, so maybe read this tutorial in parallel with the BerensWiki.
The information at the wiki is for a general purpose, but since we are using TensorBoard we need to forward another port (besides the jupyter port). So we can ssh using:
ssh [email protected] -p 60222 -L 8888:172.29.0.xx:jjjj 6006:172.29.0.xx:tttt
Where xx is a node specific IP (see wiki) and jjjj and tttt are arbitrary ports that we will use for Jupyter and TensorBoard once launching a container.
We can use the berenslab/retina-rl image (note 'retina' without 'l' at the end). This ensures that we have all the correct dependencies installed. If on gpu25 or gpu10 this should be easy, if running this on other nodes, the berenslab/retina-rl image should be transferred there first (see wiki). Generally we can run the command:
GPU=0 python agpb-docker run -d --cpuset-cpus ##-## --jupyterport jjjj --jupyterpass some_password--tensorboardport tttt --shm-size=8G berenslab/retina-rl
Which will run the custom script (see wiki). Here we can also choose which cpus to use (##-##, for example 0-30), jjjj and tttt should be the same as those used when port-forwarding (see above). We also set a higher shared memory, since the default is not sufficient for training (8GB here is somewhat arbitrary, but it seems to work). The last part refers to the image. Important: The current version of the image does not have htop and git lfs installed, so these can either be installed manually or added to a new version of the docker image (see wiki).
Running this command will build a container with a default name gpuX-username, but this can easily be changed using docker rename. To start the docker container run:
docker exec -u username -ti name-of-your-container bash
After running this command you can just cd ~/retinal-rl, conda activate retinal-rl and run training/analysis etc.
This only needs to be done when the container is first built, or if it is reset. Additionally it's sufficient to only run it on a single node, since both access the same directory. To launch TensorBoard we run the following command (this should be done within the retinal-rl conda environment:
tensorboard --logdir=train_dir --bind_all &
The --bind_all is used here because it works, however there might be a more elegant solution. Sadly using the default settings, or specifically choosing a port when passing this command did not work for me.
Once this is launched, we can open TensorBoard in the browser by accessing http://localhost:6006/ (same as for Jupyter using http://localhost:8888/).
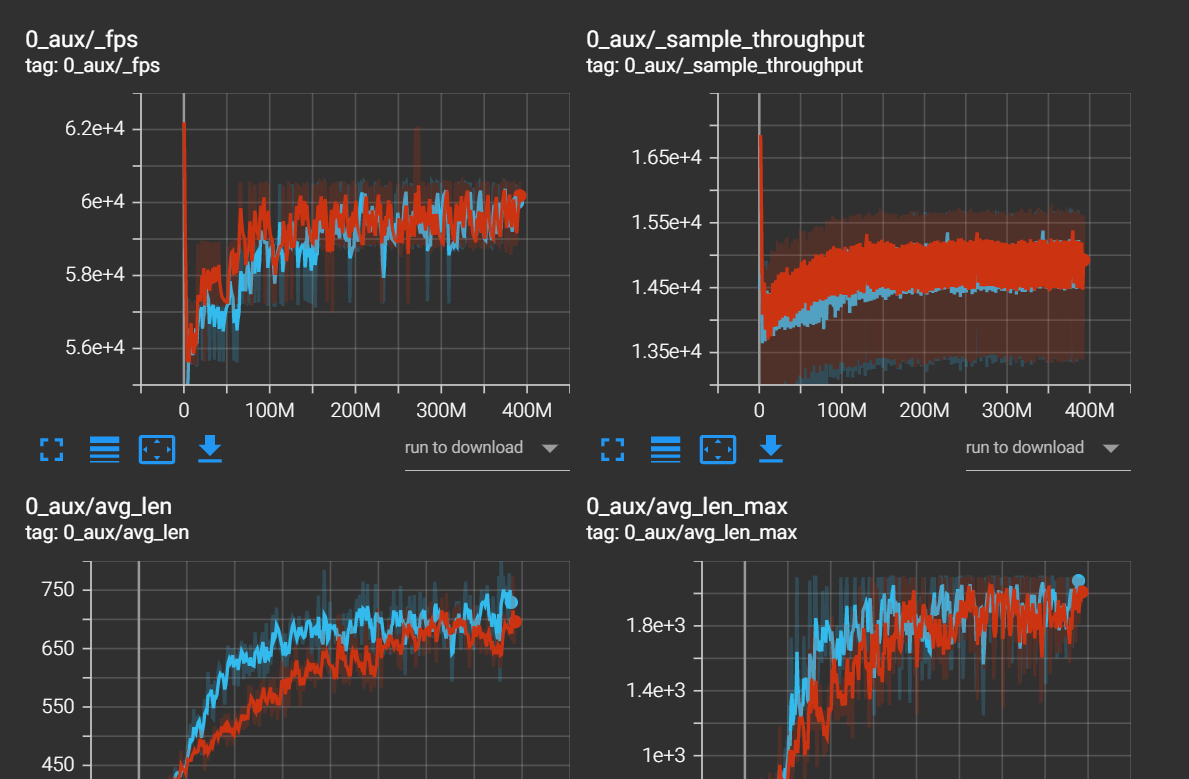
Besides the regular tracking of the training parameters:
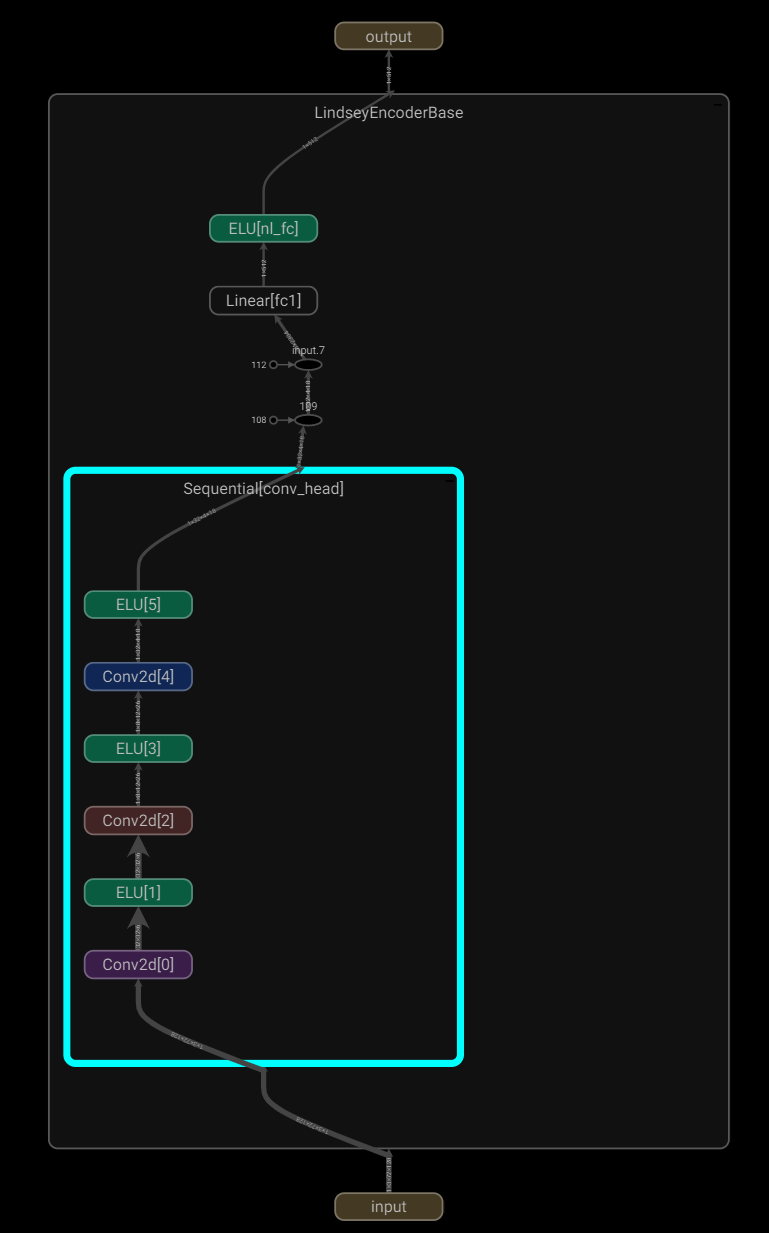
There are additional TensorBoard features integrated in the repo, for example the 'GRAPHS' section visualises the computational graphs of the models, for example:
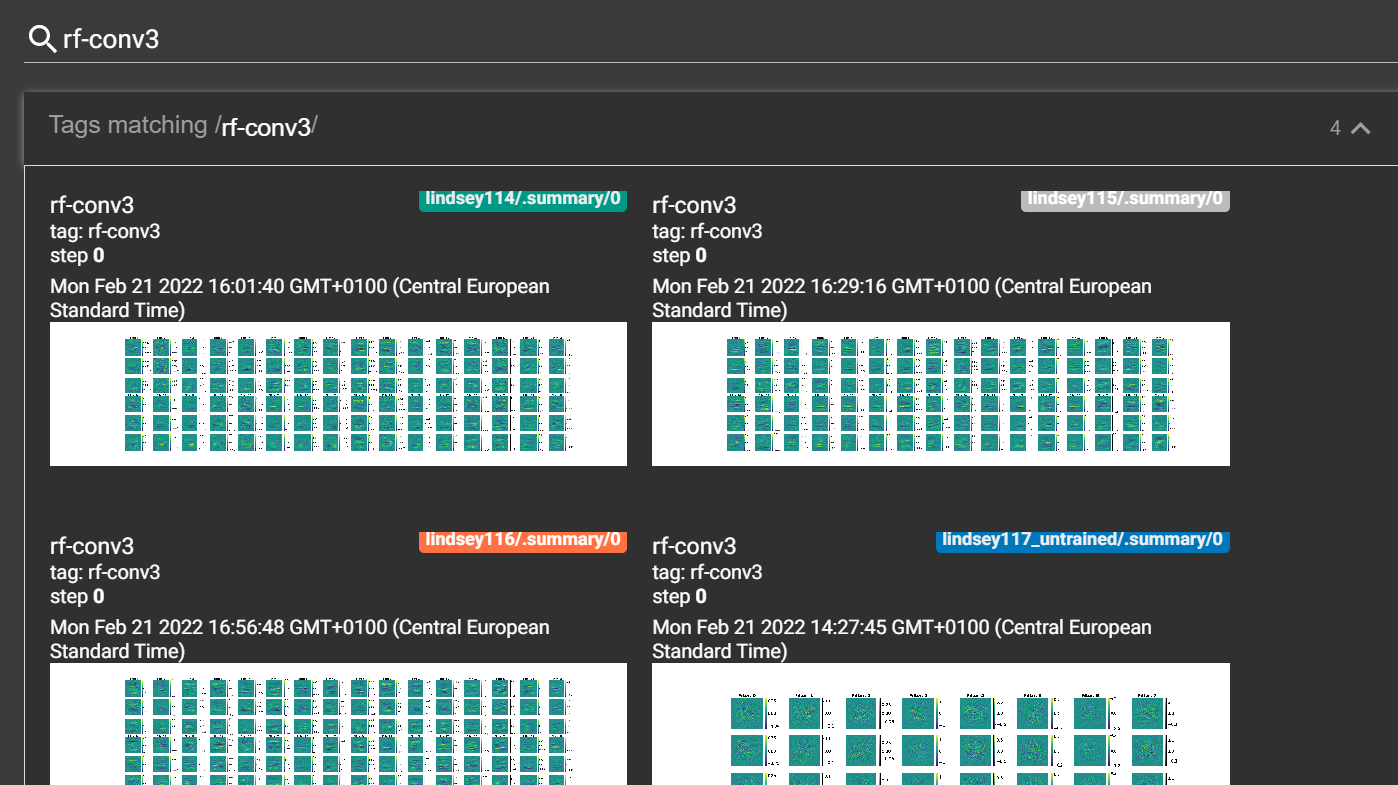
Under the 'IMAGES' section the RF plots are also uploaded, so they can easily be compared between different models. For example here by searching rf-conv3 we can show the RFs of layer 3 in arbitrarily chosen networks side by side:
While I was doing my masters (summer 2022) sample-factory added support for WandB, so we switched to that for some of the tracking and analysis in the second part of the project. The only slightly annoying thing is you need an account, and there are some bugs with plotting that we couldn't really fix, so we were still relying on TensorBoard for some stuff. But in general WandB is nice, I would say especially for handling media, like plots, gifs etc. I was mostly using it to create 'reports', which are a very simple way to organize and share plots/gifs with others. For example report click here.
For more information on setting up etc. refer to sample-factory documentation.
Accessing nodes
Building a container
Running TensorBoard
WandB
MAPINFO
DECORATE
TEXTURE1 and PNAMES
MAP01 and TEXTMAP
SCRIPTS and BEHAVIOUR
Preparing dataset
Setting offsets
Renaming and DECORATE
Modifying SCRIPTS
Importing to SLADE
Testing
Conv layers
FC layer
RNN layer
Attribution analysis (simulation)
Visualisation of encoder output
Classification (decoding) analysis
Attribution analysis (dataset)
Action analysis
