This version of Journal will allow you to implement each part of CRUD when working with Core Data.
Please fork and clone this repository. This repository does not have a starter project, so create one inside of the cloned repository folder.
Create a single view application called Journal in Xcode and do not check the Core Data box in the setup. We'll create our own Core Data stack.
- Rename the view controller included with the single view template to
CreateEntryViewController. - Create an
EntriesTableViewControllersubclass ofUITableViewController. - Create a
UITableViewCellsubclass calledEntryTableViewCell. - Create a
CoreDataStackSwift file. - Create an
Entry+ConvenienceSwift file. - Create a new Core Data model file called
Journal.
- Add a
UITableViewControllerscene - Embed each of the above scenes in their own navigation controllers
- Assign the nav controller attached to the table view scene as the initial view
- Create a bar button item in the upper right of the table view scene's nav bar.
- Connect that button to the nav controller for the create scene and use the present modally kind. Change the presentation on the segue to full screen.
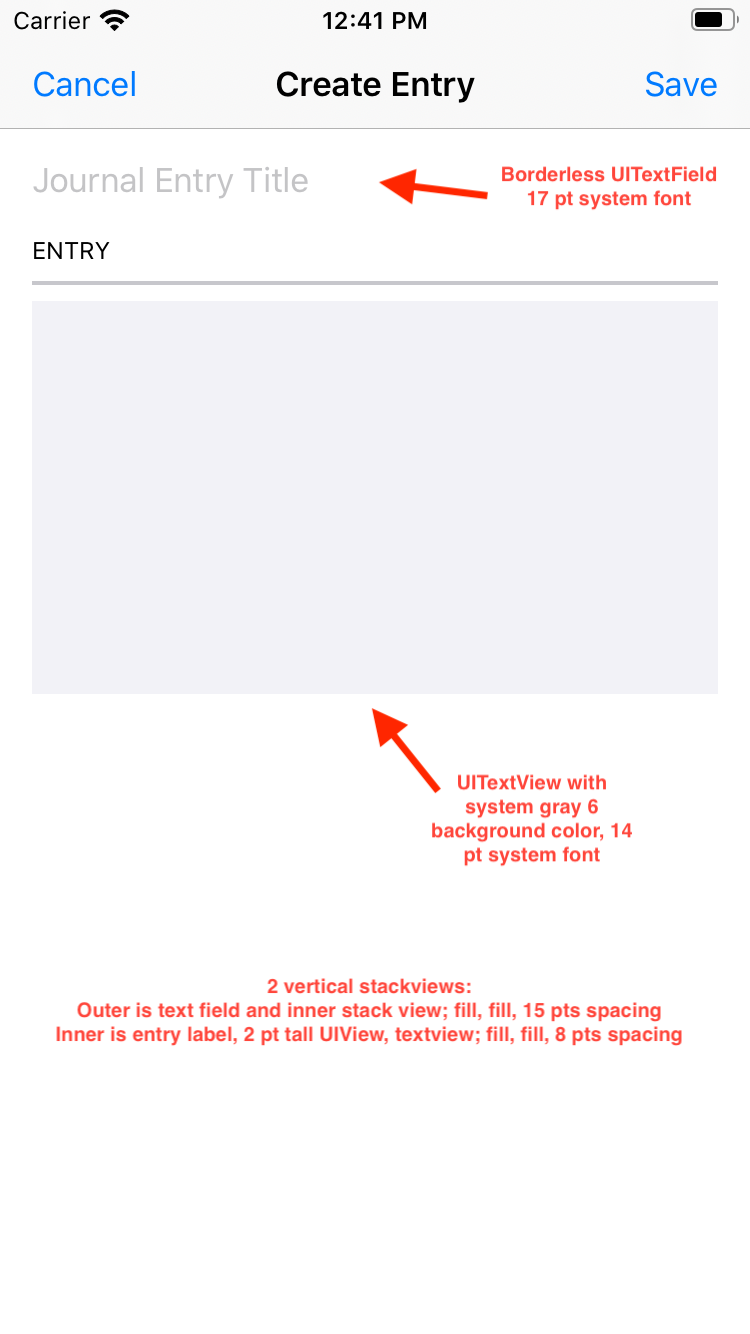
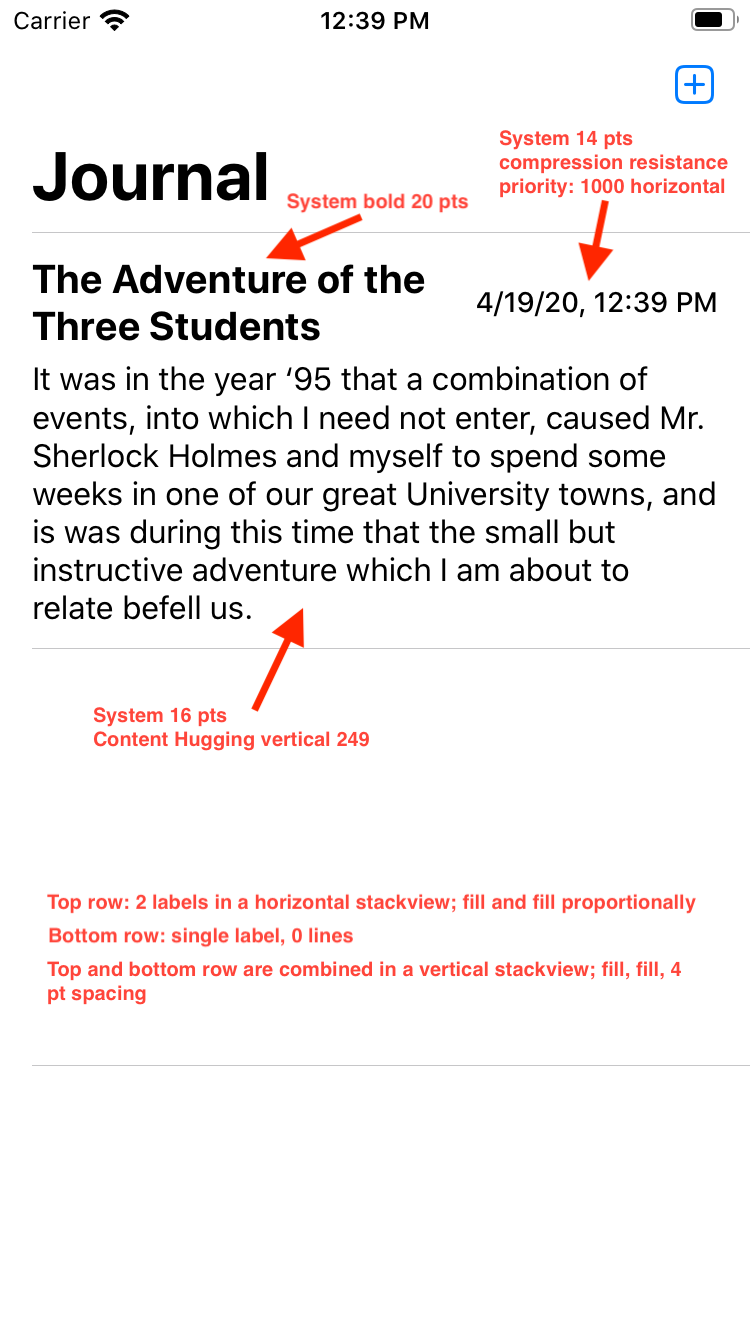
- See the below mockup images for design specs on the create entry view as as well as the table view. Try your best to recreate the design using Auto Layout, stack views, etc. (see today's guided project storyboard for help)
Feel free to take the core data stack you used in the guided project and paste it in this file. You may need to change the name of the persistent container to match the name of your data model file.
You will be using a model object called Entry.
- Create a new entity and call it
Entry. Keep the codegen as Class Definition. - Add the following attributes to the
Entryentity:- A
titlestring. - A
bodyTextstring. - A
timestampDate. - An
identifierstring.
- A
In the file Entry+Convenience.swift:
- Import
CoreDatain this file. - Add an extension on
Entry. - Create a convenience initializer that takes in values for each of the
Entryentity's attributes, and an instance ofNSManagedObjectContext. Consider giving default values to the timestamp and identifier parameters in this initializer. This initializer should:- Call the
Entryclass' initializer that takes in anNSManagedObjectContext - Set the value of attributes you defined in the data model using the parameters of the initializer.
- Add the
@discardableResultannotation to the beginning of the initializer's method signature so callers don't need to use the object returned.
- Call the
In the EntryTableViewCell class:
- Add an
entry: Entry?variable. - Create an
updateViews()function that takes the values from theentryvariable and places them in the outlets. - Add a
didSetproperty observer to theentryvariable. CallupdateViews()in it.
In the CreateEntryViewController:
- Add outlets for the textfield and the textview. Wire those up to their appropriate views in the storyboard.
- Add IBActions for the cancel and save buttons. Wire those up to their appropriate buttons in the storyboard.
- For cancel, simply dismiss this view's navigation controller.
- For save, collect the data from the user, validate that it isn't empty, create a new
Entrymanaged object, and finally issue a save on Core Data, with the appropriate error handling.
In the EntryTableViewController:
- Create an
entriescomputed property that fetches all entry entities from Core Data and returns them in an array. - Implement the
numberOfRowsmethod using the entries array property. - Implement the
cellForRowAtmethod. Remember to cast the call asEntryTableViewCell, then pass anEntryto the cell'sentryproperty in order for it to call theupdateViews()method to fill in the information for the cell's labels. - Add the
viewWillAppearmethod. It should reload the table view. - Implement the
commit editingStyleUITableViewDataSourcemethod to allow the user to swipe to delete entries. Be sure to delete the entry record from Core Data and remove the appropriate cell from the screen.