Contribution Tutorial
- Prerequisites
- Testing the development branch of Boost.Geometry
- Fork Boost.Geometry repository
- Working with Boost
- Modify the branch
- Pull request
- Review
- git (see Getting Started with Git)
- a compiler to run Boost tests - gcc, clang, Visual Studio Express, etc.
- configured GitHub account
- steps mentioned here: Getting Started with Boost understood and tested.
Other helpful links:
- http://git-scm.com/documentation
- https://help.github.com/articles/set-up-git
- https://help.github.com/articles/setting-your-email-in-git
- https://help.github.com/articles/generating-ssh-keys
Those are the steps which must be done to checkout the Boost.Geometry repository and run tests (see also: Getting Started with Boost).
Clone Boost repository, build b2 and create directory containing Boost headers
git clone --recursive https://github.com/boostorg/boost.git
cd boost
git checkout develop
.\bootstrap.sh
Optionally, create full content of /boost virtual directory with all Boost headers. Otherwise, required headers will be linked on demand while building tests or examples.
.\b2 headers
Pull the develop branch of Boost.Geometry
cd libs/geometry
git checkout develop
git branch -vv
git pull
Run the tests (assuming that Boost directory was added to PATH)
b2 test
If everything works for you, you may move forward.
You can't work directly in the original Boost.Geometry repository, therefore you should create your fork of this library. This way you can modify the code and when the job is done send a pull request to merge your changes with the original repository.
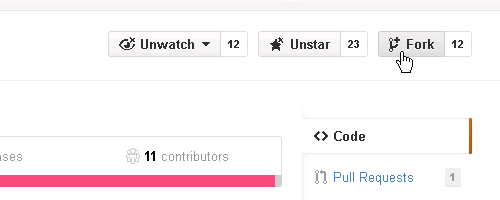
- login on GitHub
- go to Boost.Geometry repository
- click the 'Fork' button
- choose your profile
- wait
- be happy!
More info: Forking Projects
Go out of boost/libs/geometry/ directory
cd ../../..
clone your repository and checkout develop branch
git clone [email protected]:username/geometry geometry
git checkout develop
git branch -vv
git pull
see commits
git log
gitk
For now you should see exactly the same commits as in Boost.Geometry repository.
You could of course stop on the previous point and work on this local clone of the fork of Boost.Geometry however there is a catch. You won't be able to use b2 (run tests or build documentation) if the library is not inside the Boost directory. It's therefore convenient to use your fork inside boost which basically means adding new remote for Boost.Geometry and using it aside the original Boost.Geometry repository.
If you did the optional steps mentioned in the section Verify if your fork works (optional), go back to the Geometry module directory boost/libs/geometry/.
cd ../boost/libs/geometry
For now there is only one remote repository set for this local copy. You may check it by running
git remote -v
you should see something like this

There is one remote repository added, the original Boost.Geometry repository at boostorg/geometry
Add another remote repository, your fork, give it some memorable name
git remote add my_fork [email protected]:username/geometry
where username is your username (In my case it's awulkiew). Now after running
git remote -v
you should also see the remote you just added

Boost is using the GitFlow workflow or branching model if you like. It's because it is very well suited to collaboration and scaling the development team. Each repository using this model should contain two main branches:
- master - release-ready version of the library
- develop - development version of the library
and could contain various supporting branches for new features and hotfixes. Those supporting branches have specific purposes, there are also rules describing which branches they may originate from and which branches they may be merged with. Those issues aren't covered in this tutorial.
As a contributor you'll most likely be adding new features or fixing bugs in the development version of the library. This means that for each contribution you should create a new branch originating from the develop branch, modify it and send a pull request in order to merge it, again with the develop branch.
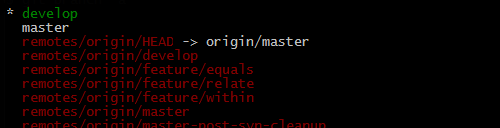
Make sure you're in develop branch running
git branch -vv
you should see

Now pick a name for your new branch. Try to choose the name which doesn't already exist. To check the names of existing remote branches run
git branch -a
or check them on GitHub.
Lets say that you'd like to add some new feature. To reflect that, and because Boost is using the GitFlow branching model, you could name your branch feature/example. Choosing the name for a branch is up to you since it won't be created in the original Boost.Geometry repository.
Create new local branch
git branch feature/example
git checkout feature/example
push it to your fork
git push -u my_fork feature/example
This should create a remote branch for you. The -u switch also sets up the tracking of the remote branch.
Now after running
git branch -vv
you should see

Have in mind that if you didn't use the -u switch you wouldn't see the tracking info for your new branch.
You should also be able to see your newly created remote branch on GitHub
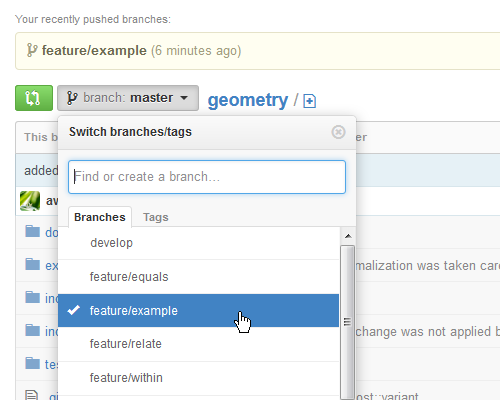
or while running
gitk
If you plan to add a new feature, or a bugfix, or some parts for the docs, or an example, it is often wise to consult the mailing list if that is a good idea. Other people may be working on the same thing. If it is a larger feature it is good to post a sort of implementation plan to check if the feature, and the implementation, is what is expected.
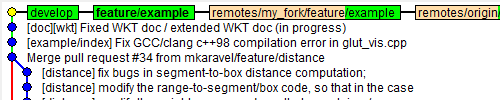
A word about commits, run
git log
or
gitk
and see what the commit messages convention is used.
In Boost.Geometry the commit messages should contain:
- some name of the modified part of the library in the square brackets, e.g. an algorithm name (tip: look at the namespaces and directories),
- a short title,
- an extended comment in the new lines (tip: to add more lines to the commit message use git commit without the
-mswitch).
As it's mentioned in the GIT documentation (http://git-scm.com/book/en/Distributed-Git-Contributing-to-a-Project):
It's also a good idea to use the imperative present tense in these messages. In other words, use commands. Instead of "I added tests for" or "Adding tests for," use "Add tests for."
As you already know tests are placed in the test/ directory. Add tests for the newly added feature and if you added new files modify the Jamfile as well.
- Run all unit tests before submit, even the tests of features you did not work on.
- Check your contribution with two compilers:
- on Windows you can use Visual Studio and MinGW/GCC or VirtualBox/GCC
- on Linux you can use GCC and Clang
- It's preferable to do this before sending the merge/pull request.
- Consider using additional compiler options like -Wall, -Wextra, -Wconversion to catch more bugs.
Run the tests (assuming you're in boost/libs/geometry/)
b2 test
If you wanted to pass some compiler options use cxxflags parameter
b2 test cxxflags="-Wall"
At the end, push your changes to the remote branch
git push my_fork feature/example
or if your local branch is tracking the remote one, just
git push
After pushing your work you should be able to see it on GitHub.
Click "Compare and pull request" button

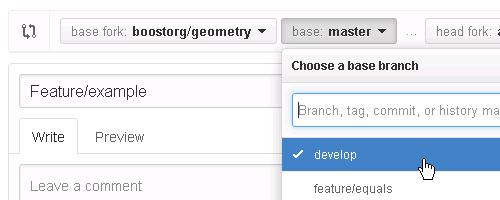
If a branch which pull request will be created against is different than develop

change it by clicking the "Edit" button on the right side and pick develop branch
Add title and description
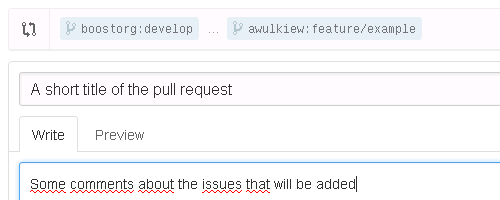
and click the "Send pull request" button.
After sending a pull request your code will be reviewed. If there are no objections your changes will be merged. Otherwise you'll see some comments under the pull request and/or under specific lines of your code. At this point it will be possible to make required changes, commit them and push to your branch. Those changes will automatically be a part of the same pull request. This procedure will be repeated until the code is ready for merging.
If you're curious how it looks like you may see one of the open or closed pull requests.