This project demonstrates how to detect faces and eyes in an image using Haar cascades in OpenCV. Haar cascades are trained classifiers capable of identifying specific objects or features within an image.
- Python 3.x
- OpenCV library
- Haar cascade files:
haarcascade_frontalface_default.xmlandhaarcascade_eye.xml
-
Install Python by downloading it from the official Python website (https://www.python.org) and following the installation instructions for your operating system.
-
Install OpenCV library using pip:
pip install opencv-python
-
Clone or download the project files from the repository.
-
Replace the image path in the code (
C:/Users/91630/Downloads/gg.jfif) with the path to your own image. -
Run the Python script, and the output will display the detected faces and eyes in separate images.
-
Import the necessary libraries:
cv2for image processing,numpyfor numerical computations, andmatplotlib.pyplotfor visualizations. -
Read the input image and create copies.
-
Load the Haar cascade classifiers for face and eye detection.
-
Define a function
adjusted_detect_faceto detect faces in the image using the face cascade classifier. This function draws rectangles around the detected faces and returns the modified image. -
Define a function
detect_eyesto detect eyes in the image using the eye cascade classifier. This function draws rectangles around the detected eyes and returns the modified image. -
Apply the
adjusted_detect_facefunction to the image copy, and display the detected faces usingplt.imshow(). -
Save the image with detected faces using
cv2.imwrite(). -
Apply the
detect_eyesfunction to another image copy, and display the detected eyes usingplt.imshow(). -
Save the image with detected eyes using
cv2.imwrite(). -
Create a weighted combination of the images with detected faces and eyes using
cv2.addWeighted(). This produces an overlay of the two images. -
Display the final image with the overlay using
plt.imshow(). -
Save the final image using
cv2.imwrite(). -
Show the image using
cv2.imshow(), and wait for a key press to close the window. -
Clean up and close all windows using
cv2.destroyAllWindows().
The script detects faces and eyes in the input image and saves three images: one with detected faces, one with detected eyes, and one with a combination of both. The images are also displayed during the execution of the script.# python-open-cv I have used an image of Israeli actress Gal Gadot for face and eye detection. Here is the original image:
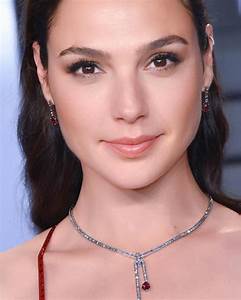
The script detects faces and eyes in the image and produces the following results:
1.Detected faces:
