Learn a single, repeatable image fix from your examples — then apply it to every other frame for you.
A direct, pixel-level mapping from source to target images via an encoder–decoder network. Train it locally on your own GPU, then run inference or export to compositing tools such as Foundry Nuke, Autodesk Flame, or After Effects.
Think of TUNET as an automated apprentice retoucher. You hand-fix 20–50 frames; the tool studies your before → after examples, learns your specific edit, and applies that same edit to the rest of the footage. Under the hood it's a small neural network performing an image-to-image mapping — conceptually similar to Nuke's CopyCat, but with auto-masking, a dedicated roto preset, scene-linear EXR support, and export to Nuke, Flame, and After Effects.
It's well suited to:
- Beauty / paint fixes — blemishes, dust, lens dirt, wire/rig removal, skin retouch
- Paint-outs / cleanup — removing larger objects with smooth blending
- Roto / mattes — turning a plate into a black-and-white matte
- General image-to-image — whole-frame grades and global looks
Runs locally on your own hardware. Training wants an NVIDIA CUDA GPU; inference can run on much more modest GPUs (and CPU in a pinch). Apple Silicon works via Metal (MPS).
AOVs:
 https://youtu.be/TwvN8axWJLY
Models from the video for Nuke and Flame can be downloaded here to test locally: https://f.io/HovatFeX
These were trained in combination with NVIDIA Cosmos foundation models on 8× B200 GPUs. Inference can be done on consumer GPUs.
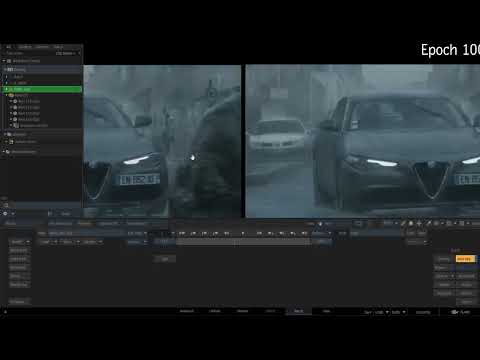
Rain — Flame:
| Term | Meaning |
|---|---|
| Source (before) | Your original frames with the problem. Folder named src/, source/, in/, or input/. |
| Target (after) | Your hand-corrected versions. Folder named dst/, dest/, out/, output/, or target/. |
| Training | The model studies the before/after pairs and learns the transformation. |
| Step | One practice repetition where the model nudges itself toward the target. |
| Epoch | One full pass over your training data (default ~500 steps). |
| Loss | A measure of error — lower is better. Watch it drop, then plateau. |
| Validation set | Optional held-out frames for an honest, unbiased read on quality. |
| Auto-mask | Automatically finds the pixels that changed between source and target, so the model focuses there. |
| Skip empty patches | Ignores crops where source and target are identical, so tiny fixes aren't drowned out. |
You'll need Miniconda or Anaconda. Pick your platform below.
git clone https://github.com/emlcpfx/tunet.git
cd tunet

conda create -n tunet python=3.12.9 -y
conda activate tunet

# PyTorch with CUDA (nightly cu128 — adjust the index URL to match your CUDA / driver)
pip install --pre torch torchvision torchaudio --index-url https://download.pytorch.org/whl/nightly/cu128

pip install onnx onnxruntime pyyaml lpips Pillow albumentations PySide6 matplotlib OpenEXRgit clone https://github.com/emlcpfx/tunet.git
cd tunet
conda create -n tunet python=3.10 -y
conda activate tunet
pip install torch torchvision torchaudio
pip install onnx onnxruntime pyyaml lpips Pillow albumentations PySide6 matplotlib OpenEXRThe pinned, fully-reproducible dependency set ships in environment.yml / requirements.txt:
git clone https://github.com/emlcpfx/tunet.git
cd tunet

conda env create -f environment.yml      # or: pip install -r requirements.txt
conda activate tunet
Multi-GPU (DDP) training is supported — launch train.py under torchrun (see
Command-line usage).
python -c "import torch; print('Torch:', torch.__version__); print('CUDA available:', torch.cuda.is_available()); print('GPU:', torch.cuda.get_device_name(0) if torch.cuda.is_available() else 'CPU only')"You should see your GPU and CUDA available: True. If not, PyTorch didn't pick up CUDA — reinstall
torch with the index URL that matches your driver.
Launch the GUI:
python tunet.pyThen follow the four-step loop:
- Prepare a dataset — two matching folders,
src/(before) anddst/(after). See Preparing your dataset. - Pick a preset in the Training tab and point it at your project folder.
- Train, and watch the live loss graph and preview grid.
- Export the finished model to Nuke, Flame, or After Effects.
The interface is organized into tabs:
- Main / Data control — point TUNET at your project folder; it auto-detects
src//dst/. Review source → target pairs before you commit time to training. - Training — choose a preset, then start/resume/fine-tune a run. Live loss curve and a Source → Target → Prediction preview grid with a Diff heatmap.
- Skip Filter Preview — an interactive patch grid to tune the "skip empty patches" threshold, with a mask view (live gamma + coverage stats) and a Show-diff toggle, so you can see exactly which crops the trainer will keep.
- Converter — export a trained checkpoint to a deployable model (Nuke
.catvia TorchScript, or ONNX for Flame / After Effects). - Advanced — every knob (model type/size, resolution, loss weights, learning rate, augmentation, mask weighting, checkpointing). A preset already sets these well — you can train great models without opening this.
Start from the preset closest to your task, then tweak one thing at a time only if it isn't delivering.
| Preset | Best for | Model | Resolution | Loss | Auto-mask |
|---|---|---|---|---|---|
| General (Image-to-Image) | Whole-frame looks, grades, global transforms | MSRN 64 | 512 | L1 | off |
| Beauty / Paint Fix | Small, localized corrections (blemishes, dust, wires) | MSRN 64 | 512 | L1 + LPIPS | on (γ 0.5, mask weight 100) |
| Paintout / Cleanup | Larger object removal with smooth blending | MSRN 64 | 512 (overlap 0.75) | Weighted L1 + L2 | on |
| Roto / Matte | Plate → black-and-white matte | U-Net 128 | 512 (progressive) | BCE + Dice | off |
| Custom | Full manual control | — | — | — | — |
- Create two matching folders —
src/(originals) anddst/(your corrected frames). Optionally addval_src/andval_dst/for validation. - Match filenames exactly.
frame_001.exrinsrc/needs aframe_001.exrindst/. - 20–50 well-chosen pairs is plenty for most shots. What matters more than quantity is variety: include frames covering the range of motion, lighting, and angles in your shot.
- Review the pairs before training to catch misalignment early.
Formats: PNG, JPG/JPEG, EXR, TIF/TIFF, BMP, WEBP.
Color space: 8-bit images (PNG/JPG) are sRGB; 32-bit EXRs are scene-linear. Auto-detection is recommended — a mismatched color space causes blown highlights or muddy shadows.
Tip — prune near-duplicates. If your
src/has long static stretches,scripts/dedupe_src.pyremoves near-duplicate source frames so you train on variety rather than redundancy (--moveis safer than--delete).
These defaults reflect production experience — change one setting at a time, and only if the preset isn't delivering.
- Loss function
- L1 — sharp, pixel-difference; good general default.
- L1 + LPIPS — best for skin/beauty work; looks real to a human eye.
- BCE + Dice — for roto/matte tasks only.
- Learning rate —
1e-4works for most cases. Training too slow? Try3e-4. Loss spiking? Drop to5e-5. - Auto-mask — essential for small fixes (objects under ~1% of frame). Use a mask weight of 100+
for tiny corrections; an
auto_mask_gammabelow 1.0 expands the mask for subtle work. - Augmentation — enable horizontal flip for direction-independent tasks; use color augmentation when lighting varies. Disable it for text, direction-specific content, or color-critical work.
- Resolution — 256 is fast for small fixes; 512 is the balanced default; 768–1024 helps heavy blending but costs more VRAM (cost scales roughly with resolution²).
Watch three signals:
- Loss curve — should drop steeply, then flatten. A rising loss signals a problem.
- Preview grid — when the Prediction column matches Target and the Diff heatmap goes dark, you're there.
- Validation — if validation loss stops improving while training loss keeps dropping, you're starting to overfit. Stop and export the last good checkpoint.
A live loss graph is available standalone too:
python training_monitor.pyTrain, then convert a checkpoint (.pth) to a deployable model. The Converter tab does this for you, or
use the command line:
Nuke — TorchScript .pt plus a helper .nk. Run the helper in Nuke to produce the .cat file for
the Inference node — exactly like a CopyCat result.
python exporters/nuke_exporter.py --checkpoint_pth path/to/model.pth --generate_nkFlame / After Effects — ONNX (plus a Flame .json), for Flame's ML node or After Effects.
python exporters/flame_exporter.py --checkpoint path/to/model.pthDuring a run, a model is also auto-exported every few epochs (default: 10) without halting training, and a final model is exported automatically on completion.
Everything the GUI does is scriptable.
Train (a YAML config defines the run; the GUI can write one for you):
python train.py --config path/to/config.yaml
# graceful stop: create the file passed to --stop-file, or just Ctrl-C
Multi-GPU (DDP):
torchrun --nproc_per_node=<N> train.py --config path/to/config.yamlInference on a folder of frames:
python inference.py --checkpoint model.pth --input_dir src_frames/ --output_dir result/ \
    --overlap_factor 0.5 --use_amp
# --half_res processes at half resolution for ~4× speedup (upscale in comp)
Export — exporters/nuke_exporter.py (Nuke) and exporters/flame_exporter.py (Flame / AE), as above.
@article{tpo2025tunet,
  title={TuNet},
  author={Thiago Porto},
  year={2025}
}
This is a fork of tpc2233/tunet — full credit to the original author.
Source code is licensed under the Apache License, Version 2.0. Commercial use permitted.