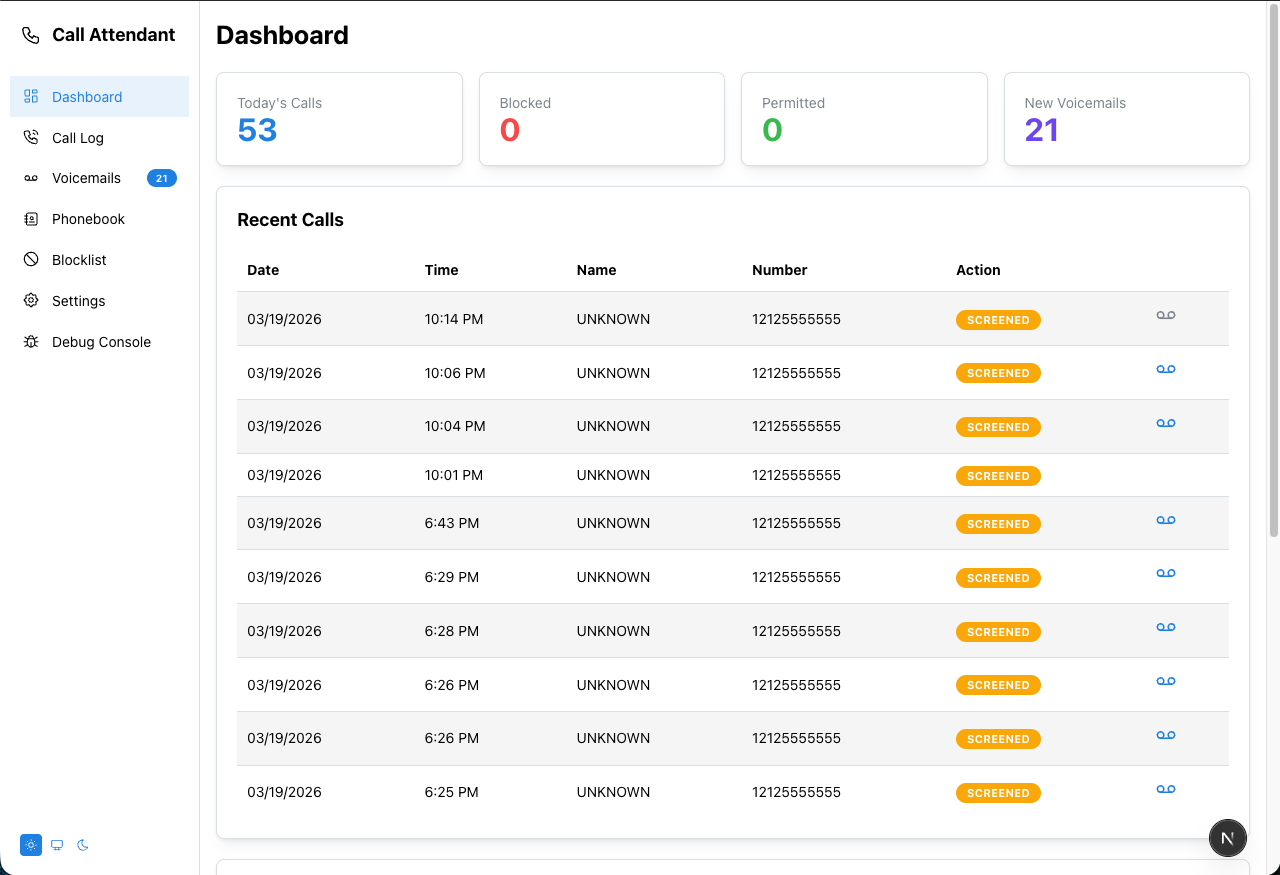
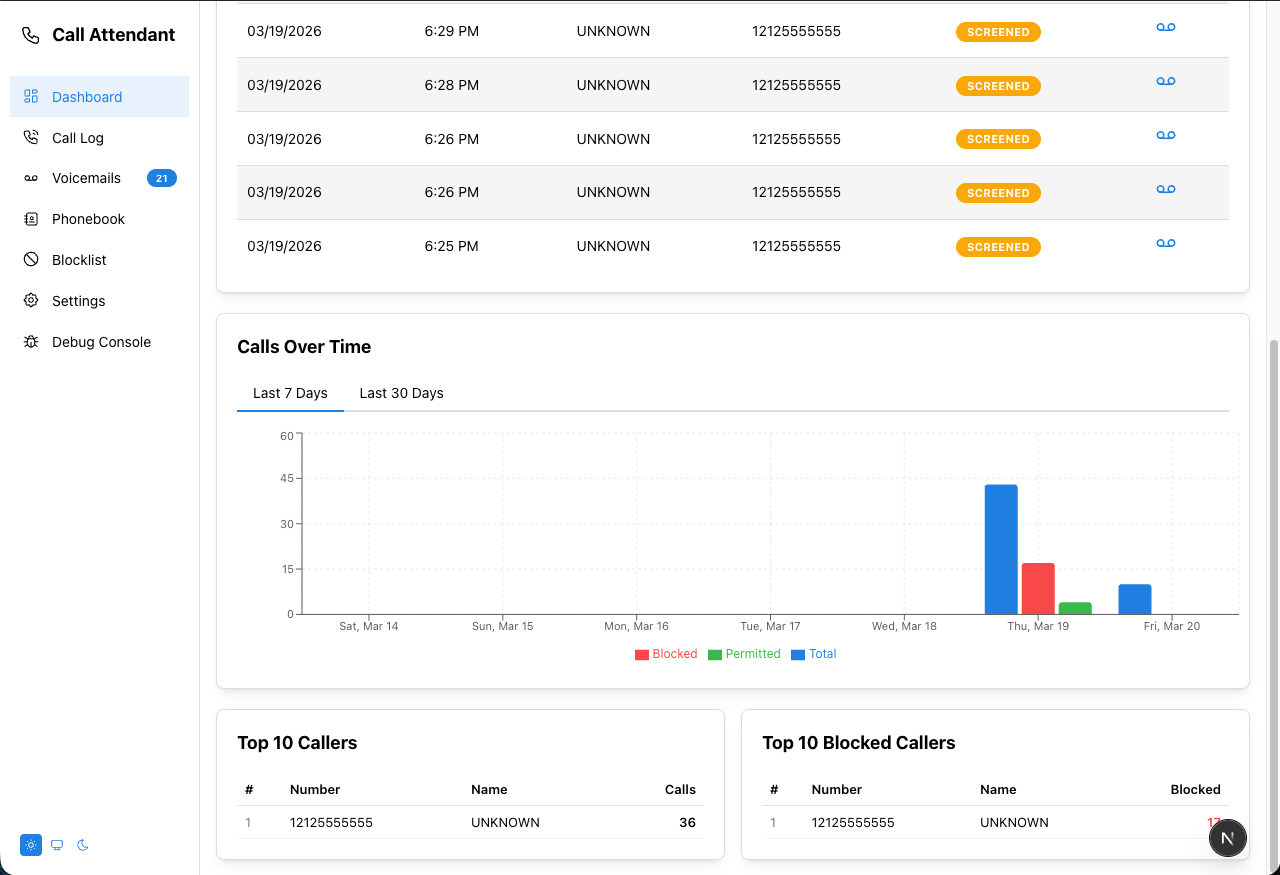
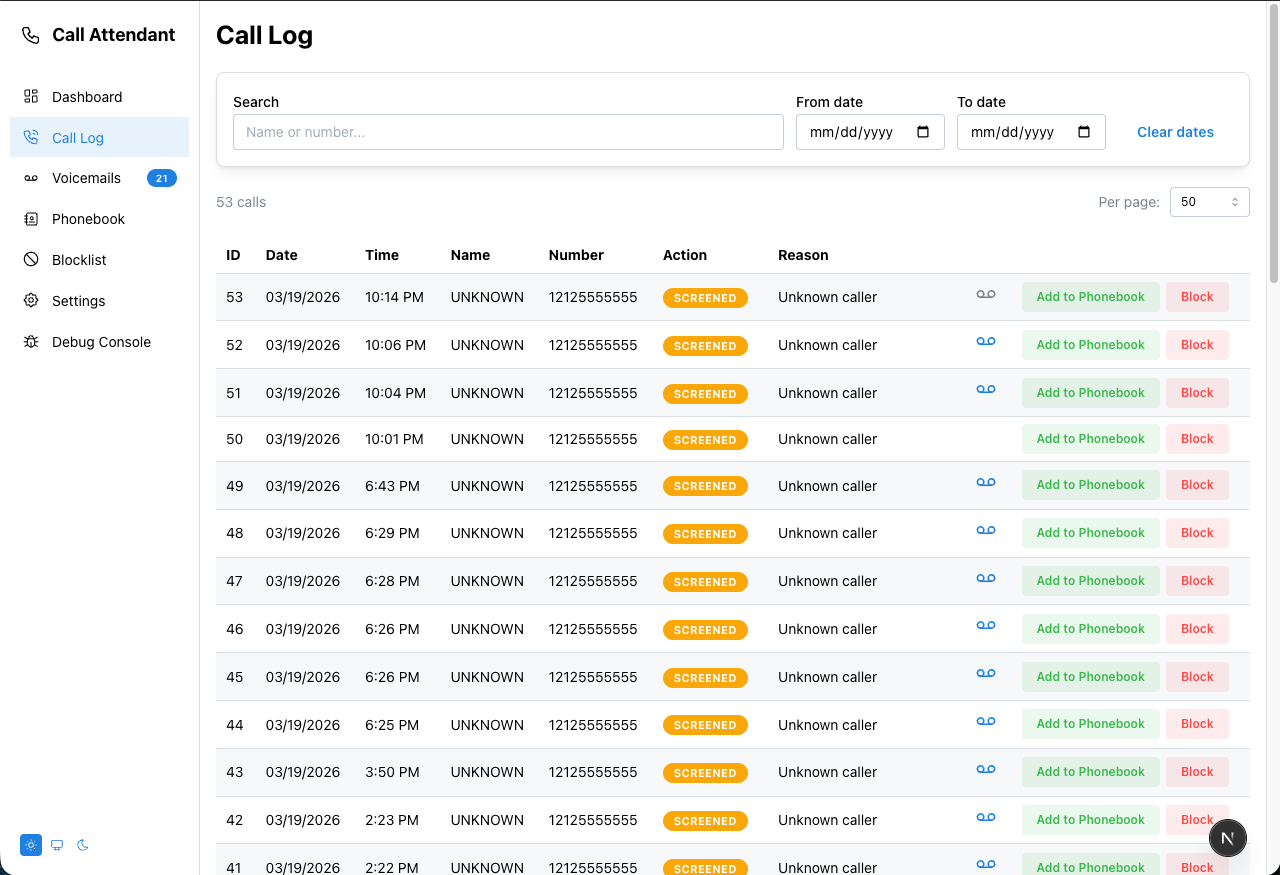
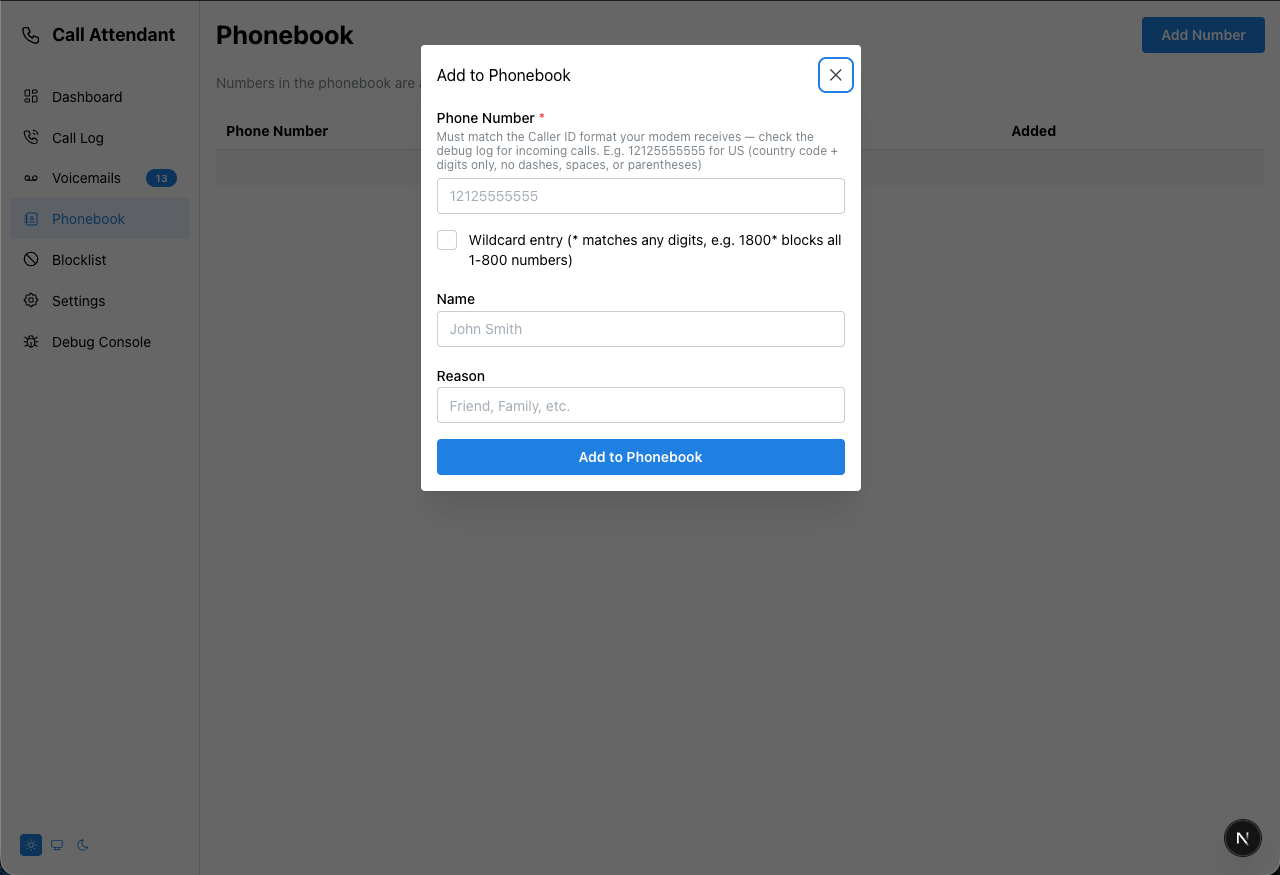
A TypeScript/Next.js port of the callattendant Python project — an automated call screener and voicemail system for landlines using a USB modem.
Only hardware modems are supported. Software modems (winmodems) will not work as they lack the voice mode capabilities required for call screening and audio playback.
| Modem | Recommended Baud Rate |
|---|---|
| US Robotics USR5637 | 57600 |
| MultiTech MT9234MU-CDC | 115200 — provides best voice quality |
| ZOOM 3095 | 115200 — provides best voice quality |
If you have a hardware modem not on this list and would like support added, open an issue at foureight84/CallAttendantNext.
- Next.js 15 — frontend and API routes
- ts-rest + zod — type-safe REST API contract
- SQLite via drizzle-orm + libsql
- serialport — serial communication with USB modem
- Piper TTS — real-time speech synthesis for greetings
- ffmpeg — voicemail encoding (MP3) and audio conversion
- Docker — containerized deployment
- Non-blocking call handling — async/await throughout, no blocking main thread
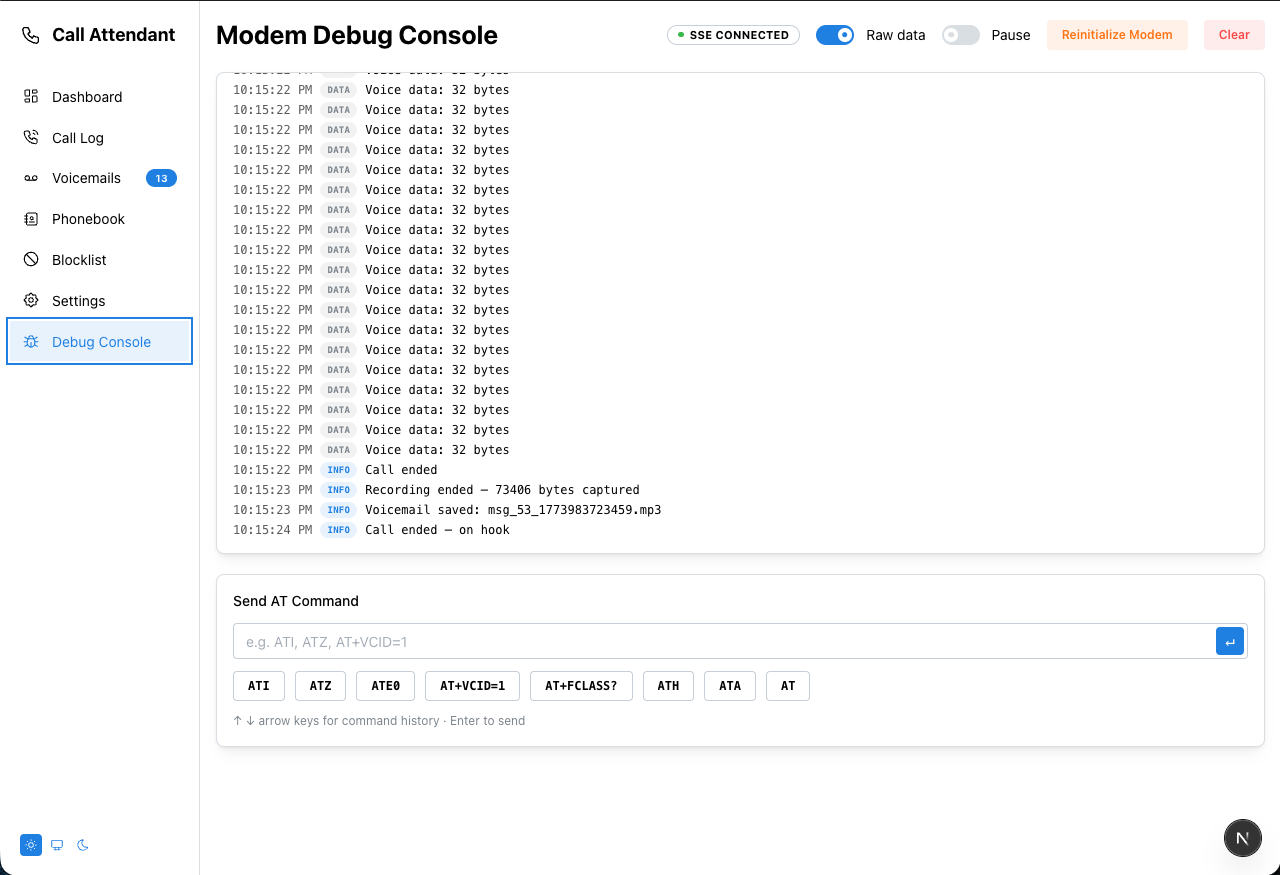
- Easier debugging — structured log events streamed to the browser via SSE; Debug Console page
- Piper TTS instead of WAV files — greetings are synthesized on demand from
.txtscripts; no per-voice audio files to manage - ffmpeg voicemail encoding — recordings saved as MP3 (falls back to WAV if ffmpeg is unavailable); filenames match the Python pattern:
{callLogId}_{number}_{name}_{MMDDyy_HHMM}.mp3(e.g.42_8005551234_JOHN_SMITH_032621_1423.mp3) - Updated Nomorobo scraping — adapted for their current website format
- Improved serial port handling — faster modem detection, reduced call response time
- Raspberry Pi GPIO LED support — toggle via
ENABLE_GPIO=truein.env
Copy .env.example to .env and set your values:
cp .env.example .envOn every startup, .env values are written to the database as defaults. This means:
- First run:
.envseeds all settings into the database - Subsequent runs:
.envcan override any setting back to a specific value - Settings changed via the web UI are stored in the database and take effect immediately, but will be overwritten on next restart if
.envspecifies that key
Only two keys are mandatory:
| Key | Description |
|---|---|
SERIAL_PORT |
Path to your modem device (e.g. /dev/ttyUSB0, /dev/tty.usbmodem*, COM3) |
SERIAL_BAUD_RATE |
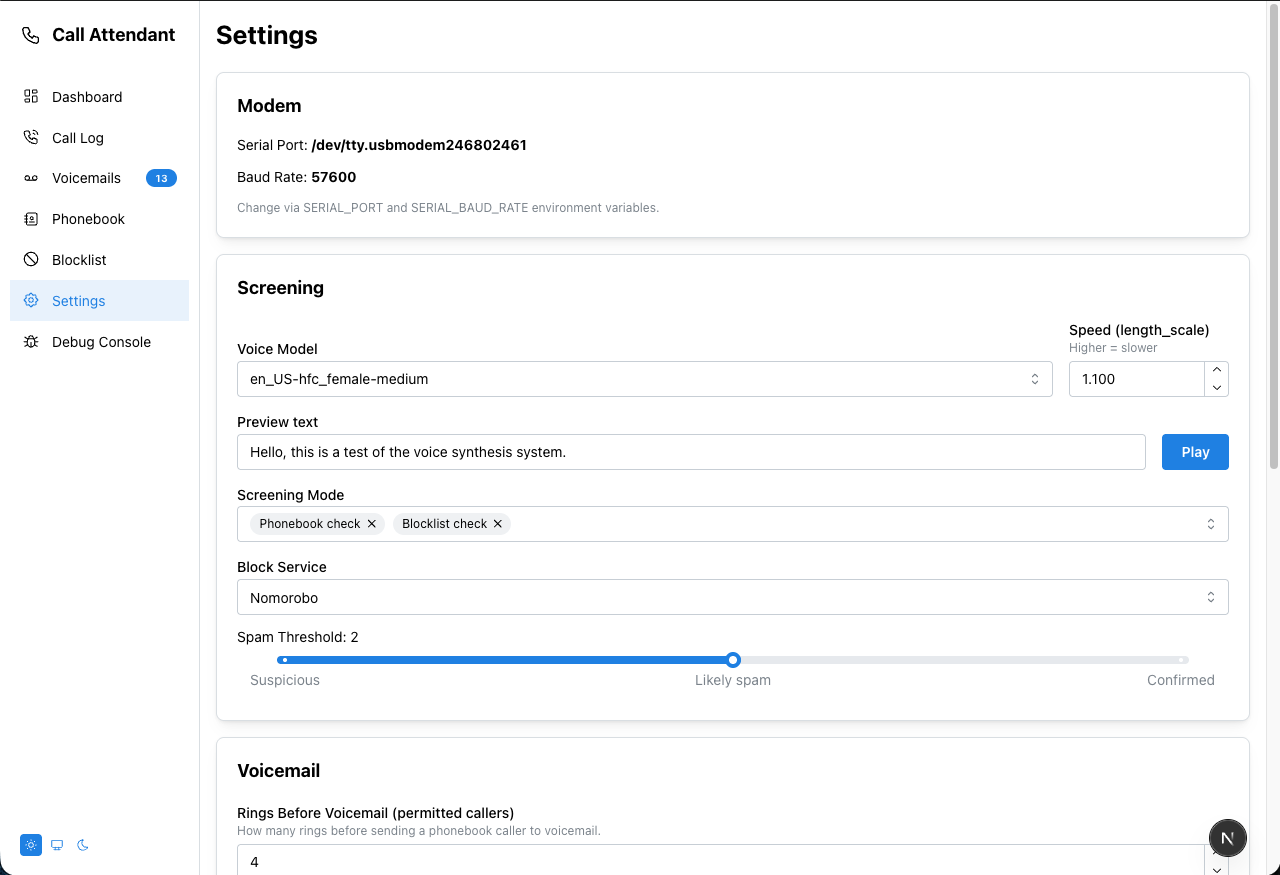
Modem baud rate — 115200 for ZOOM 3095 and MultiTech MT9234MU-CDC (best voice quality); 57600 for US Robotics USR5637 |
All other keys are optional and fall back to sensible defaults.
Required. Piper TTS is used to synthesize greeting messages in real time during calls — without it, greetings will not play.
Piper is a fast, lightweight C++ TTS engine optimized for low-latency local inference — well suited for real-time telephony use. While the library is no longer actively maintained, it remains fully functional with modern speech models as long as they are in ONNX format. You need:
- The Piper binary
- At least one voice model (
.onnx+.onnx.json) in thepiper-models/directory
Download the release for your platform from the rhasspy/piper releases page:
| Platform | File |
|---|---|
| Linux x86_64 | piper_linux_x86_64.tar.gz |
| Linux arm64 (Pi 4/5) | piper_linux_aarch64.tar.gz |
| macOS x86_64 | piper_macos_x64.tar.gz |
| Windows | piper_windows_amd64.zip |
Extract into a piper/ directory at the project root:
mkdir -p piper
tar -xzf piper_linux_aarch64.tar.gz --strip-components=1 -C piper
Set the path in .env:
PIPER_BINARY=./piper/piper
PIPER_MODELS_DIR=./piper-models
Docker: the Dockerfile downloads the Linux x86_64 binary automatically. You only need to supply models.
Voice models are hosted on Hugging Face — rhasspy/piper-voices.
Each voice requires two files:
<model>.onnx— the model weights<model>.onnx.json— metadata including sample rate
Example — US English female (medium quality):
mkdir -p piper-models

# Download model + metadata
wget -P piper-models https://huggingface.co/rhasspy/piper-voices/resolve/main/en/en_US/hfc_female/medium/en_US-hfc_female-medium.onnx
wget -P piper-models https://huggingface.co/rhasspy/piper-voices/resolve/main/en/en_US/hfc_female/medium/en_US-hfc_female-medium.onnx.json
Browse all available voices at: https://huggingface.co/rhasspy/piper-voices/tree/main
After downloading, select the model in Settings → Voice Model and click Play to preview.
# Copy and edit your .env
cp .env.example .env

# Create directories for persistent data
mkdir -p data messages logs

# Place your .onnx models in ./piper-models/
mkdir -p piper-models
# (download models as shown above)

# Start
docker compose up -d
The app will be available at http://localhost:3000.
- The Dockerfile downloads the piper binary automatically during build
- Mount your modem device via
devicesindocker-compose.yml(already configured for/dev/ttyUSB0). If your modem is on a different path, update both thedevicesentry and theSERIAL_PORTenvironment variable indocker-compose.yml data/,messages/, andlogs/must exist before first run — Docker will create them automatically on start but as root-owned, which can cause permission issues- Pass all config via environment variables in
docker-compose.yml— no.envfile is loaded inside the container
docker compose up -d --build# Node.js 22+
curl -fsSL https://deb.nodesource.com/setup_22.x | sudo -E bash -
sudo apt install -y nodejs
# ffmpeg and build tools
sudo apt install -y ffmpeg python3 make g++ libudev-dev
# Add your user to the dialout group for serial port access
sudo usermod -aG dialout $USER
# Log out and back in for this to take effectgit clone https://github.com/foureight84/CallAttendantNext callattendantnext
cd callattendantnext
npm install
npm run buildcp .env.example .env
# Edit .env — set SERIAL_PORT and SERIAL_BAUD_RATE at minimum
nano .env
# Create directories for persistent data
mkdir -p data messages logsDownload Piper and models as described in the Piper TTS Setup section above.
npm startThe app will be available at http://localhost:3000 (or the port set via PORT in .env).
sudo nano /etc/systemd/system/callattendant.service[Unit]
Description=Call Attendant Next
After=network.target
[Service]
Type=simple
User=pi
WorkingDirectory=/home/pi/callattendantnext
ExecStart=/usr/bin/npm start
Restart=on-failure
RestartSec=5
[Install]
WantedBy=multi-user.targetsudo systemctl daemon-reload
sudo systemctl enable callattendant
sudo systemctl start callattendantNote: This feature has not been tested.
Set ENABLE_GPIO=true in .env to enable LED indicators on GPIO pins (requires the onoff package and appropriate wiring). See lib/modem/gpio.ts for pin assignments.
If you have an existing callattendant Python installation, use the included migration script to import your call log, whitelist, blocklist, and voicemail recordings.
The schema is identical between both apps — migration is a direct copy. Voicemail WAV files are copied as-is and served without conversion.
# systemd
sudo systemctl stop callattendant

# or just Ctrl-C if running in the foregroundnpx tsx scripts/migrate-from-python.ts \
--old-db /path/to/callattendant/callattendant.db \
--old-messages /path/to/callattendant/messages \
--dry-runCheck that the row counts look correct before proceeding.
npx tsx scripts/migrate-from-python.ts \
  --old-db /path/to/callattendant/callattendant.db \
  --old-messages /path/to/callattendant/messages
The script will print a summary when done:
Whitelist : 12 / 12 rows
Blacklist : 47 / 47 rows
CallLog   : 1842 / 1842 rows
Message   : 38 / 38 rows
Files     : 38 copied, 0 already present
Done.
npm startAll historical call log entries, whitelist/blocklist entries, and voicemail recordings will be present.
| Flag | Default | Description |
|---|---|---|
--old-db |
(required) | Path to the Python app's callattendant.db |
--old-messages |
(optional) | Path to the Python app's messages/ directory |
--new-db |
./callattendant.db |
Path to the new app's database (Docker: ./data/callattendant.db) |
--new-messages |
./messages |
Path to the new app's messages directory |
--dry-run |
— | Read and count everything; write nothing |
The script is safe to re-run — it uses INSERT OR IGNORE for all rows and skips files that already exist in the destination.
Note: Settings are not migrated. The Python app has no Settings table; the new app seeds settings from your
.envon first startup.
The new app's database and messages directory are bind-mounted to the host (./data/ and ./messages/ next to docker-compose.yml), so the migration script can reach them directly.
Step 1 — Stop the new app
docker compose downStep 2 — Get the old database and messages onto the host
If the old Python callattendant also uses bind mounts, the files are already on the host — note their paths and skip to step 3.
If the old app uses named Docker volumes, copy the files out first:
# Find the old container name
docker ps -a

# Copy the database
docker cp <old-container>:/app/callattendant.db /tmp/old-callattendant.db

# Copy the messages directory
docker cp <old-container>:/app/messages /tmp/old-messages
Adjust /app/callattendant.db and /app/messages to match the actual paths inside the old container if they differ.
Step 3 — Run the migration inside a one-off container
Use the already-built callattendantnext image so Node.js and all dependencies are available — no need to install anything on the host:
# Dry run first
docker run --rm \
  -v /tmp/old-callattendant.db:/old/callattendant.db:ro \
  -v /tmp/old-messages:/old/messages:ro \
  -v ./data:/app/data \
  -v ./messages:/app/messages \
  callattendantnext-callattendant \
  node_modules/.bin/tsx scripts/migrate-from-python.ts \
    --old-db /old/callattendant.db \
    --old-messages /old/messages \
    --new-db /app/data/callattendant.db \
    --new-messages /app/messages \
    --dry-run
# Run for real (remove --dry-run)
docker run --rm \
-v /tmp/old-callattendant.db:/old/callattendant.db:ro \
-v /tmp/old-messages:/old/messages:ro \
-v ./data:/app/data \
-v ./messages:/app/messages \
callattendantnext-callattendant \
node_modules/.bin/tsx scripts/migrate-from-python.ts \
--old-db /old/callattendant.db \
--old-messages /old/messages \
--new-db /app/data/callattendant.db \
--new-messages /app/messagesThe image name (callattendantnext-callattendant) is the default Docker Compose generates from the project directory name and service name. If yours differs, check with docker images.
If the old app's files are already bind-mounted on the host (e.g. at ./old-messages), pass the host paths directly — no docker cp step needed.
Step 4 — Start the new app
docker compose up -dGreeting text files live in public/audio/script/. Edit them to customize what is spoken. Do not rename these files — the filenames are hardcoded and the application will not find them if changed.
| File | When used |
|---|---|
general_greeting.txt |
Played when a call is answered and sent to voicemail |
please_leave_message.txt |
Played after the greeting, just before recording begins |
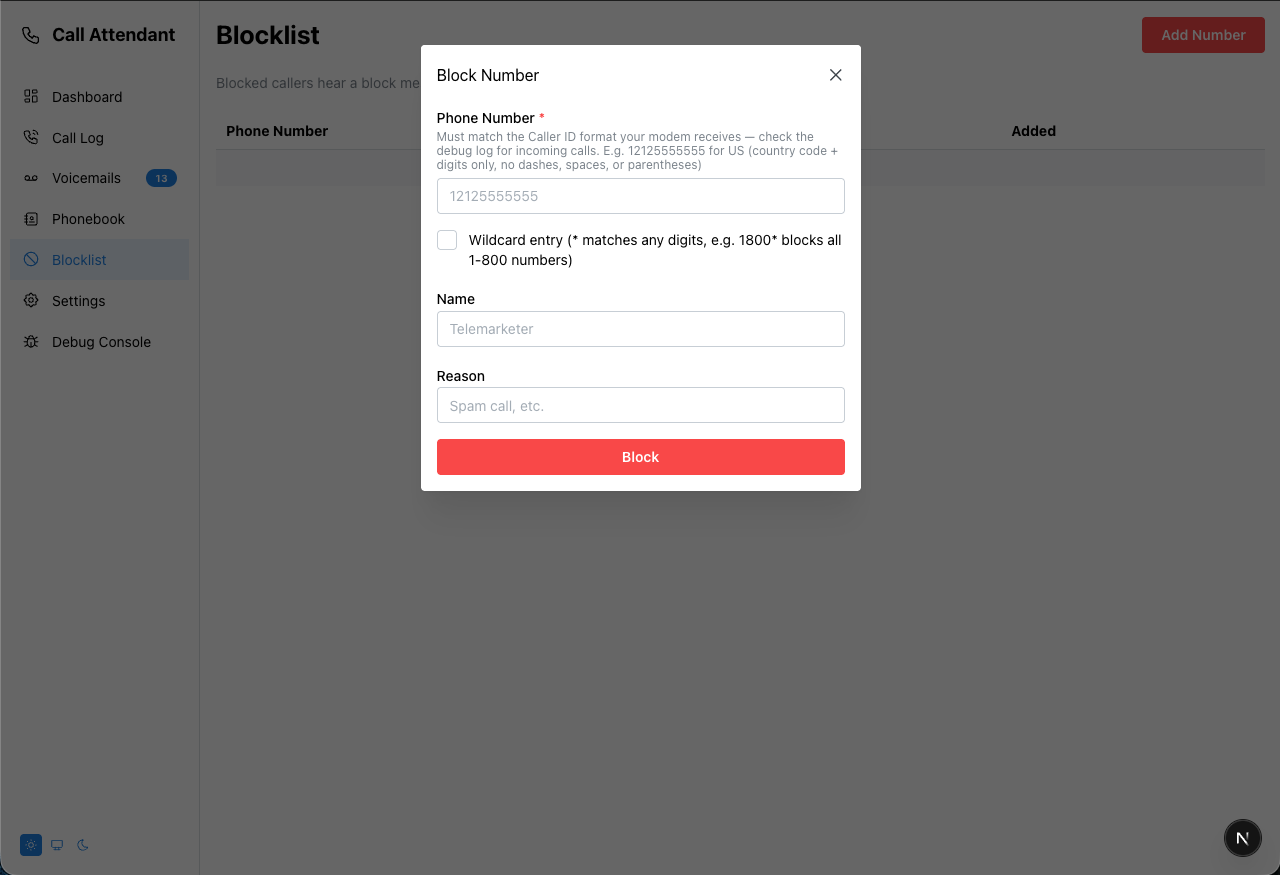
blocked_greeting.txt |
Played to blocklisted callers before hanging up (when blocklist action is set to "play greeting") |
goodbye.txt |
Played when ending an interaction |
invalid_response.txt |
Played when an unrecognized input is received |
voice_mail_menu.txt |
Played to present the voicemail menu options |