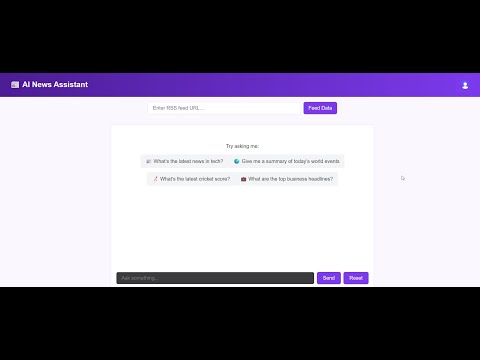
A modern React frontend application for the RAG (Retrieval-Augmented Generation) system that provides an AI-powered news assistant. Users can add RSS feeds, chat with AI about current events, and get contextual answers with citations from processed news articles.
- User Authentication: Secure authentication using Clerk
- RSS Feed Management: Add and process RSS news feeds
- AI-Powered Chat: Real-time chat interface with streaming responses
- Message History: Persistent chat history with Redis backend
- Responsive Design: Modern, mobile-friendly interface
- Real-time Updates: Live streaming of AI responses
- Error Handling: Comprehensive error management with user-friendly messages
- Citation Support: Clickable citations linking to original news sources
- Frontend Framework: React 19 with TypeScript
- Build Tool: Vite
- Authentication: Clerk React
- Styling: SCSS/CSS modules
- HTTP Client: Fetch API with custom hooks
- State Management: React hooks and context
- Development: ESLint, TypeScript
Live Demo:
Before you begin, ensure you have the following installed:
- Node.js (v18 or higher)
- npm or yarn
- Access to the RAG Backend API (see backend README for setup)
- Clerk account for authentication
git clone https://github.com/haider0107/rag-frontend.git
cd rag-frontendnpm installCreate a .env file in the root directory based on .env.sample:
# Clerk Authentication
VITE_CLERK_PUBLISHABLE_KEY=your_clerk_publishable_key

# Backend API URL
VITE_SERVER_URL=http://localhost:3000- Sign up for a Clerk account
- Create a new application in the Clerk dashboard
- Copy your publishable key to the
.envfile - Configure your application settings (sign-in/sign-up options, etc.)
npm run devThe application will start on http://localhost:5173 (or next available port).
npm run build
npm run preview- Authentication: Sign up or login using the authentication modal
- Add RSS Feeds: Use the RSS input field to add news feed URLs
- Wait for Processing: The system will process articles and create embeddings
- Start Chatting: Ask questions about current events and news
- View Sources: Click on citation links in responses to view original articles
The system works with most standard RSS feeds. Popular examples:
- Times of India:
https://timesofindia.indiatimes.com/rssfeedstopstories.cms - BBC News:
http://feeds.bbci.co.uk/news/rss.xml - CNN:
http://rss.cnn.com/rss/edition.rss - TechCrunch:
https://techcrunch.com/feed/
- Type your questions in the input field
- Press Enter or click Send to submit
- Watch as the AI streams responses in real-time
- Click on citation numbers to view source articles
- Use the Reset button to clear chat history
rag-frontend/
├── public/
│   └── index.html              # HTML template
├── src/
│   ├── components/
│   │   ├── Auth/
│   │   │   ├── SignInModal.tsx  # Login modal component
│   │   │   └── SignUpModal.tsx  # Registration modal component
│   │   ├── Chat/
│   │   │   ├── ChatBox.tsx      # Main chat container
│   │   │   ├── InputArea.tsx    # Message input and controls
│   │   │   ├── MessageItem.tsx  # Individual message component
│   │   │   ├── Messages.tsx     # Message list container
│   │   │   └── TypingIndicator.tsx # Loading animation
│   │   ├── RSS/
│   │   │   ├── RssInput.tsx     # RSS URL input component
│   │   │   └── RssModal.tsx     # RSS processing modal
│   │   └── common/
│   │       ├── ErrorPopup.tsx   # Error notification component
│   │       └── Loader.tsx       # Loading spinner component
│   ├── hooks/
│   │   ├── useChat.ts           # Chat functionality hook
│   │   ├── useRss.ts            # RSS feed management hook
│   │   └── useScrollToBottom.ts # Auto-scroll functionality
│   ├── App.tsx                  # Main application component
│   ├── App.scss                 # Main application styles
│   ├── index.css                # Global styles
│   └── main.tsx                 # Application entry point
├── package.json                 # Dependencies and scripts
├── .env                         # Environment variables (create this)
├── .env.sample                  # Environment template
├── tsconfig.json                # TypeScript configuration
├── vite.config.ts               # Vite configuration
└── README.md                    # Project documentation
This frontend connects to the RAG Backend API. Ensure the backend is running before starting the frontend.
POST /upload/add-feed- Add RSS feed for processingPOST /chat/ask- Send messages and receive streaming responsesGET /chat/history- Retrieve chat historyPOST /chat/clear- Clear chat history
All API requests include JWT tokens from Clerk in the Authorization header.
The application uses a theme system with CSS variables. Current theme: theme-purple
- Main styles in
App.scss - Component-specific styles in respective component files
- Global styles in
index.css
- Create components in the appropriate folder under
src/components/ - Add custom hooks in
src/hooks/ - Update the main App component to integrate new features
npm run dev- Start development servernpm run build- Build for productionnpm run preview- Preview production buildnpm run lint- Run ESLint
- Use TypeScript for type safety
- Follow React hooks patterns
- Use functional components
- Implement proper error handling
- Add loading states for better UX
- Components: PascalCase (e.g.,
MessageItem.tsx) - Hooks: camelCase starting with 'use' (e.g.,
useChat.ts) - Utilities: camelCase (e.g.,
apiHelpers.ts)
-
Authentication Errors
- Check Clerk publishable key in
.env - Verify Clerk dashboard configuration
- Check Clerk publishable key in
-
API Connection Issues
- Ensure backend server is running
- Check
VITE_SERVER_URLin.env - Verify CORS settings on backend
-
Build Errors
- Run
npm installto ensure dependencies are installed - Check TypeScript errors with
npm run lint
- Run
-
RSS Processing Issues
- Verify RSS URL is valid and accessible
- Check backend logs for processing errors
Ensure all required environment variables are set:
VITE_CLERK_PUBLISHABLE_KEY- Your Clerk publishable keyVITE_SERVER_URL- Backend API URL (default: http://localhost:3000)
Built with ❤️ using React, TypeScript, Vite, and Clerk