
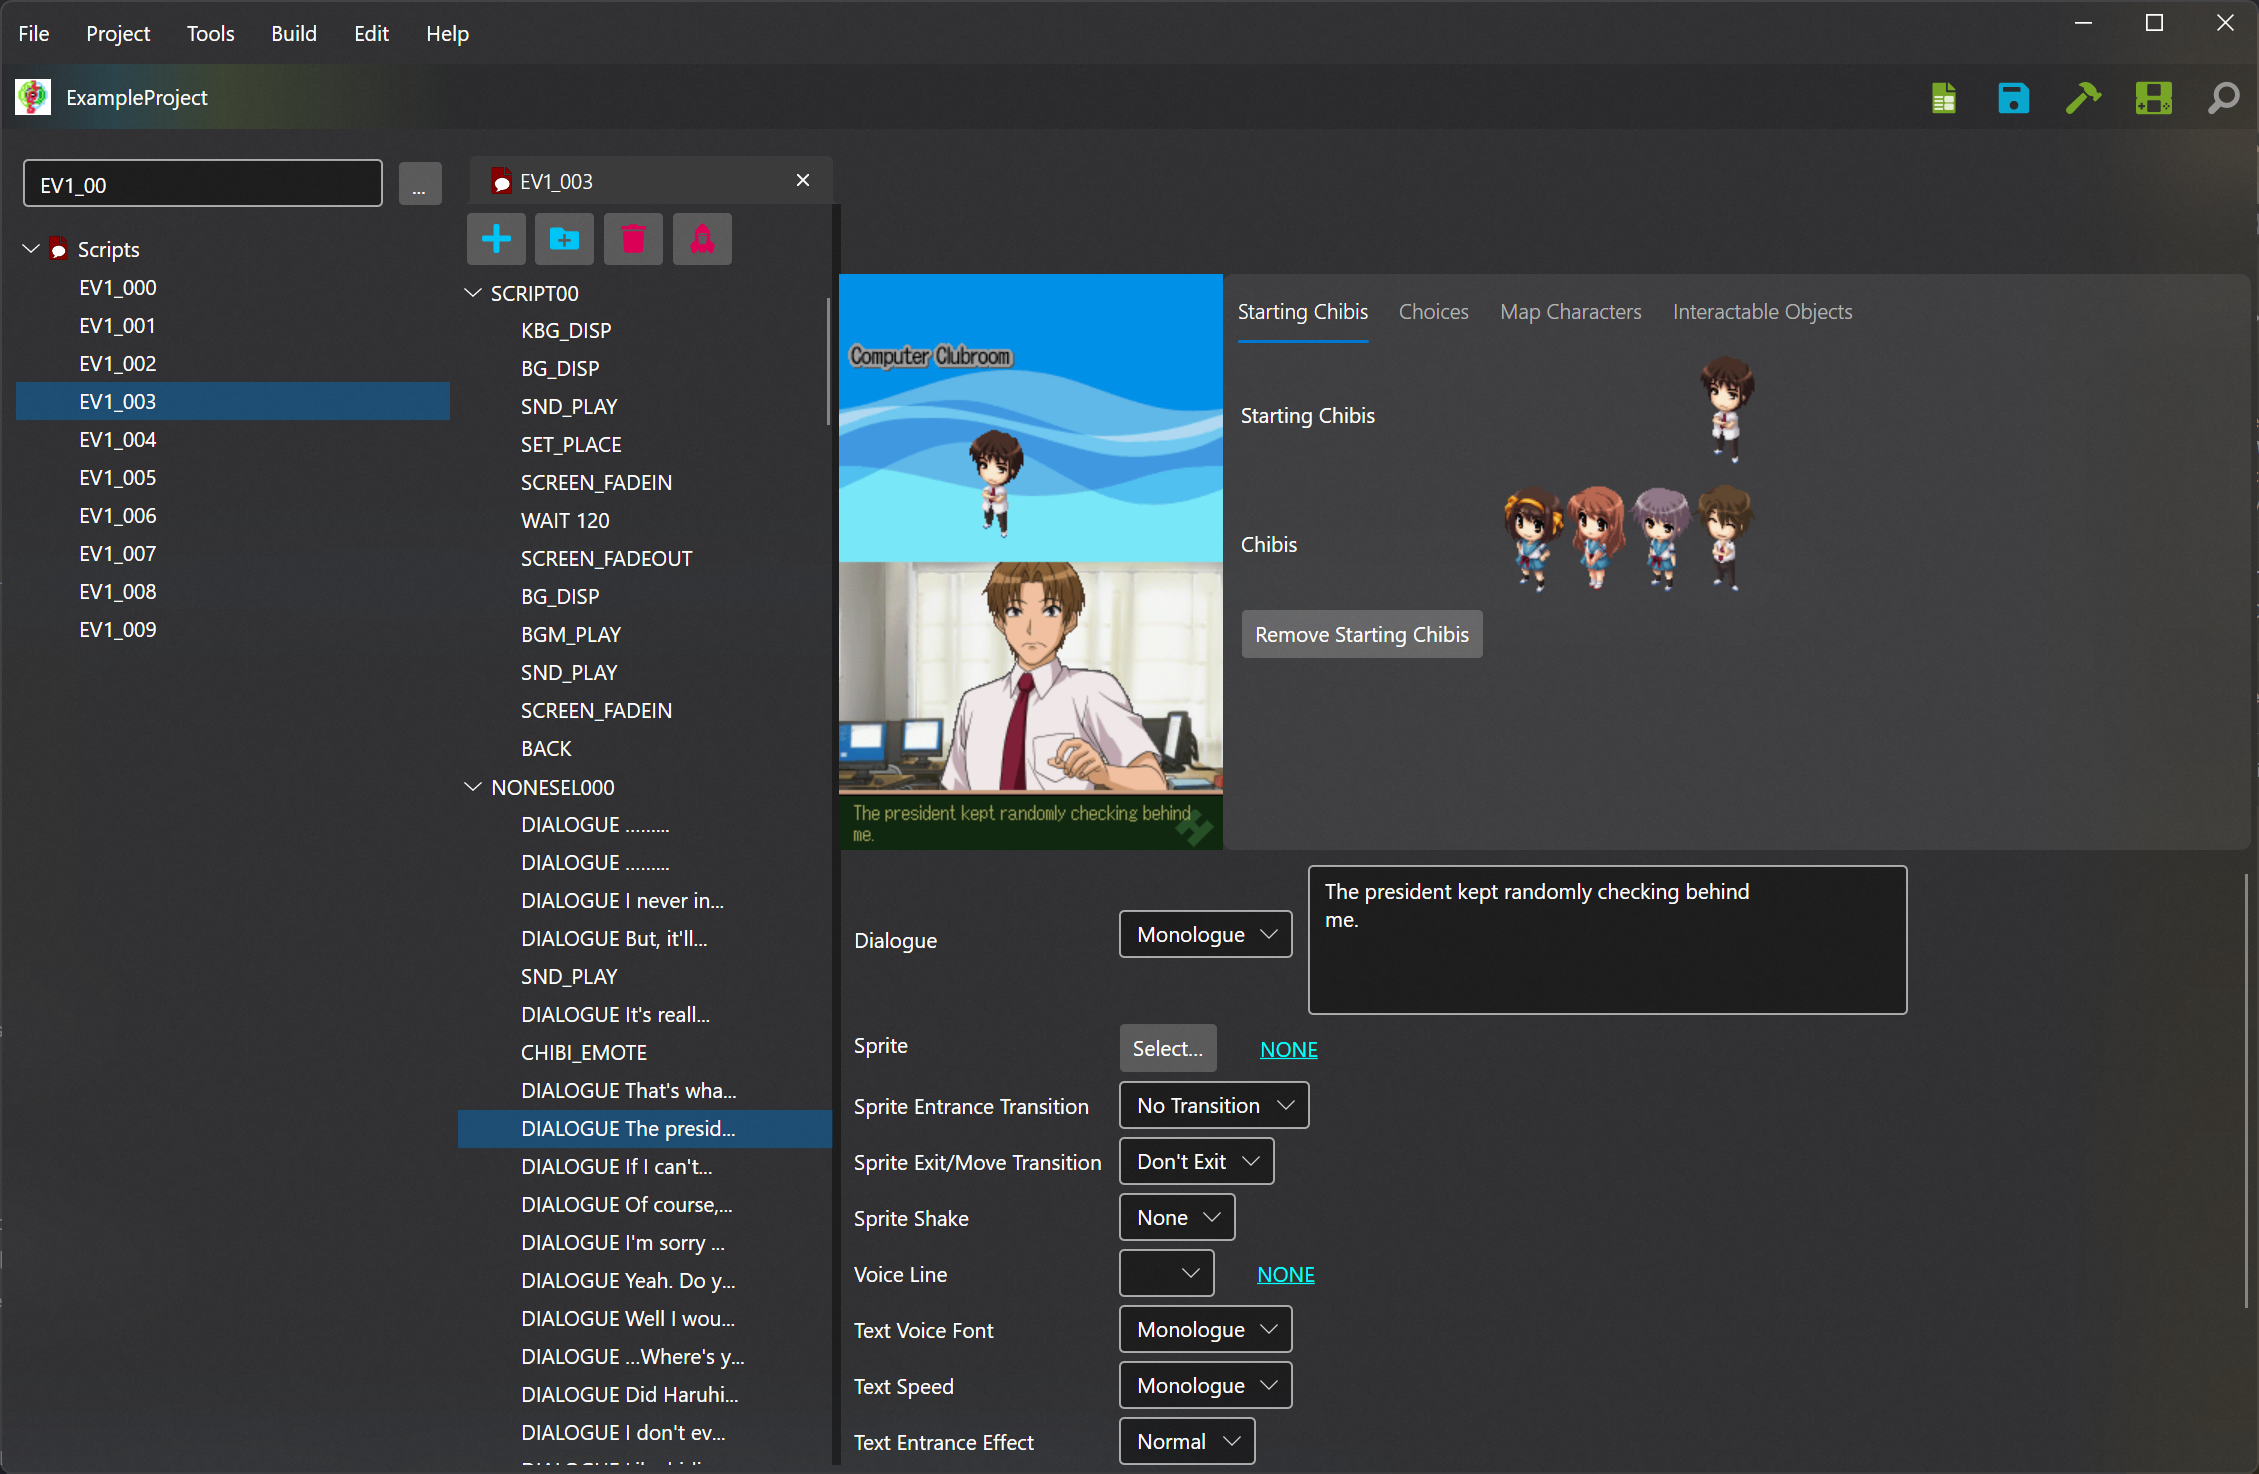
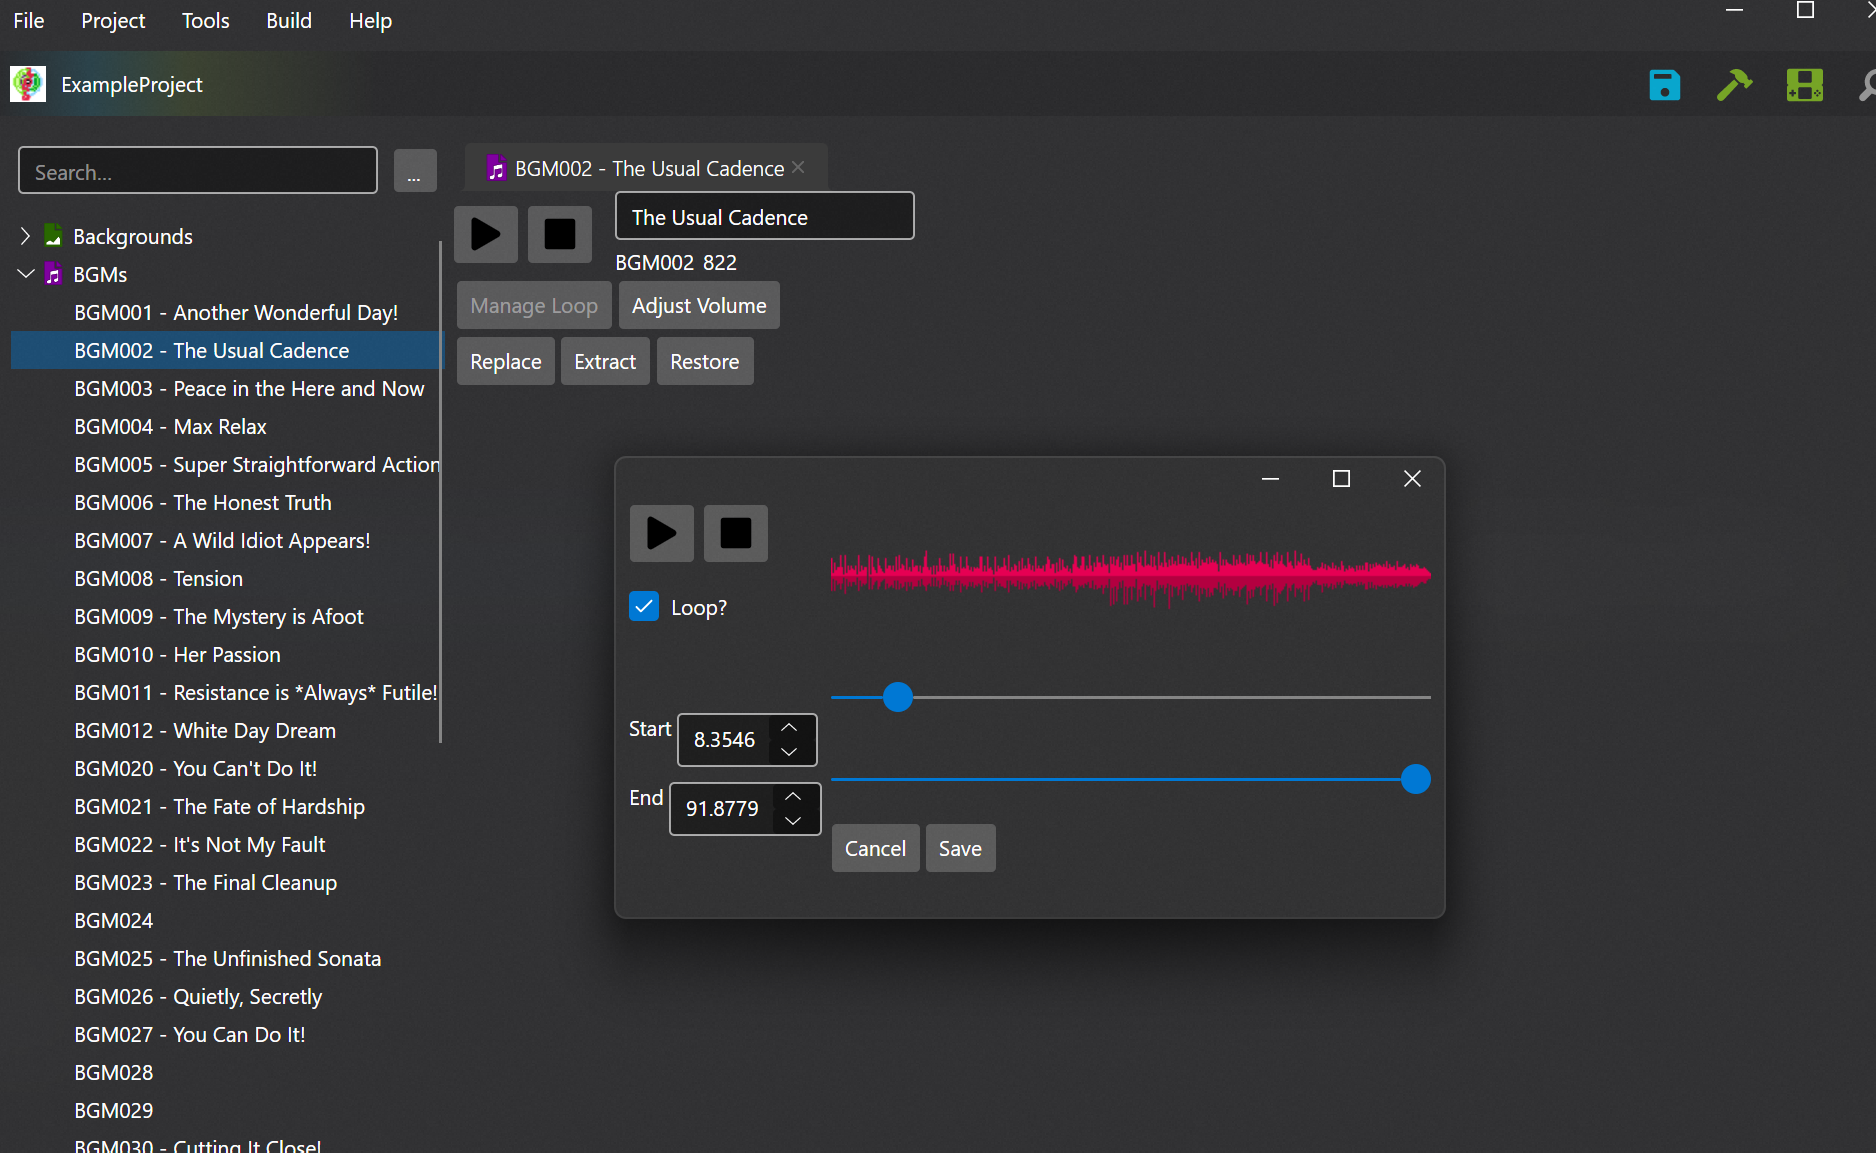
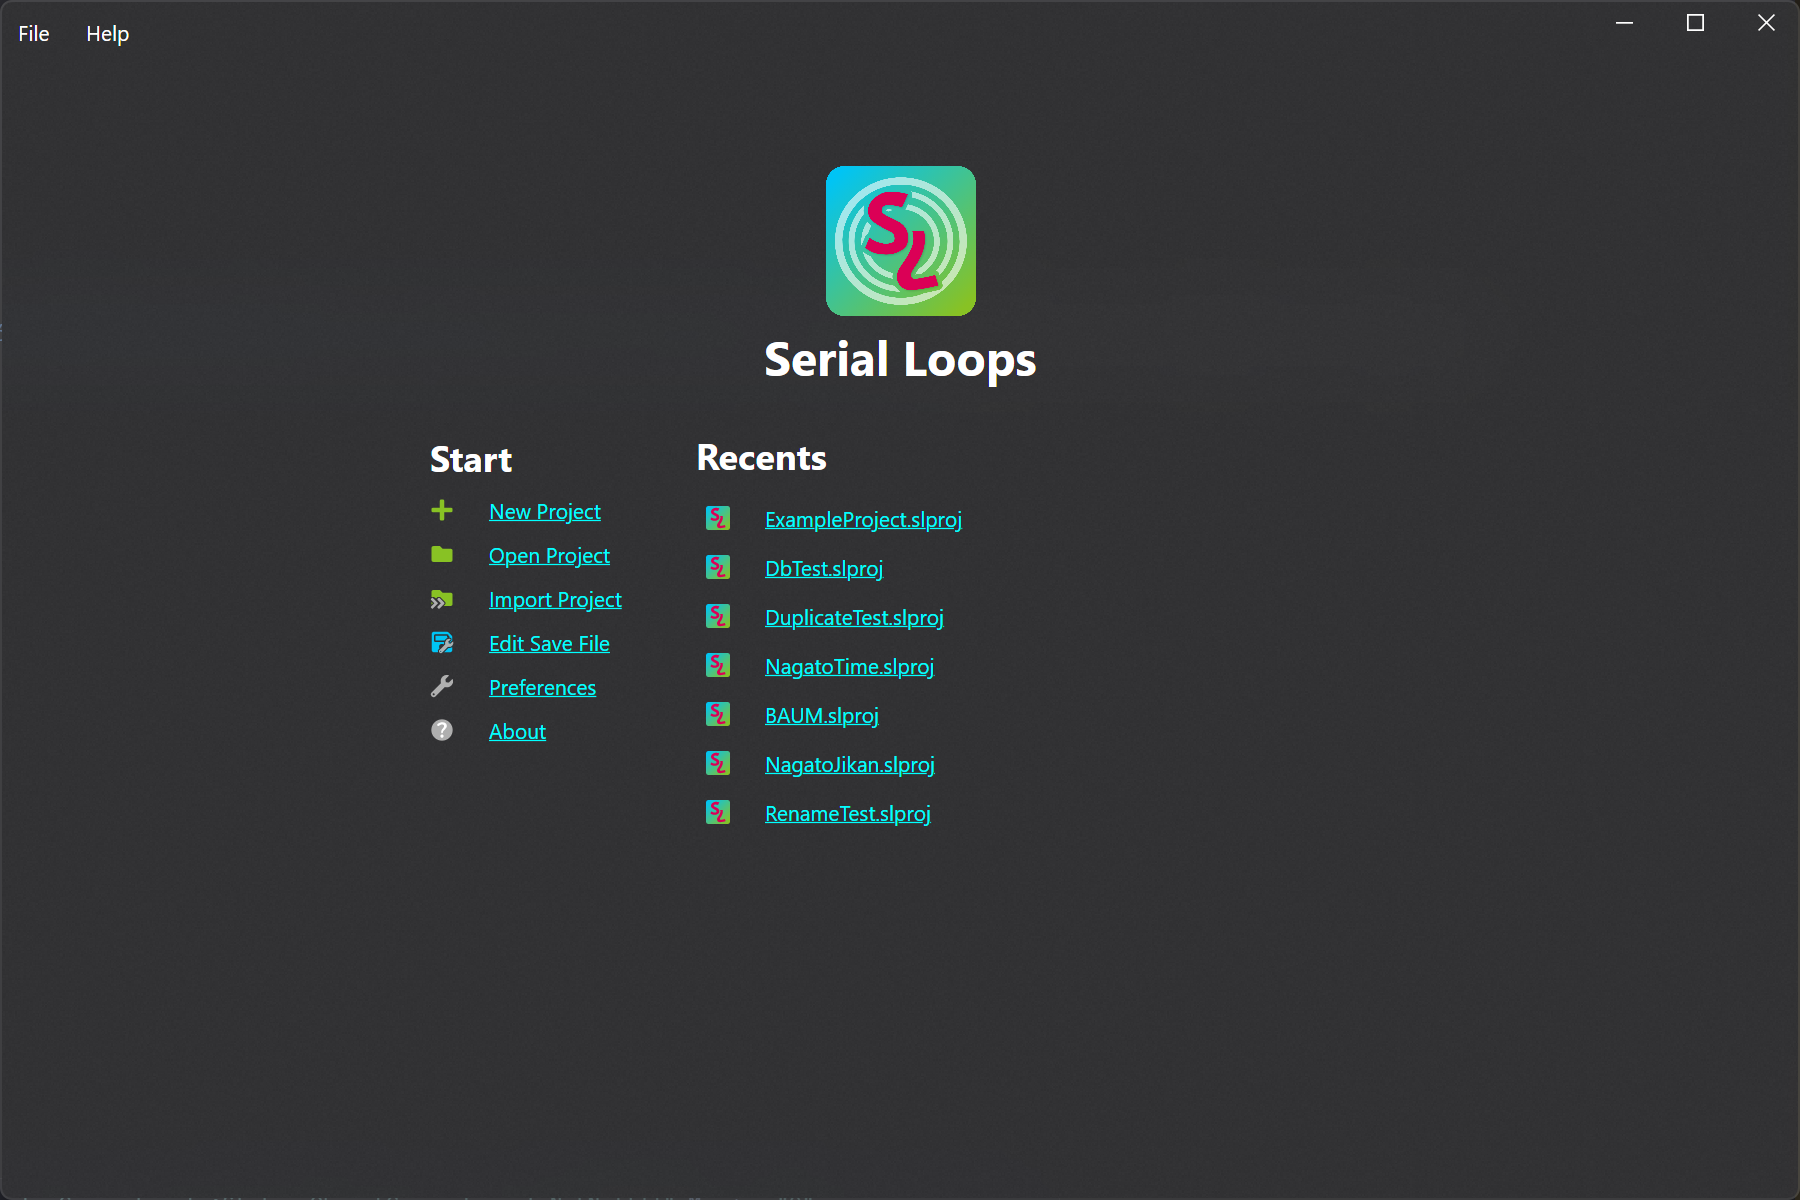
Serial Loops is a full-fledged editor for the Nintendo DS game Suzumiya Haruhi no Chokuretsu (The Series of Haruhi Suzumiya).

Serial Loops is developed by:
- Jonko – Systems architect & reverse engineering work
- William278 – UX architect & design work
Additional contributions have been made by:
- Fuyuko Ayumu
- Xzonn
Serial Loops is translated into a variety of langauges thanks to the following contributors:
- Chinese (Simplified/Traditional): Xzonn (traditional is auto-generated via OpenCC)
- Italian: Oropuro_49 and Fuyuko Ayumu
- Japanese: Amelia Chaplin
Documentation for how to use Serial Loops can be found on our website.
It is recommended that you use a distribution of Serial Loops that automatically installs or comes with the necessary prerequisites. For each platform these are:
- Linux: Flatpak from Flathub
- The AppImage, deb, and rpm packages are also easy to use, but if you're not sure which to choose, go with the Flatpak
- macOS: Installer
- Windows: Installer
Using these will ensure Serial Loops is ready to use after installation. However, if you would rather use a portable build on Windows/Linux, please check the information on installing these prerequisites in the next section.
If you opt to use one of the non-packaged releases on Windows or Linux, you will need to install a few dependencies. These are:
- Clang and LLD from LLVM (on Windows, it's best to just use the LLVM installer as it will install both of these; on Linux, you can opt to install just the
clang,lld, and possiblyllvmpackages from your package manager) - Ninja
- On Linux, you will also need SDL2
To test the game easily, you will want to have a Nintendo DS emulator installed. We recommend using melonDS for its accuracy. If you are using the Flatpak release, melonDS comes pre-packaged with it.
Once you have installed any necessary prerequisites, to install Serial Loops, download the latest release for your platform from the Releases tab.
Be sure to read the Serial Loops documentation for instructions on how to use it!
Uninstalling Serial Loops itself is quite simple; however, you may also want to uninstall the packaged dependencies. Follow the instructions below for each platform to do this.
- If you installed the Flatpak, simply run uninstall it via the Warehouse app or your software/app store application. Alternatively, you can run
flatpak uninstall --delete-data club.haroohie.SerialLoopsto remove the Flatpak and all its associated data. If you don't want to keep your project data, ensure you delete the~/SerialLoopsdirectory as well. - If you installed the AppImage, simply delete it from your machine.
- If you installed the deb or rpm package, run your package manager's uninstall command for the
SerialLoopspackage. - If you downloaded the tarball, delete the unpacked files from your system. You may also run your package manager's uninstallation command for Clang, LLD, Ninja, and SDL2.
Simply drag the Serial Loops application from the Applications folder to the trash. Then run brew uninstall llvm and brew uninstall ninja-build to remove LLVM and Ninja (if you want to do so). Finally, if you also want to uninstall Homebrew, you can run /bin/bash -c "$(curl -fsSL https://raw.githubusercontent.com/Homebrew/install/HEAD/uninstall.sh)".
Go into Add or Remove Programs and remove Serial Loops and (if you don't want it anymore) LLVM.
Please file bugs in the Issues tab in this repository. Please include the following information:
- The platform you are running Serial Loops on
- The version of the Chokuretsu ROM you are using (Japanese, patched English ROM, etc.)
- A description of the steps required to reproduce the issue
- The relevant logs for the issue (can be found in ~/SerialLoops/Logs)
Serial Loops is licensed under the GPLv3. See LICENSE for more information.
Serial Loops requires the .NET 8.0 SDK to build. You can download it here.
Additionally, on macOS, you will have to install CMake so that the build can compile SDL2. To do this, download the macOS dmg for your here and install it. Then run:
sudo /Applications/CMake.app/Contents/bin/cmake-gui --installThis will symlink the CMake binaries to /usr/local/bin which is necessary for the build to work. Alternatively, you can install
cmake via Homebrew with brew install cmake.
On Linux, you will need to install the SDL2 binaries for your distribution.
To build Serial Loops for your platform, run:
dotnet buildOn Linux/Mac, you need to specify the target framework:
dotnet build -f net8.0Specifying this prevents dotnet from trying to build the Windows project, which can cause errors.
We recommend Rider for development as it has the best Avalonia support and is now free to use for non-commercial purposes; however, on Windows, you can also use Visual Studio 2022.
You can also build from both of these IDEs; however, when building from Rider on Linux/Mac, you must go into Settings → Build, Execution, Deployment → Toolset and Build and add TargetFramework=net8.0
to the MSBuild global properties field. This has the same effect as specifying -f net8.0 on the command line.
If you'd like to contribute new features or fixes, we recommend getting in touch on Discord first before submitting a pull request!
Serial Loops has headless tests that run to test the UI and other functionality of the program.
Tests can be run via dotnet test (make sure to add -f net8.0 on Linux or Mac) or through the test runners in Rider or Visual Studio.