Repo contains source code for smart image correction application. This application is developed by PRC SMG TEG ADC IOT team to provide AI capability on Core platform to leverage iGPU acceleration.
The application will scan input image with Intel(R) Core platform, auto-remove messy background and enhance, precisely restore, and finally generate HD image. It targets for conference, education scenarios, etc.
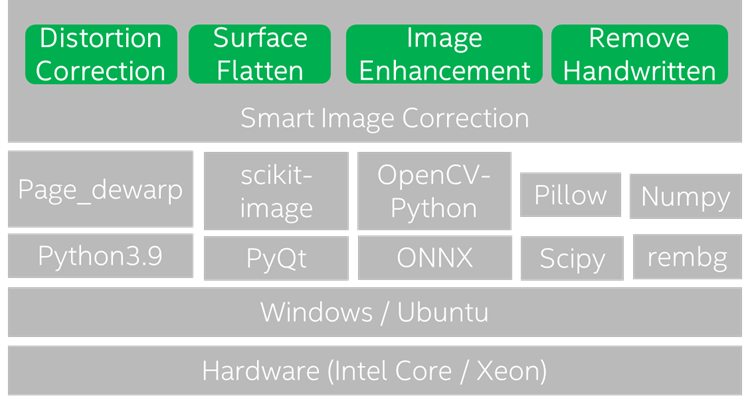
Users can utilize source code to deploy their application based on this Smart Image Correction project on Windows/Ubuntu. The following steps are verified on TGL-U i7-1185G7 Windows10.
Pythons 3.9 is available from this link (https://www.python.org/downloads/), download and follow the instructions to complete Python 3.9 installation.
The PyCharm download is available via this link: https://www.jetbrains.com/pycharm/download/other.html
https://packaging.python.org/en/latest/tutorials/installing-packages/
Please get the source from https://github.com/intel/smart-image-correction
Download public pre-trained model u2net.onnx from https://drive.google.com/uc?id=1tCU5MM1LhRgGou5OpmpjBQbSrYIUoYab
Create a folder named .unet in C:\Users\username\
Copy u2net.onnx to folder C:\Users\username\.u2net\
Open Windows “Command Prompt” App, navigate to Smart Image Correction source directory and execute:
pip install -r requirements.txt
• Open Smart Image Correction project by PyCharm. • Choose Main.py • Click "Run" button.
Open Windows “Command Prompt” App, navigate to Smart Image Correction source directory and execute:
Pyinstaller -F -w Main.py
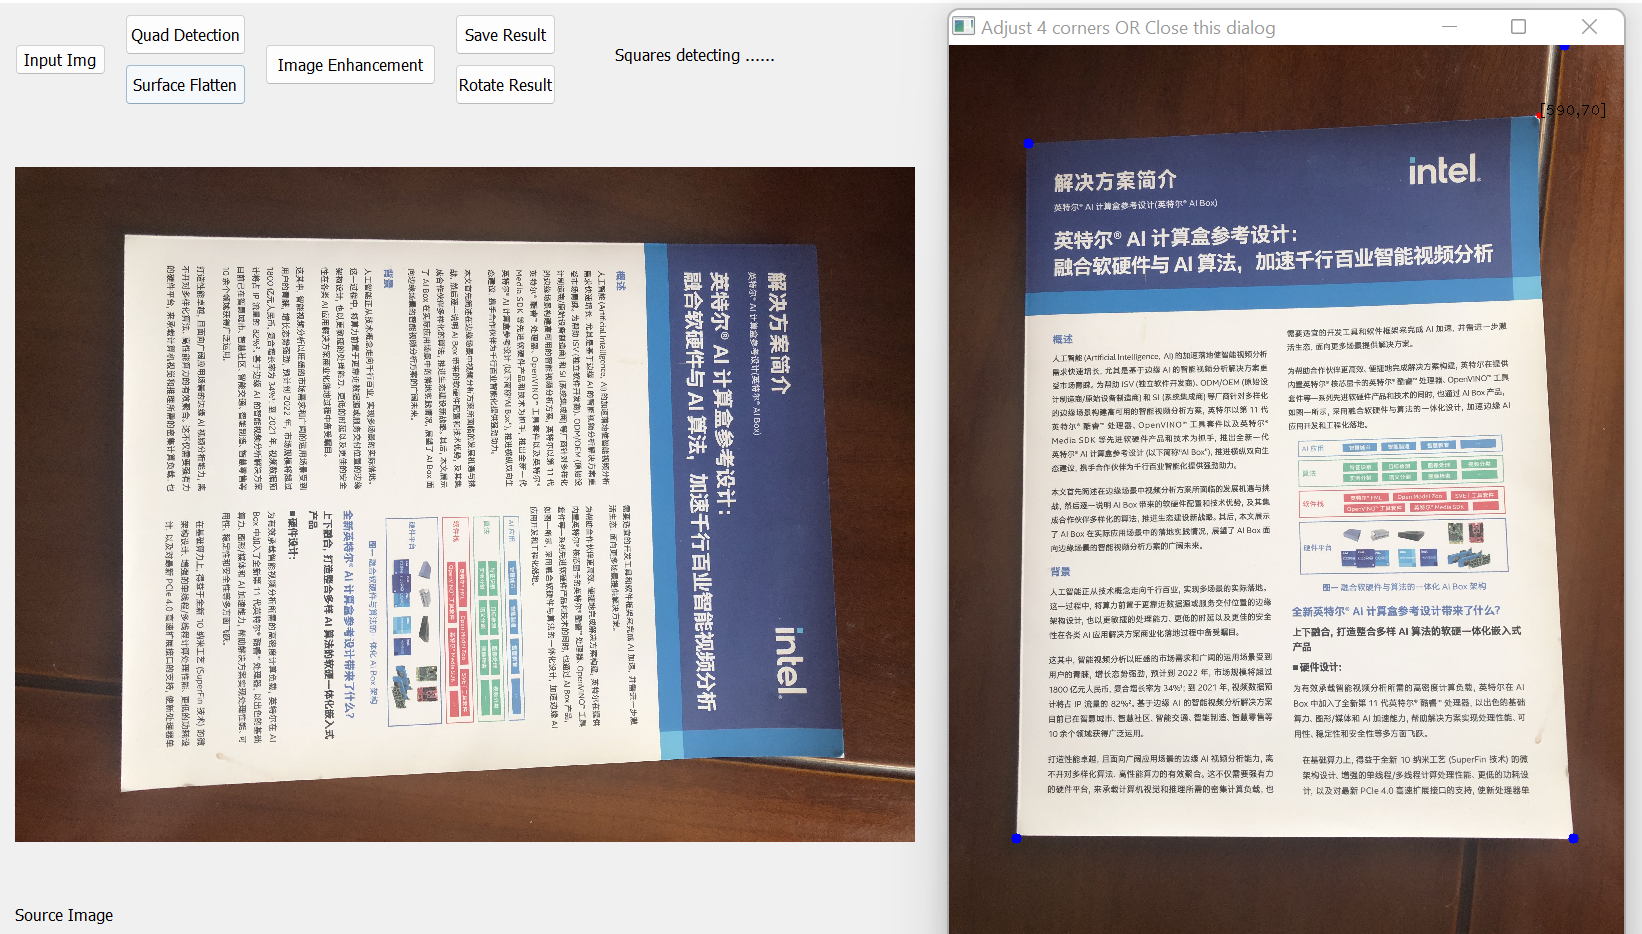
Users can use all features of Smart Image Correction App as Figure 3-1 by double clicking SmartImageCorrection.exe on Windows 10 without library dependencies installation after completing the u2net model environment setup as described in Part One.
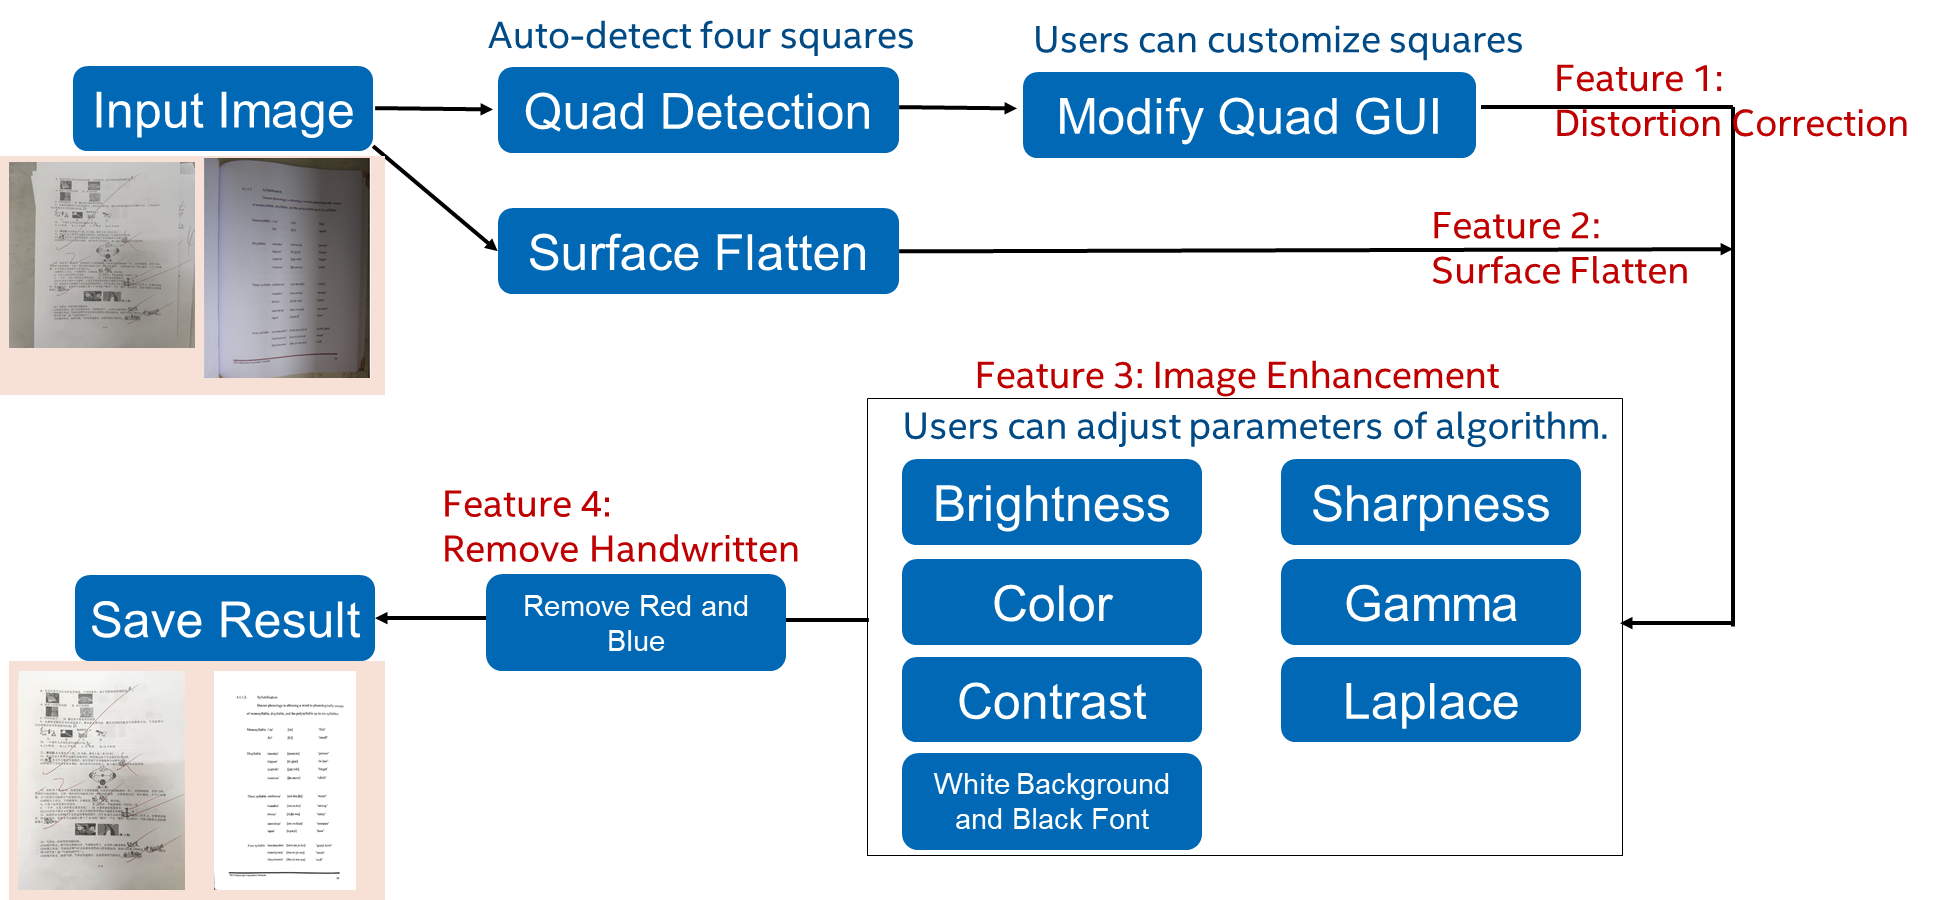
- When use Distortion Correction Feature, once click “Quad Detection” Button, then Quad GUI titled “Adjust 4 corners OR close this dialog” will show up in Figure 3-2.
• If the auto-detected four squares (blue points) meet users' expectation, please close this Quad GUI directly.
• If users aren't satisfied with the location of any squares, please click your prefer squares' location (red points) in Quad GUI and then close this Quad GUI.
-
When use Surface Flatten Feature, please input an image such as the paper is bent caused by the spine.
-
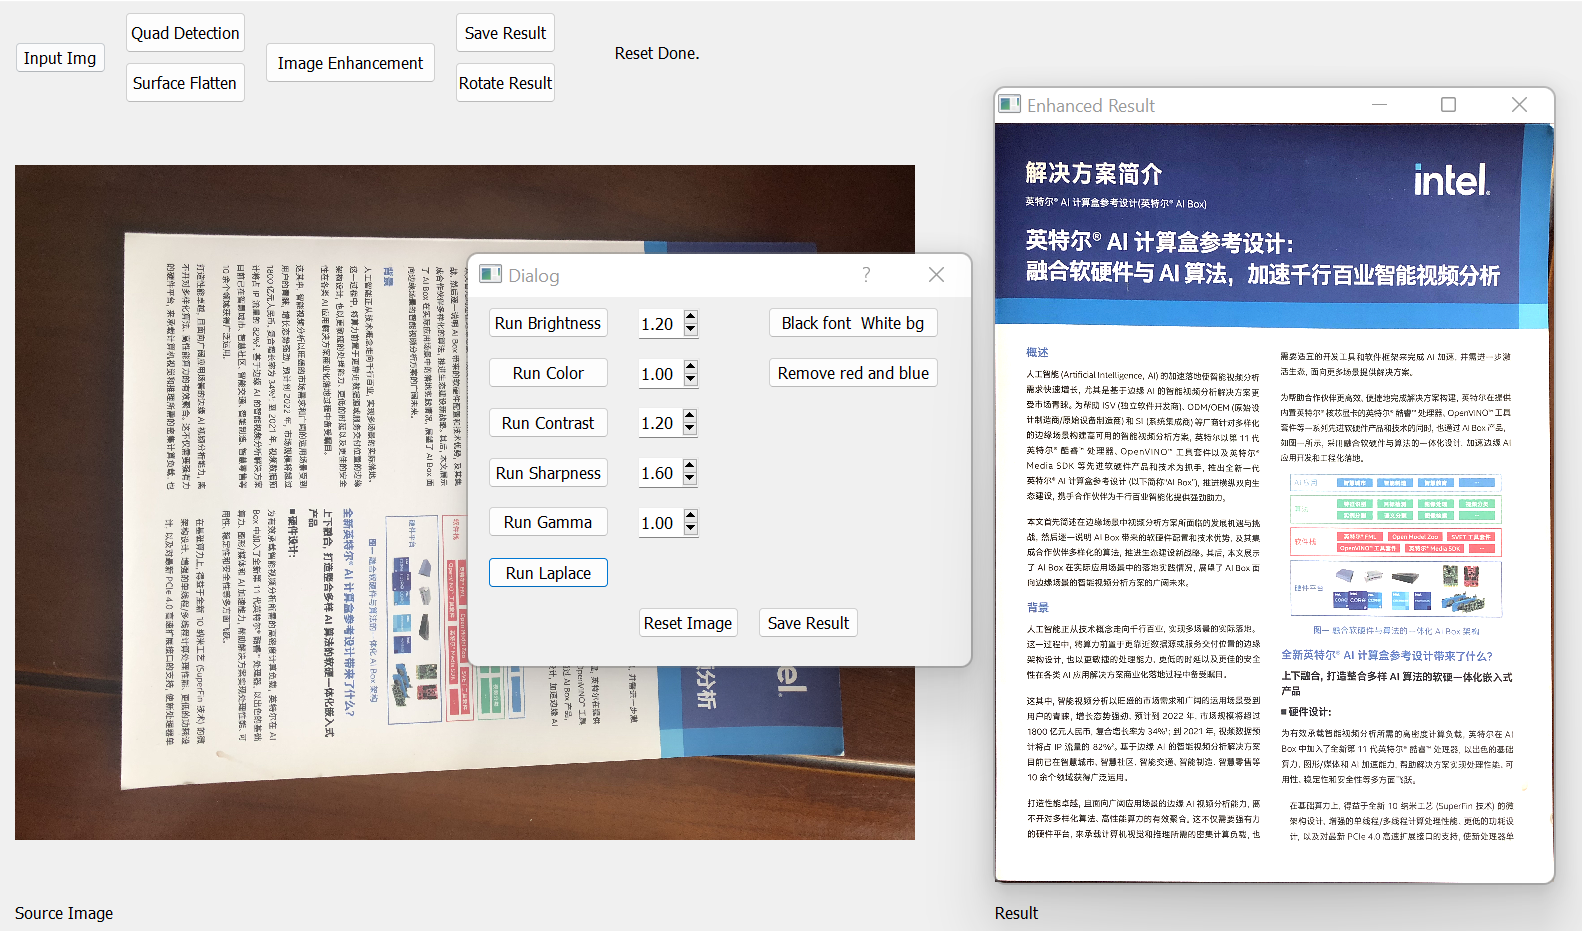
When use Image Enhancement Feature, once click "Image Enhancement" Button, then Image Enhancement GUI titled "Dialog" will show up. This "Dialog" includes 7 Image Enhancement functions and 1 Remove Handwritten function as shown in Figure 3-3.
• There are 5 image enhancement function with default parameter, e.g., Brightness, Color, Contrast, Sharpness and Gamma. If users want to adjust one of these parameters, i.e., change the right-side parameter of the corresponding "Run Brightness" button firstly and then click "Run Brightness" button.

• There are 2 image enhancement functions without default parameter, such as Laplace named "Run Laplace", White Background and Black Font named "Black font White bg".
• 1 Remove Handwritten function can apply to image directly without parameter such as Remove Red and Blue.
page_dewarp.py comes from https://github.com/mzucker/page_dewarp