
Build a Markdown Previewer. This is the second project of FreeCodeCamp Front End Libraries Certification.
This project was built with React.
Live project link: https://thenomadicenby.github.io/build-a-markdown-previewer-freecodecamp/
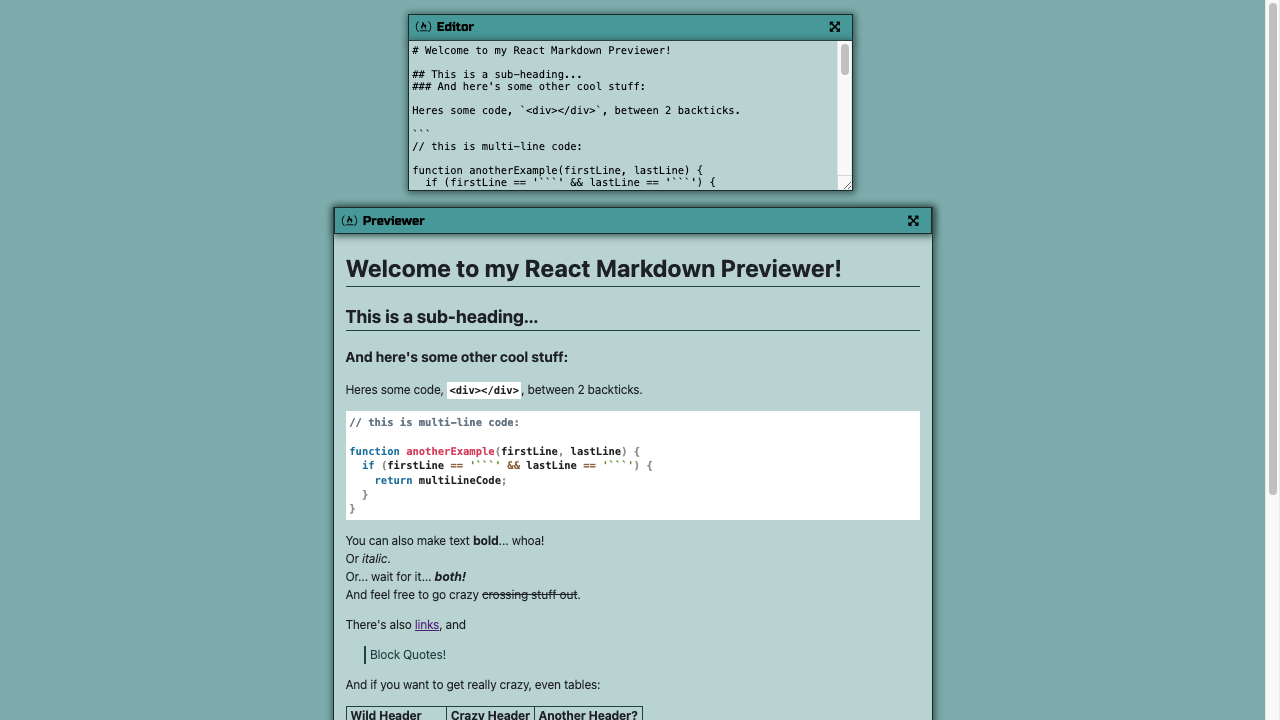
- Build a CodePen.io app that is functionally similar to this: https://codepen.io/freeCodeCamp/full/GrZVVO. Fulfill the below user stories and get all of the tests to pass. Give it your own personal style. You can use any mix of HTML, JavaScript, CSS, Bootstrap, SASS, React, Redux, and jQuery to complete this project. You should use a frontend framework (like React for example) because this section is about learning frontend frameworks. Additional technologies not listed above are not recommended and using them is at your own risk. We are looking at supporting other frontend frameworks like Angular and Vue, but they are not currently supported. We will accept and try to fix all issue reports that use the suggested technology stack for this project. Happy coding!
- I can see a
textareaelement with a correspondingid="editor". - I can see an element with a corresponding
id="preview". - When I enter text into the
#editorelement, the#previewelement is updated as I type to display the content of the textarea. - When I enter GitHub flavored markdown into the
#editorelement, the text is rendered as HTML in the#previewelement as I type (HINT: You don't need to parse Markdown yourself - you can import the Marked library for this: https://cdnjs.com/libraries/marked). - When my markdown previewer first loads, the default text in the
#editorfield should contain valid markdown that represents at least one of each of the following elements: a header (H1 size), a sub header (H2 size), a link, inline code, a code block, a list item, a blockquote, an image, and bolded text. - When my markdown previewer first loads, the default markdown in the
#editorfield should be rendered as HTML in the#previewelement. - Optional Bonus: When I click a link rendered by my markdown previewer, the link is opened up in a new tab (HINT: read the Marked.js docs for this one!).
- Optional Bonus: My markdown previewer interprets carriage returns and renders them as br (line break) elements.
This project was bootstrapped with Create React App.
In the project directory, you can run:
Runs the app in the development mode.
Open http://localhost:3000 to view it in the browser.
The page will reload if you make edits.
You will also see any lint errors in the console.
Launches the test runner in the interactive watch mode.
See the section about running tests for more information.
Builds the app for production to the build folder.
It correctly bundles React in production mode and optimizes the build for the best performance.
The build is minified and the filenames include the hashes.
Your app is ready to be deployed!
See the section about deployment for more information.
Note: this is a one-way operation. Once you eject, you can’t go back!
If you aren’t satisfied with the build tool and configuration choices, you can eject at any time. This command will remove the single build dependency from your project.
Instead, it will copy all the configuration files and the transitive dependencies (Webpack, Babel, ESLint, etc) right into your project so you have full control over them. All of the commands except eject will still work, but they will point to the copied scripts so you can tweak them. At this point you’re on your own.
You don’t have to ever use eject. The curated feature set is suitable for small and middle deployments, and you shouldn’t feel obligated to use this feature. However we understand that this tool wouldn’t be useful if you couldn’t customize it when you are ready for it.
You can learn more in the Create React App documentation.
To learn React, check out the React documentation.