

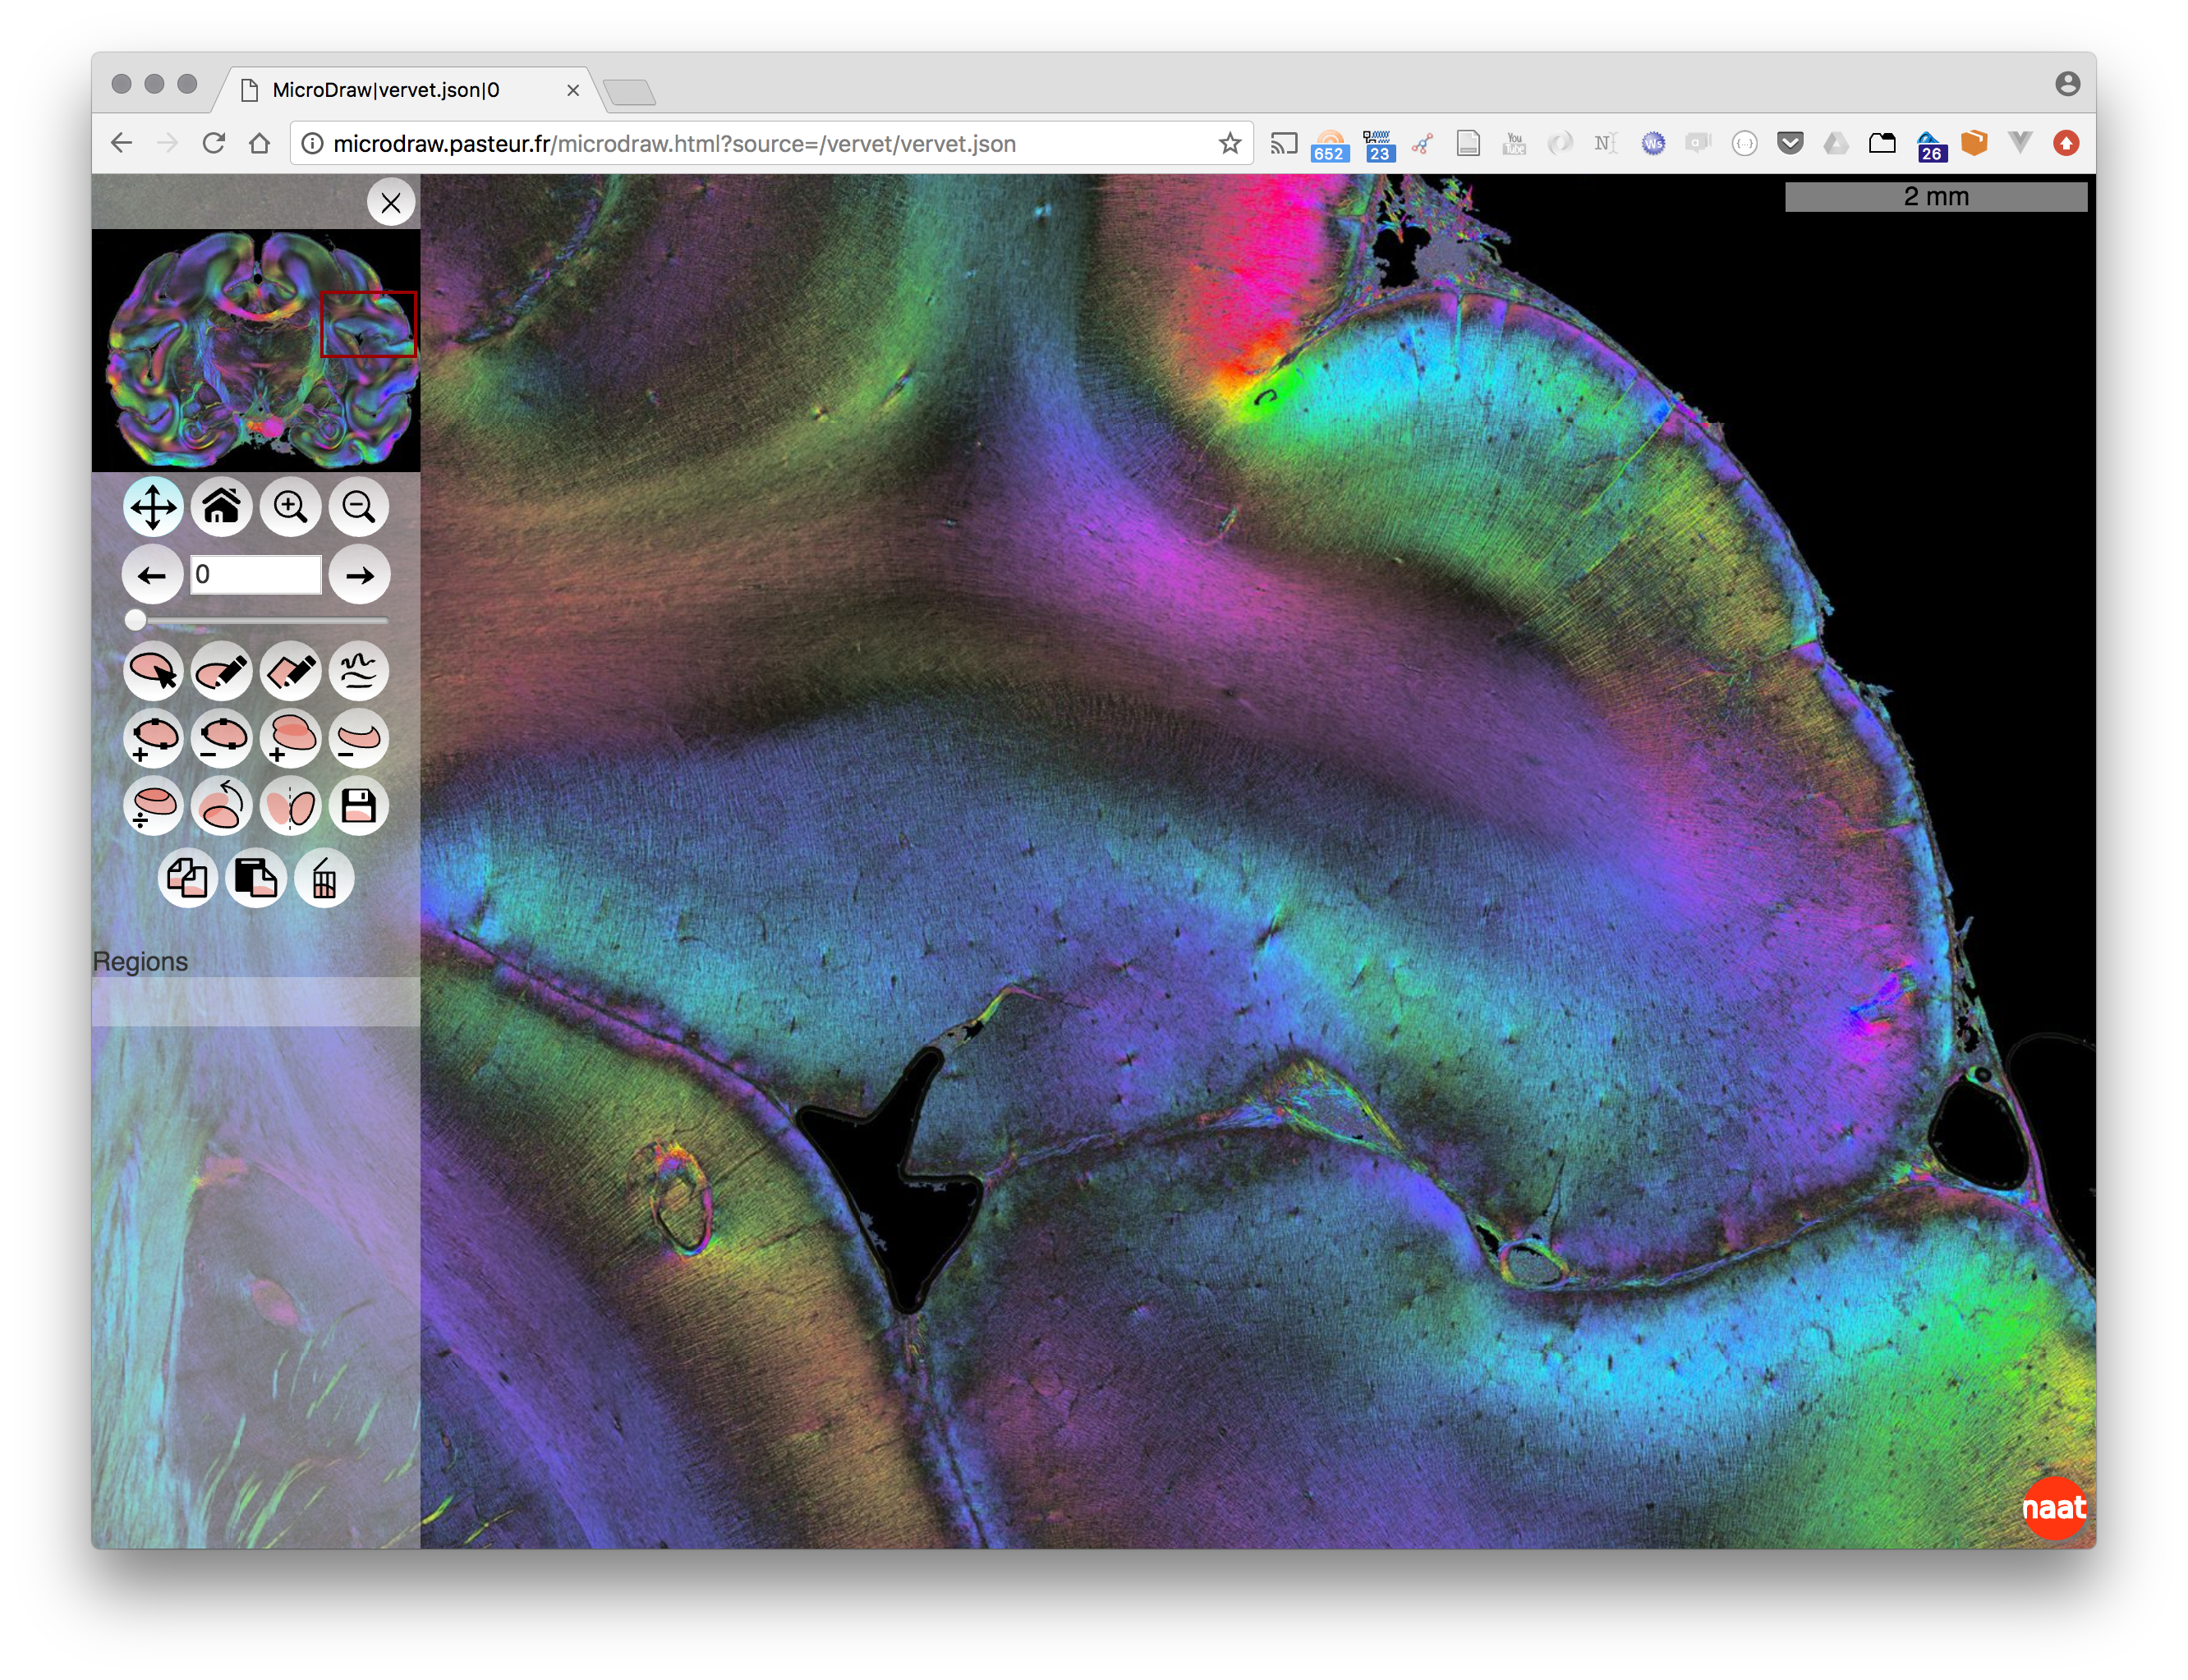
MicroDraw is a collaborative vectorial annotation tool for ultra high resolution data, such as that produced by high-throughput histology.
Data visualisation uses OpenSeadragon, and data annotation uses Paper.js.
As of July 2018
-
Install nodejs
-
Install mongo
-
Checkout the repository
git clone https://github.com/neuroanatomy/microdraw.git -
cd microdraw -
install the project
- cd into microdraw
npm installnpm run build-pages- drop the
.exampleincfg.json.example - drop the
.exampleinapp/auth/github-keys.json.example - drop the
.exampleinapp/controller/microdrawWebsocketServer/whitelist.json.example - drop the
.exampleinapp/controller/microdrawWebsocketServer/blacklist.json.example
-
run the project
- in one terminal window start
mongoddatabase and leave it run - in another terminal: cd into microdraw folder:
npm start
- in one terminal window start
-
open http://localhost:3000 to see MicroDraws landing page and click any of the data links provided
-
test data can be viewed at http://localhost:3000/data?source=/test_data/cat.json
- checkout the repository
git clone https://github.com/neuroanatomy/microdraw.git cd microdrawdocker-compose builddocker-compose up- open http://localhost:3000 to see MicroDraw's landing page and click any of the data links provided
- test data can be viewed at http://localhost:3000/data?source=/test_data/cat.json
Microdraw utilises passportjs to manage user login. By default, Microdraw is configured to use Github and local strageties.
You may also want to set the session secret by setting the environment variable: SESSION_SECRET=MySuperDuperSecret
- Get your Github developer keys for your local microdraw url
- go to
https://github.com/settings/applications/newand add a new application - App name: MicroDraw development for example
- Homepage URL: http://localhost:3000
- Authorization callback URL: http://localhost:3000/auth/github/callback (this may differ between your development/production instances)
- go to
- copy paste client id, client secret and callback URL into
./app/auth/github-keys.json
- Set environment variable:
LOCALSIGNIN=true
n.b. it is highly advised to not use local strategies to manage users unless absolutely necessary.
Microdraw uses mongodb to manage the annotations by default. You may choose to use a different solution, by replacing ./app/db/db.js and replace with your own backend.
You can set a custom endpoint for mongodb by setting the environment variable : MONGODB=url-to-mongo:27017/db_name
In order to access the user specific annotation, logged in user can visit token endpoint on a logged in browser. This will generate a token, which, when appended as a query param with the key token can be used as proxy to user login.
# get annotations
curl -XGET /api?source=/path/to/file&slice=12&token=YOUR_TOKEN
# save annotation
curl -XPOST /api?source=/path/to/file&slice=12token=FAKE_TOKEN -H "Content-Type: application/json" -d"{\"hello\":\"world\"}"
# save annotation via API
# note that only the files in the `data` field is parsed and saved
curl -XPOST /api?action=save&source=/path/to/file&slice=12token=FAKE_TOKEN -F "data=@/path/to/file.json"
# append annotation via API
# note that only the files in the data field is parsed and appended
curl -XPOST /api?action=append&source=/path/to/file&slice=12token=FAKE_TOKEN -F "data=@/path/to/file.json"
multer is used to handle uploaded file. An optional TMP_DIR environmental variable can be set for the uploaded json file to be saved to disk. If unset, multer is configured to use buffer storage.
The token expires after 24 hours by default (can be changed by setting env TOKEN_DURATION)
This is the basic format. The slice indices will go from 0 to 4:
{
  "tileSources": [
    "/MyBrain/1.dzi",
    "/MyBrain/2.dzi",
    "/MyBrain/3.dzi",
    "/MyBrain/4.dzi",
    "/MyBrain/5.dzi"
  ],
  "pixelsPerMeter": 1000000,
  "fileID": "MyBrain"
}
In this other example, the default slice indices are replaced by a display name:
{
  "tileSources": [
    "/MyBrain/1.dzi",
    "/MyBrain/2.dzi",
    "/MyBrain/3.dzi",
    "/MyBrain/4.dzi",
    "/MyBrain/5.dzi"
  ],
  "names": [
    "1 first",
    "2",
    "3 mid",
    "4",
    "5 last"
  ],
  "pixelsPerMeter": 1000000,
  "fileID": "MyBrain"
}Deploy environments may not allow for fs access. As a result, Microdraw uses memory storage by default. This can lead to OOM. If TMP_DIR env is set, Microdraw will use TMP_DIR to write uploaded file.
- cd to /public directory, put yourDataFolder here which must contain
- a folder with the folders with your data tiles in dzi format
- the .dzi file containing the information about your data (generated by the converter)
- a json file containing information about your data in the following form:
{
  "pixelsPerMeter": 1000000,
  "tileSources": [
    "yourDataFolder/yourData.dzi"
  ]
}
# Run unit tests (API routes, mocked with Sinon/nock, no database needed)
npm run mocha

# Run E2E tests (Puppeteer-based, headless Chrome; requires a running MongoDB instance)
npm run test-e2e
test-e2e starts its own server (via test/e2e/runner.js) on OS-assigned free
ports, so it runs happily alongside a development server you already have going.
Pin the ports with E2E_PORT / E2E_WS_PORT if you need them fixed.
The suite is hermetic: every third-party asset the app used to pull from a CDN is
vendored under app/public/lib/, and the test browser resolves all non-local
hosts to NOTFOUND (see test/e2e/browser.js), so runs need no internet access
and cannot be broken by a CDN outage.
It also runs against cfg.json.example rather than your own cfg.json (which is
gitignored, and whose secure: true would otherwise leave the page unable to
reach the websocket server). Override with CFG_PATH to test a different config.
Note that the screenshot comparisons are sensitive to the host's installed fonts.
The app's text falls back through "Lucida Grande", "Lucida Sans Unicode", Helvetica, …, and Lucida Grande only exists on macOS, so text-heavy pages render
differently there than on the Linux hosts the reference images in
test/reference-screenshots/ came from.
These are the same checks run in CI (see .github/workflows/main.yml).
These were previously fetched from unpkg/jsdelivr at runtime, which meant a CDN
outage broke the whole viewer (they load inside a single Promise.all, so one
failure rejected all of them). They now live in app/public/lib/, pinned:
| asset | version | upstream |
|---|---|---|
hippy-hippo/ |
0.0.1 | unpkg.com/hippy-hippo |
muijs/ |
v0.1.3 | cdn.jsdelivr.net/gh/r03ert0/muijs |
codeflask/ |
1.4.1 | unpkg.com/codeflask |
consolita/ |
0.2.1 | cdn.jsdelivr.net/gh/r03ert0/consolita.js |
openseadragon-screenshot/openseadragonScreenshot-v0.0.1.js |
v0.0.1 | cdn.jsdelivr.net/gh/r03ert0/Openseadragon-screenshot |
roboto/ |
Google Fonts v51, weight 100, latin + latin-ext | fonts.googleapis.com |
app/public/lib/vendor.json is the source of truth: it records the exact download
URL, version, and SHA-256 of every file, and scripts/verify-vendor.js checks them.
npm run verify-vendor              # do the files still match what was downloaded?
npm run verify-vendor -- --refetch # ...and do the CDNs still serve those bytes?
To update one, re-download it at the desired version, drop it in the same place,
bump the path in app/public/js/microdraw.js, and update its entry in
vendor.json. Two provenance caveats are recorded there in full:
codeflaskused to be requested unpinned (unpkg.com/codeflask/...), so the version served could change underneath the reference screenshots at any time. 1.4.1 is what that URL resolved to on the retrieval date; what loaded before is not recoverable.- The Roboto
.woff2files are markedupstreamStable: false— gstatic re-subsets its binaries behind the same versioned URL, so--refetchskips them. That instability is precisely why the font is vendored.
This project is licensed under GNU GPL v3 or any later version.