
A GUI for managing multiple Python virtual environments

VenviPy is a desktop GUI to create, manage, and maintain many Python virtual environments from one place. It focuses on a fast, practical workflow:
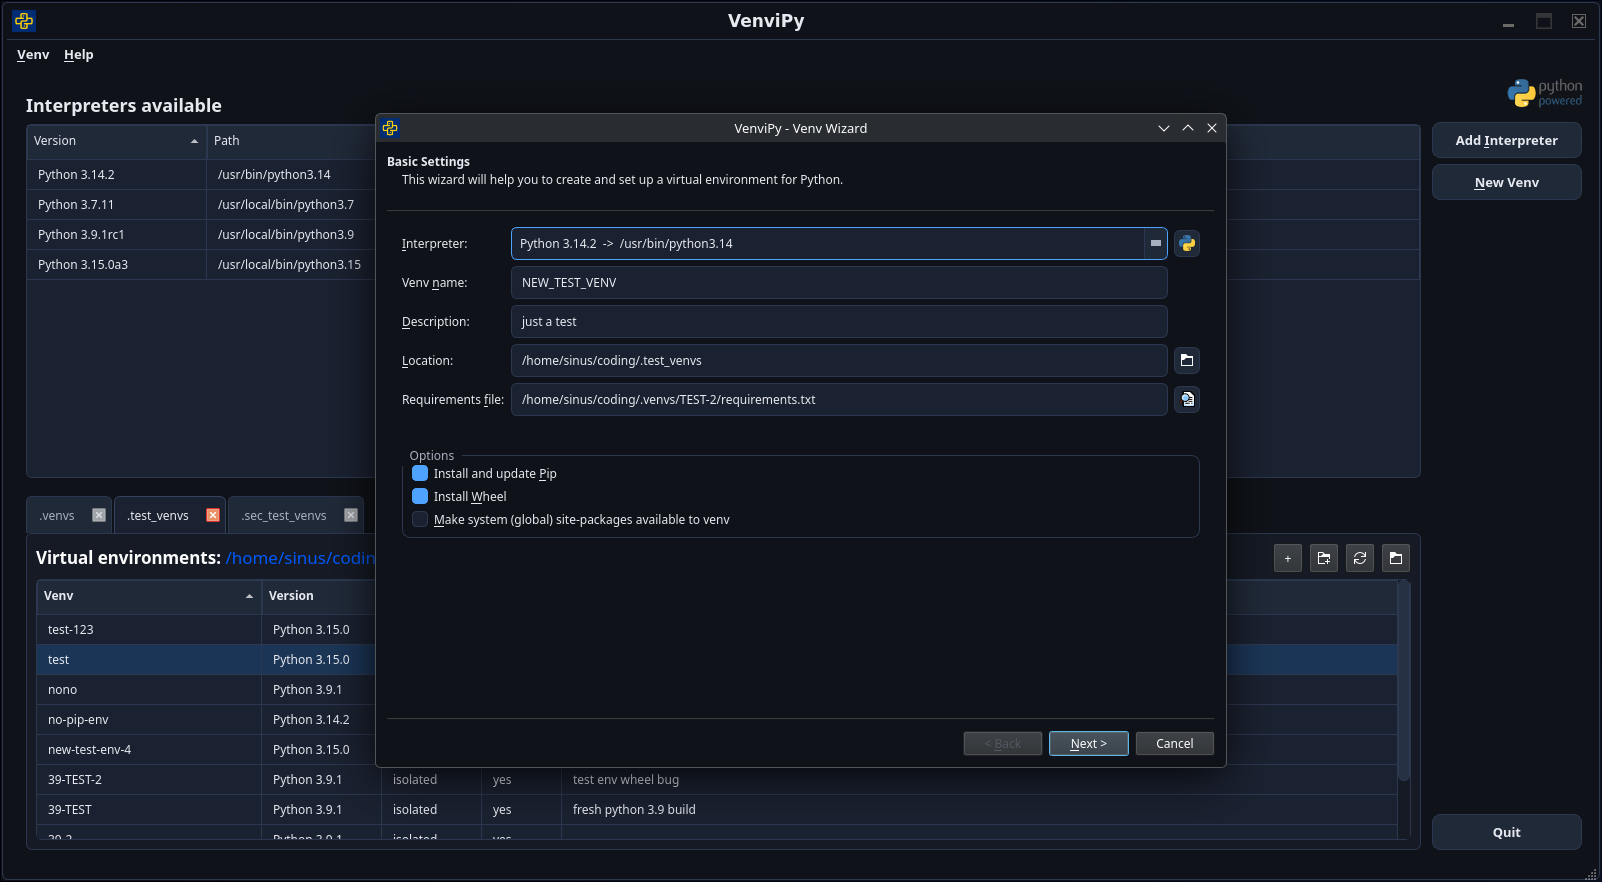
- create environments via a wizard (Python version, location, pre-install packages)
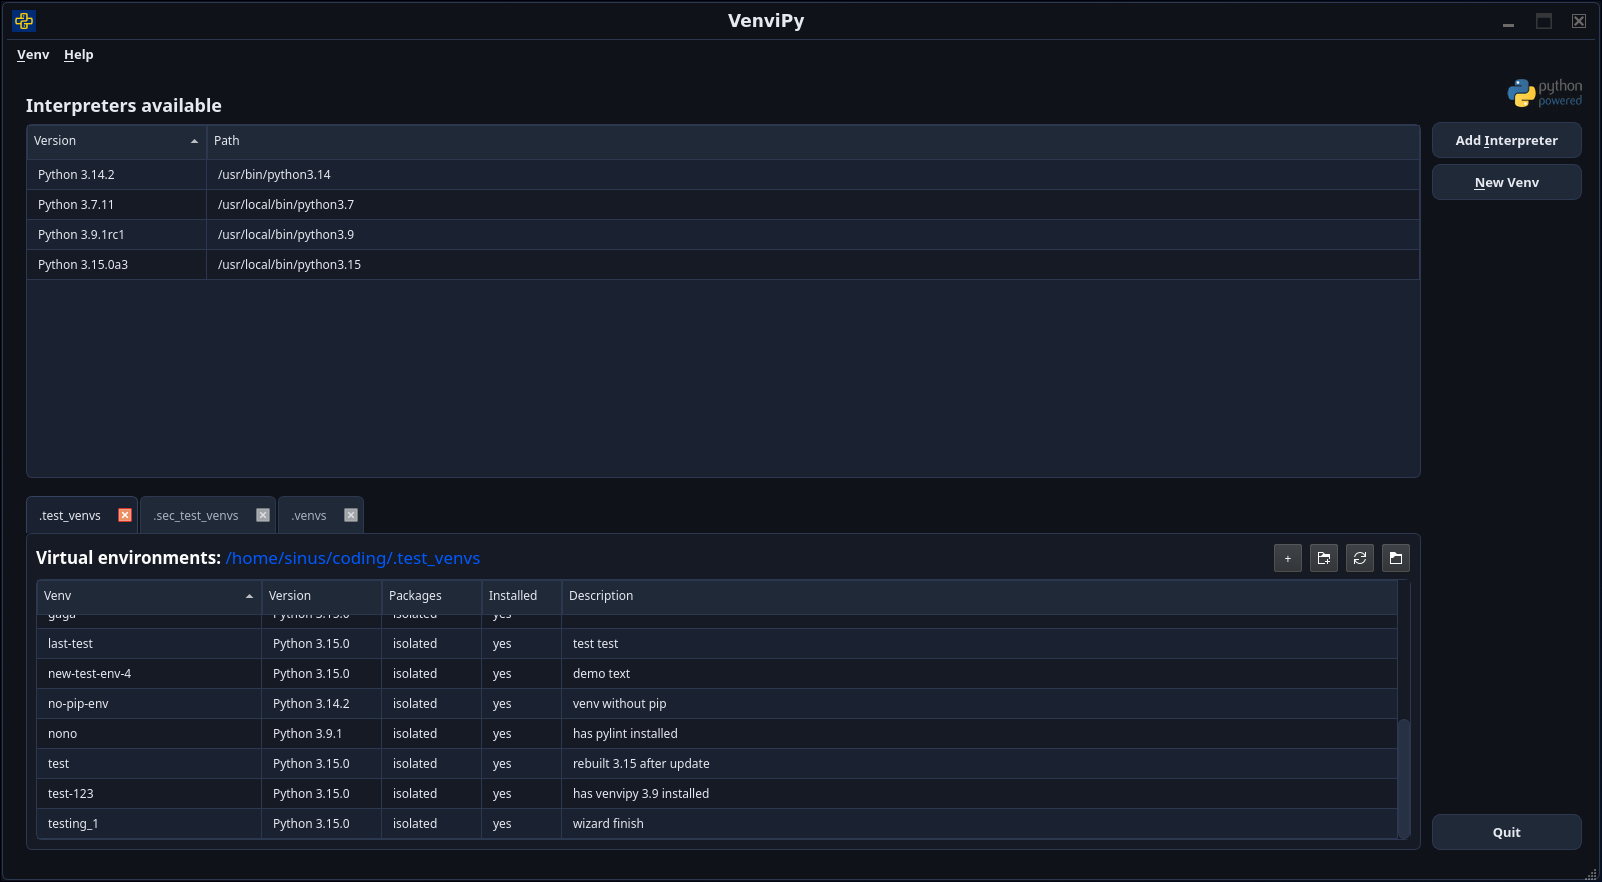
- keep an overview table of all environments in a directory
- manage multiple environments at the same time with tabs
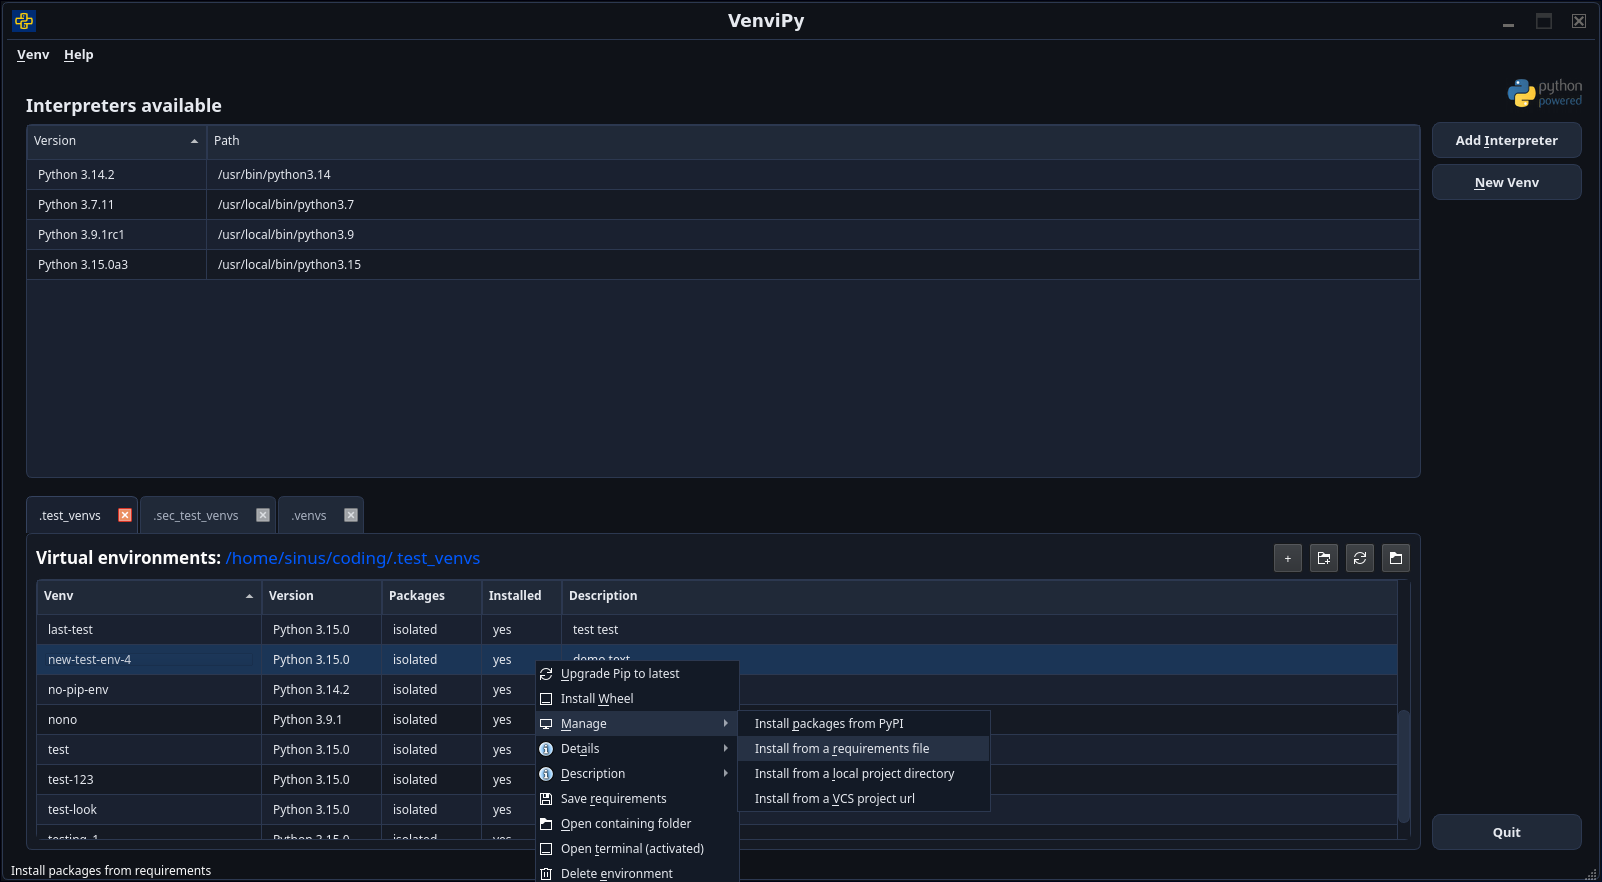
- install / update / inspect packages with context-menu actions
- open a console in the environment's context with one click
VenviPy was originally built for *NIX systems. Windows support exists via a platform abstraction layer, but should currently be considered experimental.
Main menu
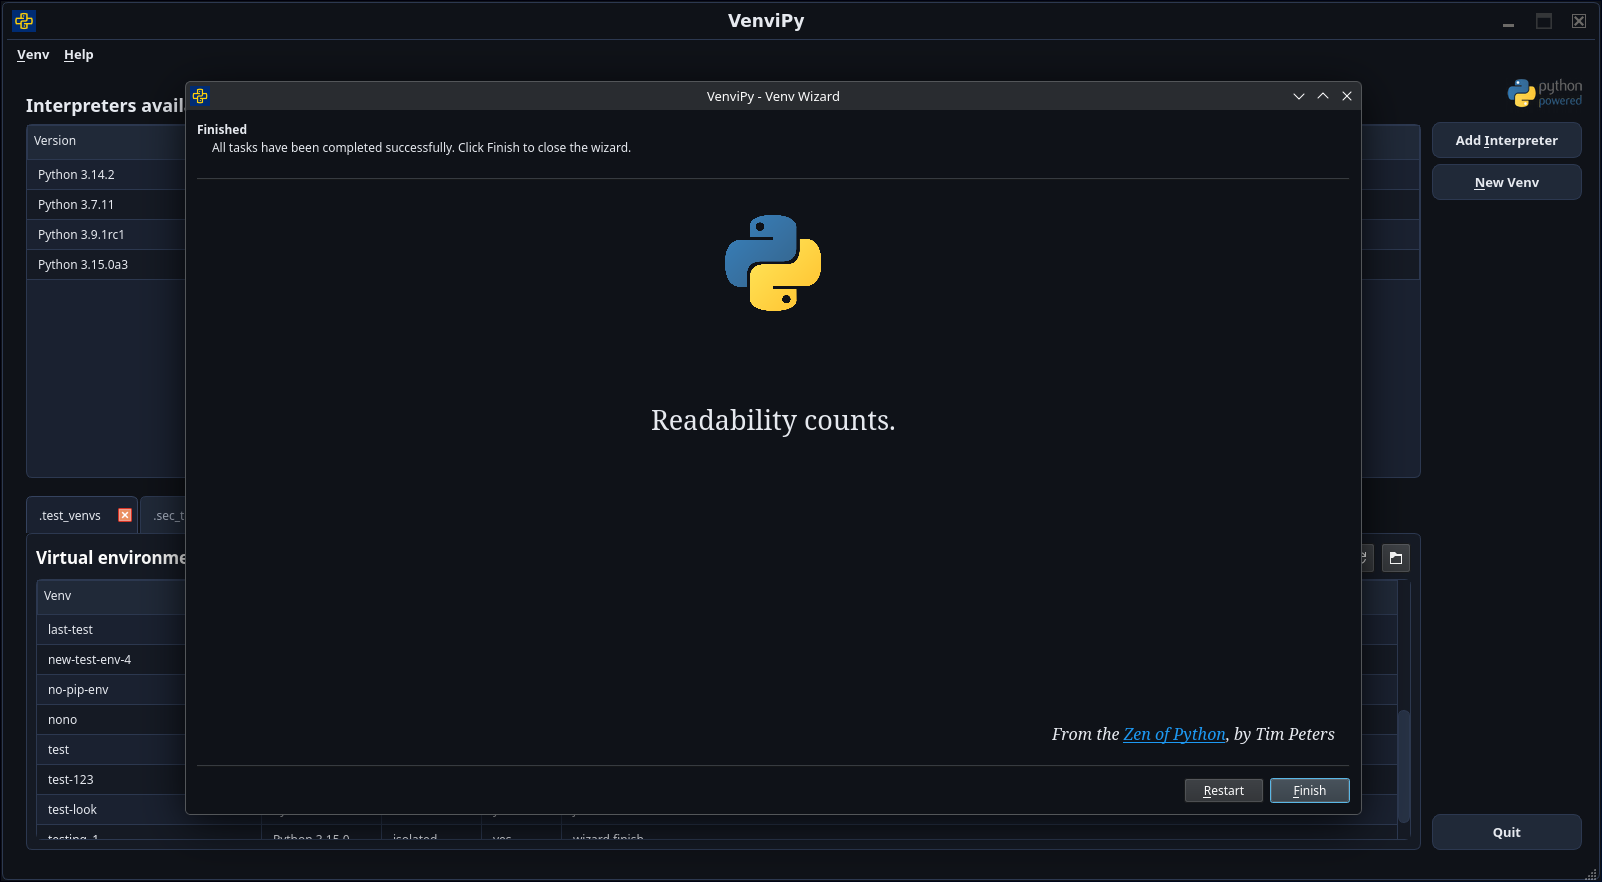
Wizard
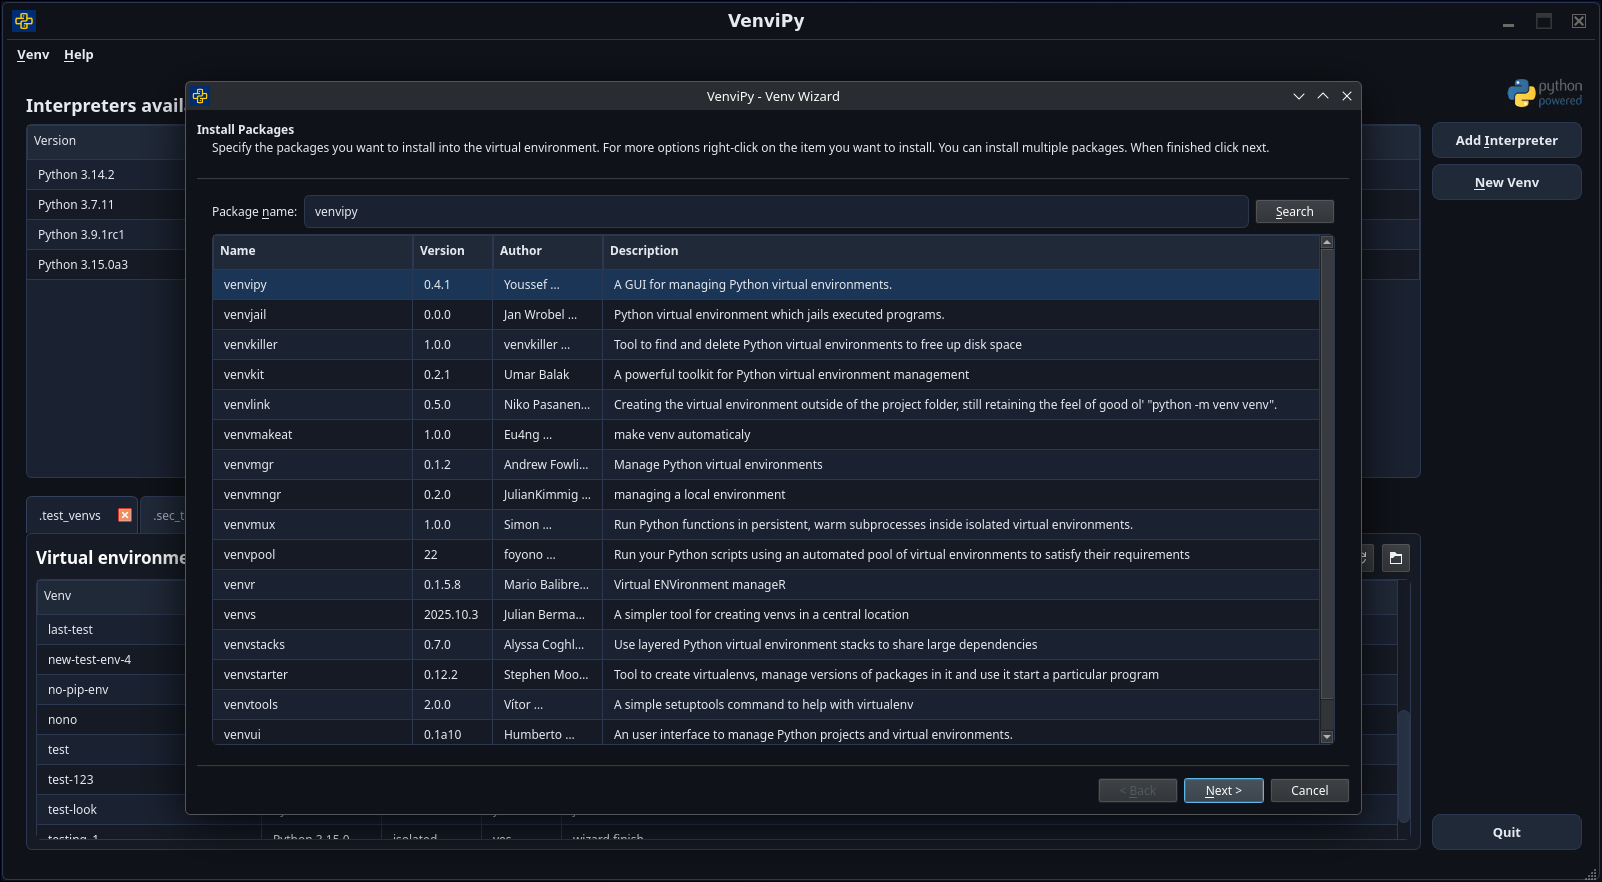
Package installer
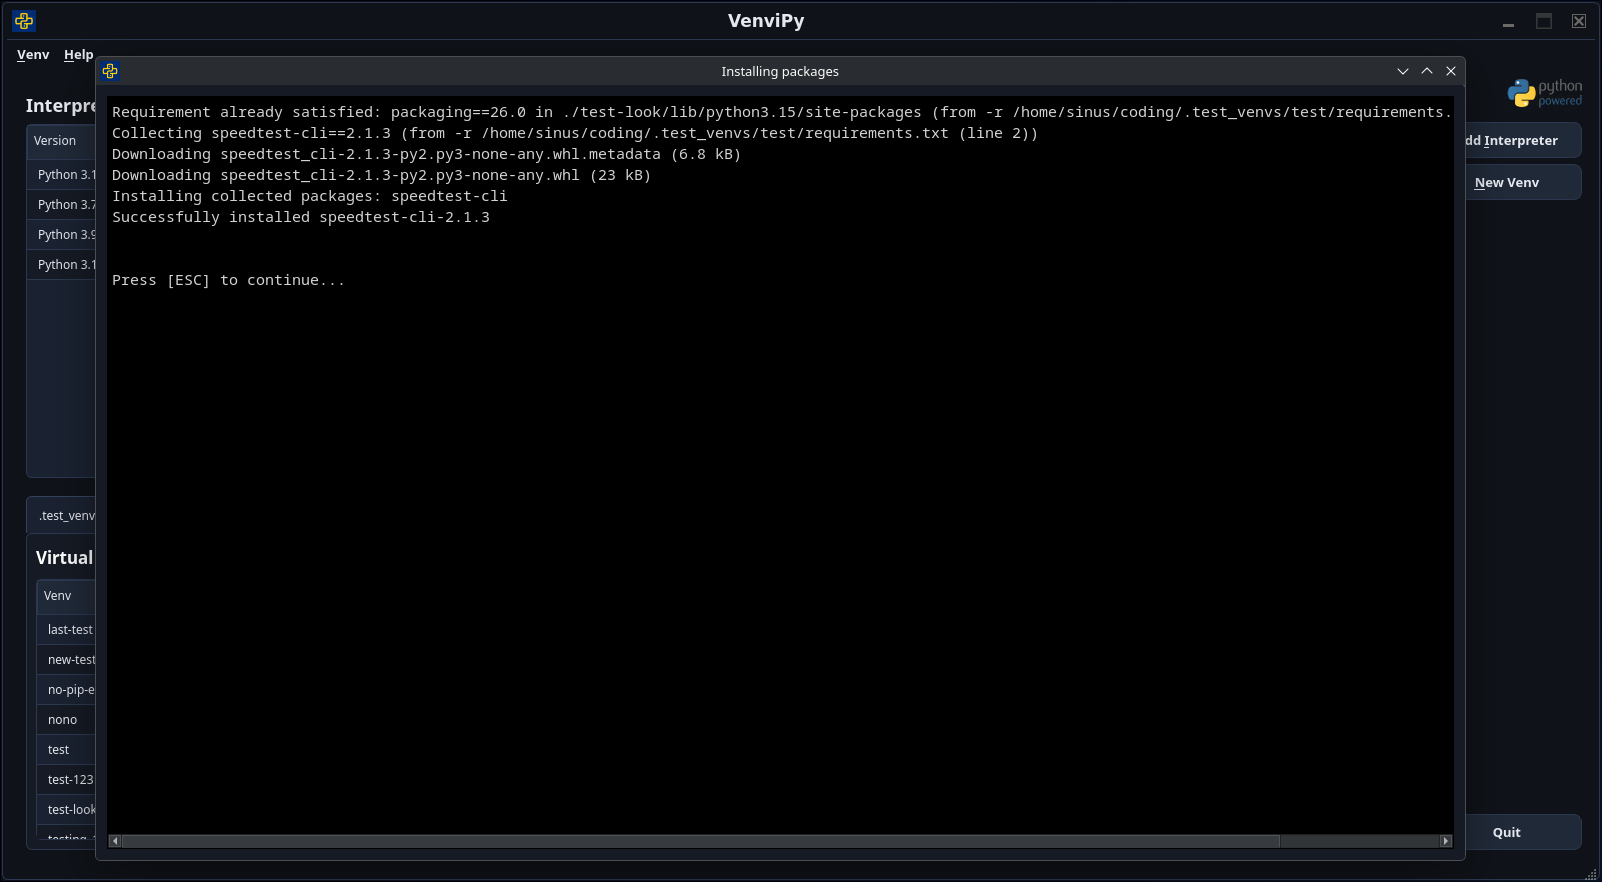
Console output
- Create virtual environments with a selectable Python version (3.3+)
- Clone an environment from a requirements file
- Generate requirements from an existing environment
- Add a description to an environment
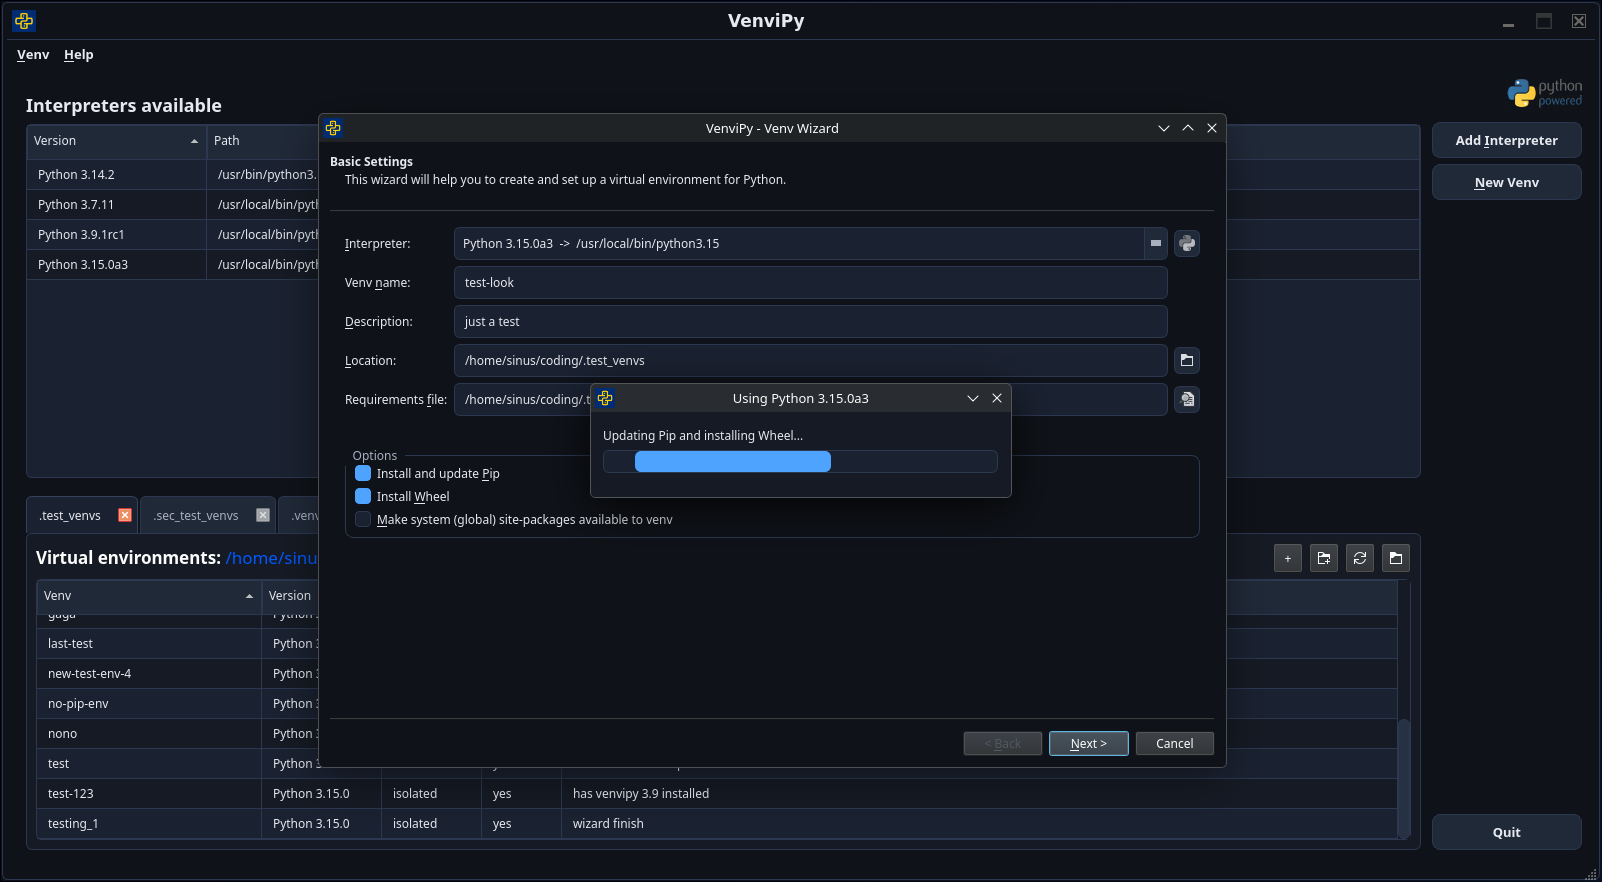
- Install and update Pip and Wheel with one click
- Search and install packages from PyPI
- Install from requirements files
- Install from local project directories
- Install from a VCS URL (currently git only)
- Install from local or remote source archives
- List detailed information about installed packages
- Open a project's PyPI page in your browser
- Create or remove Desktop and Startmenu launchers from within the app
- Clone environments, created by non-installed Python versions and has no requirements file
- Run scripts in the environment's context
- Run VenviPy or the Wizard only from context menu in file explorer/desktop
More to come.
- Python 3.7+ (PyQt6 6.10.2 requires Python >= 3.7)
- A working
venvmodule for the Python versions you want to use
If you already have Python and pip available, this is the fastest path:
python -m venv .venv
source .venv/bin/activate  # Windows (PowerShell): .venv\Scripts\Activate.ps1
pip install -U pip
pip install venvipy
venvipy
For full setup details and platform-specific notes, continue below.
Install the basics:
sudo apt update
sudo apt install python3-pip python3-venv
If you want to create venvs for a specific Python version, install its -venv package as well
(example for Python 3.10):
sudo apt install python3.10-venvInstall Python from python.org and make sure it is on PATH. No additional system packages are required.
Installing into the system Python is discouraged. Use a dedicated venv (recommended) or pipx.
python -m venv .venv

# on Linux/macOS:
source .venv/bin/activate

# on Windows (PowerShell):
# .venv\\Scripts\\Activate.ps1

pip install -U pip
pip install venvipy
Development version (GitHub):
pip install -U pip
pip install git+https://github.com/sinusphi/venvipy.gitpipx install venvipyAfter installation you get the entry point:
venvipyFor command line options run:
venvipy --helpClone and install dependencies:
git clone --depth 50 https://github.com/sinusphi/venvipy.git
cd venvipy
python -m venv .venv

# on Linux/macOS:
source .venv/bin/activate

# on Windows (PowerShell):
# .venv\\Scripts\\Activate.ps1

pip install -U pip

# minimal requirements to run VenviPy
pip install -r requirements/base.txt

# for development and testing
pip install -r requirements/dev.txt

# deployment and build dependencies
pip install -r requirements/deploy.txt
If you prefer a minimal manual install:
pip install requests beautifulsoup4 PyQt6==6.10.2Run:
python venvipy/venvi.pyContributions are welcome: