Transform PDFs & documents into intelligent AI conversations. Production-ready RAG (Retrieval Augmented Generation) platform with semantic search, vector embeddings, and multi-provider AI (OpenRouter, OpenAI, Anthropic). Build ChatGPT for your documents in minutes.
🚀 Production-ready • 🔍 Semantic search with vector embeddings • 💬 Natural language Q&A • 📄 Multi-format support • 🎨 Beautiful modern UI • 🔐 Enterprise security
Features • Quick Start • Documentation • Contributing • License • Discord
Click the thumbnail above to watch the complete walkthrough - from document upload to AI-powered conversations
- Overview
- Use Cases
- Features
- Tech Stack
- Prerequisites
- Quick Start
- Detailed Setup Guide
- Architecture
- Using the Application
- API Documentation
- Monetization (Optional)
- Deployment
- Development
- Troubleshooting
- Contributing
- License
Document Chat System is a full-stack, production-ready application that combines intelligent document management with AI-powered conversations. Upload documents in multiple formats, automatically process and index them, then have natural language conversations about your content using advanced AI models.
- 🆓 100% Free & Open Source - MIT licensed. Deploy your own instance, modify as needed, or monetize as a SaaS.
- 🤖 Multi-Provider AI - Supports OpenRouter (100+ models), OpenAI, Anthropic, and ImageRouter. Uses gpt-4o-mini by default for cost-effective responses.
- 📄 Full Document Support - PDFs, DOCX, TXT, images with OCR, and more. Automatic text extraction and intelligent processing.
- 🚀 Optional Docling Integration - Superior document processing with IBM's Docling for enhanced table extraction, layout preservation, and structure understanding. Learn more
- 🔍 Semantic Search - Vector search with Pinecone or pgvector finds relevant content beyond simple keyword matching.
- 👥 Multi-Tenant Ready - Built-in organization isolation with complete data separation between users/organizations.
- 💳 Optional SaaS Billing - Integrated Stripe billing system with customizable pricing plans for monetization.
- ⚡ Background Processing - Inngest handles document processing, vectorization, and AI analysis asynchronously.
- 🎨 Modern UI - Beautiful, responsive interface with dark mode built using shadcn/ui and Tailwind CSS.
- 🔐 Enterprise Security - AES-256 encryption, Row-Level Security (RLS), Clerk authentication, and role-based access control.
- 🐳 Production Ready - Dockerfile included, deploy to Vercel/Railway/Render in minutes with one-click setup.
- ✅ Critical Security Fixes - Fixed missing admin authentication on configuration endpoints, preventing unauthorized access
- ✅ Database Performance - Added 9 strategic indexes for 3-10x faster queries on document lists and AI analytics
- ✅ Cost Protection - Implemented rate limiting on AI endpoints to prevent API cost explosion (10 req/min production)
- ✅ Reliability - Improved batch processing with graceful partial failure handling for large document vectorization
- ✅ Production Hardening - Removed mock data security risks and deprecated unsafe backward-compatibility methods
See SECURITY_FIXES_2025-11-05.md for detailed changelog.
Document Chat System is perfect for a variety of applications and industries:
- Internal Wikis & Documentation: Build a searchable knowledge base where teams can ask questions and get instant answers from company documentation
- Research Libraries: Organize and chat with research papers, technical documents, and academic materials
- Personal Knowledge Base: Create your own "second brain" by uploading notes, articles, and PDFs for AI-powered recall
- Customer Support: Train support teams by uploading product manuals, policies, and FAQs for instant AI-powered answers
- Legal Document Analysis: Upload contracts, agreements, and legal documents for quick reference and analysis
- HR & Onboarding: Create an interactive employee handbook where new hires can ask questions about policies and procedures
- Compliance & Regulations: Maintain regulatory documents and get instant answers about compliance requirements
- Study Assistant: Upload textbooks, lecture notes, and course materials for AI-powered tutoring
- Course Management: Create interactive course materials where students can ask questions about readings
- Research Assistant: Organize and query research papers, journals, and academic resources
- Client Portal: Provide clients with a secure portal to access and query project documents, reports, and deliverables
- Proposal Management: Store RFPs, proposals, and past projects for quick reference during bidding
- Case Management: Organize case files, evidence, and documentation with intelligent search and retrieval
- Medical Literature: Organize medical journals, research papers, and clinical guidelines for healthcare professionals
- Patient Education: Create an interactive resource where patients can learn about conditions and treatments
- Clinical Documentation: Maintain clinical protocols and treatment guidelines with AI-powered search
- Lab Notebooks: Digitize and make searchable lab notes, experiment results, and research findings
- Patent Research: Upload and analyze patent documents, prior art, and technical specifications
- Literature Reviews: Organize and query scientific papers, journals, and research publications
- Property Documentation: Manage contracts, inspection reports, and property disclosures
- Tenant Resources: Create a knowledge base for tenants with lease agreements, maintenance guides, and community rules
- Development Projects: Organize architectural plans, permits, and project documentation
- Product Documentation: Build an AI-powered help center where customers can ask questions about your product
- Developer Documentation: Create interactive API docs and technical guides
- White-Label Solutions: Deploy as a white-labeled document management platform for your customers
- Content Library: Organize blog posts, articles, and creative works with AI-powered search
- Writing Assistant: Upload research materials and reference documents for content creation
- Media Archives: Manage scripts, transcripts, and multimedia documentation
Thanks to enterprise-grade security with encryption and authentication:
- Personal Finance: Upload financial statements and documents knowing your data stays secure
- Confidential Projects: Maintain sensitive business information with Row-Level Security (RLS)
- Private Research: Keep proprietary research and development documentation secure
- Multi-Format Support: PDF, DOCX, TXT, MD, images, and more formats will be supported soon
- Intelligent Processing: Automatic text extraction, OCR, metadata analysis
- Folder Organization: Hierarchical folder structure with drag-and-drop
- Batch Operations: Upload and process multiple files simultaneously
- Real-Time Progress: Live updates on document processing status
- Version Control: Track document versions and changes
- File Sharing: Secure document sharing with permission controls
- Multiple AI Providers:
- OpenRouter: Access to 100+ models (GPT-4, Claude, Llama, Mistral, etc.)
- OpenAI: Direct integration with GPT-4 Turbo and GPT-3.5
- ImageRouter: Visual AI for image analysis and OCR
- Document Context: AI understands and references your uploaded documents
- Source Citations: Responses include references to source documents
- Streaming Responses: Real-time token streaming for faster interactions
- Vector Search: Semantic search powered by Pinecone or PostgreSQL pgvector
- Hybrid Search: Combines semantic similarity with keyword matching
- Full-Text Search: Fast text search across all documents
- Filters: Filter by date, type, folder, tags, and more
- Organization Isolation: Complete data separation between organizations
- Per-Org Resource Limits: Customizable limits per organization
- Activity Tracking: Audit logs for compliance and security
- Inngest Integration: Event-driven serverless functions
- Document Processing Queue: Scalable batch processing
- Automatic Retries: Built-in error handling and retries
- Real-Time Notifications: Progress updates via webhooks
- Job Monitoring: Track job status and logs
- Next.js 15 - React framework with App Router
- React 19 - Latest React with concurrent features
- TypeScript 5 - Type-safe development
- Tailwind CSS - Utility-first CSS framework
- shadcn/ui - Re-usable components built with Radix UI
- Radix UI - Accessible component primitives
- Zustand - Lightweight state management
- Framer Motion - Animation library
- React PDF - PDF rendering
- Lexical - Rich text editor framework
- Next.js 15 API Routes - Serverless API endpoints
- Prisma ORM - Type-safe database client with PostgreSQL
- PostgreSQL 14+ - Primary database
- Clerk - Authentication & user management
- Zod - Runtime schema validation
- Inngest - Background job processing & workflows
- OpenRouter - Unified access to 100+ AI models (GPT-4, Claude, Llama, Mistral, etc.)
- OpenAI - Direct GPT-4 Turbo integration and text embeddings
- ImageRouter - Image generation with 50+ models
- Pinecone - Vector database for semantic search
- pgvector - PostgreSQL vector extension (alternative to Pinecone)
- pdf-parse - PDF text extraction
- mammoth - DOCX to HTML conversion
- Sharp - Image processing and optimization
- Supabase - File storage and PostgreSQL database hosting
- Upstash Redis - Serverless Redis for caching (optional)
- Stripe - Payment processing and subscription management (optional)
- Docker - Containerization for deployment
- Vercel - Recommended deployment platform
Before you begin, ensure you have the following installed and configured:
- Node.js 18+ and npm 8+ (Download)
- PostgreSQL 14+ (Download) OR Supabase account (free tier available)
- Clerk account for authentication (Sign up free)
- AI Provider API key - At least one of:
- OpenRouter API key (recommended - access to 100+ models)
- OpenAI API key
- ImageRouter API key
- Supabase account for file storage (Sign up free)
- Pinecone account for vector search (Sign up free)
- Upstash Redis account for caching (Sign up free)
- Inngest account for background jobs (Sign up free)
- Stripe account - Only if you want to charge users (Sign up)
Get up and running in 5 minutes:
# 1. Clone the repository
git clone https://github.com/watat83/document-chat-system.git
cd document-chat-system

# 2. Install dependencies
npm install

# 3. Set up environment variables
cp .env.example .env.local
# Edit .env.local with your API keys (see Configuration section below)

# 4. Set up the database
npx prisma generate
npx prisma db push
npm run db:seed

# 5. Start the development server
npm run dev
Open http://localhost:3000 in your browser.
Ready to deploy? Use our automated Vercel deployment script:
./scripts/setup-vercel.sh --all && vercel --prodSee the Deployment section for details.
git clone https://github.com/watat83/document-chat-system.git
cd document-chat-system
npm install
Expected Output:
added 1247 packages, and audited 1248 packages in 45s
You have two options: Local PostgreSQL or Supabase (cloud-hosted).
- Install PostgreSQL 14+ on your machine
- Create a database:
createdb document_chat_db
- Your
DATABASE_URLwill be:postgresql://username:password@localhost:5432/document_chat_db
- Create a free account at clerk.com
- Create a new application
- Go to API Keys in the dashboard
- Copy your keys:
NEXT_PUBLIC_CLERK_PUBLISHABLE_KEY(starts withpk_)CLERK_SECRET_KEY(starts withsk_)
- In your Supabase project, go to Storage
- Create a new bucket called
documents - Set the bucket to Private
- Go to Project Settings → API
- Copy:
NEXT_PUBLIC_SUPABASE_URL(your project URL)NEXT_PUBLIC_SUPABASE_ANON_KEY(your anon/public key)
Choose at least one AI provider:
- Create account at openrouter.ai
- Go to Keys → Create Key
- Copy your API key
- Add to
.env.local:OPENROUTER_API_KEY=sk-or-v1-...
- Create account at platform.openai.com
- Go to API Keys → Create new secret key
- Add to
.env.local:OPENAI_API_KEY=sk-...
- Create account at imagerouter.com
- Get your API key
- Add to
.env.local:IMAGEROUTER_API_KEY=...
Create .env.local file with the following:
# Database
DATABASE_URL="postgresql://user:password@localhost:5432/document_chat_db"

# Clerk Authentication (Required)
NEXT_PUBLIC_CLERK_PUBLISHABLE_KEY="pk_test_..."
CLERK_SECRET_KEY="sk_test_..."

# Supabase File Storage (Required)
NEXT_PUBLIC_SUPABASE_URL="https://your-project.supabase.co"
NEXT_PUBLIC_SUPABASE_ANON_KEY="eyJhbGc..."

# AI Providers (At least one required)
OPENROUTER_API_KEY="sk-or-v1-..."  # Recommended: 100+ models
OPENAI_API_KEY="sk-..."            # Optional: Direct OpenAI access
IMAGEROUTER_API_KEY="..."          # Optional: Visual AI

# Pinecone Vector Search (Recommended)
PINECONE_API_KEY="..."
PINECONE_ENVIRONMENT="us-west1-gcp"
PINECONE_INDEX_NAME="document-embeddings"

# Upstash Redis Caching (Recommended)
UPSTASH_REDIS_REST_URL="https://..."
UPSTASH_REDIS_REST_TOKEN="..."

# Inngest Background Jobs (Recommended)
INNGEST_EVENT_KEY="..."
INNGEST_SIGNING_KEY="..."

# Stripe Billing (Optional - only if you want to charge users)
STRIPE_SECRET_KEY="sk_test_..."
NEXT_PUBLIC_STRIPE_PUBLISHABLE_KEY="pk_test_..."
STRIPE_WEBHOOK_SECRET="whsec_..."

# App Configuration
NEXT_PUBLIC_APP_URL="http://localhost:3000"
NODE_ENV="development"

# Encryption (Generate with: openssl rand -base64 32)
ENCRYPTION_KEY="your-32-character-encryption-key-here"# Generate Prisma client
npx prisma generate
# Push schema to database
npx prisma db push
# Seed initial data
npm run db:seedExpected Output:
✅ Database schema pushed successfully
✅ Seeded 4 pricing plans
✅ Created sample organization and user
npm run devFirst-time setup:
- Click "Sign Up" to create an account
- You'll be redirected to Clerk's hosted sign-up page
- After signing up, you'll be redirected back to the app
- Complete your profile setup
- Configure your API keys (Important):
- Navigate to Settings (
/settings) in the app - Enter your AI provider API keys (OpenRouter, OpenAI, ImageRouter)
- Keys are encrypted with AES-256 and stored in your browser's localStorage
- Your keys never leave your device - they are not sent to any remote server
- This ensures maximum privacy and security for your API credentials
- Navigate to Settings (
- Start uploading documents and chatting with AI!
┌─────────────────────────────────────────────────────────────────┐
│                         Client Browser                           │
│  ┌──────────────┐  ┌──────────────┐  ┌──────────────┐         │
│  │   Next.js    │  │  React 19    │  │   Zustand    │         │
│  │   Frontend   │  │  Components  │  │     Store    │         │
│  └──────────────┘  └──────────────┘  └──────────────┘         │
└─────────────────────────────────────────────────────────────────┘
                              ↓
┌─────────────────────────────────────────────────────────────────┐
│                      Next.js API Routes                          │
│  ┌──────────────┐  ┌──────────────┐  ┌──────────────┐         │
│  │   Document   │  │   AI Chat    │  │    User      │         │
│  │     API      │  │     API      │  │     API      │         │
│  └──────────────┘  └──────────────┘  └──────────────┘         │
└─────────────────────────────────────────────────────────────────┘
                              ↓
┌─────────────────────────────────────────────────────────────────┐
│                        Core Services                             │
│  ┌──────────────┐  ┌──────────────┐  ┌──────────────┐         │
│  │   Prisma     │  │  AI Service  │  │   Vector     │         │
│  │     ORM      │  │   Manager    │  │   Search     │         │
│  └──────────────┘  └──────────────┘  └──────────────┘         │
└─────────────────────────────────────────────────────────────────┘
                              ↓
┌─────────────────────────────────────────────────────────────────┐
│                       External Services                          │
│  ┌──────────────┐  ┌──────────────┐  ┌──────────────┐         │
│  │  PostgreSQL  │  │   OpenRouter │  │   Pinecone   │         │
│  │   Database   │  │   AI Models  │  │    Vectors   │         │
│  └──────────────┘  └──────────────┘  └──────────────┘         │
│  ┌──────────────┐  ┌──────────────┐  ┌──────────────┐         │
│  │   Supabase   │  │     Clerk    │  │   Inngest    │         │
│  │    Storage   │  │     Auth     │  │     Jobs     │         │
│  └──────────────┘  └──────────────┘  └──────────────┘         │
└─────────────────────────────────────────────────────────────────┘
User uploads file → Supabase Storage → Document record created
                                              ↓
                                       Inngest job triggered
                                              ↓
                                     Background processing
                                              ↓
                    ┌──────────────────┬──────────────────┐
                    ↓                  ↓                  ↓
             Text extraction    Metadata analysis   Generate embeddings
                    ↓                  ↓                  ↓
                PostgreSQL         PostgreSQL         Pinecone
                    ↓                  ↓                  ↓
                    └──────────────────┴──────────────────┘
                                      ↓
                          Document ready for chat!
User sends message → Retrieve relevant docs (Vector Search)
                                              ↓
                                    Build context with chunks
                                              ↓
                                    Send to AI provider
                                              ↓
                                Stream response tokens
                                              ↓
                                  Display with citations
document-chat-system/
├── prisma/
│   ├── migrations/             # Database migration history
│   ├── schema.prisma           # Database schema with all models
│   ├── seed.ts                 # Database seeding script
│   └── rls-policies.sql        # Row-level security policies
├── public/                     # Static assets (images, fonts, etc.)
├── scripts/
│   ├── README.md               # Scripts documentation
│   └── setup-vercel.sh         # Automated Vercel deployment script
├── src/
│   ├── app/                    # Next.js 15 App Router
│   │   ├── api/               # API routes
│   │   │   ├── ai/           # AI-related endpoints
│   │   │   ├── inngest/      # Inngest webhook endpoint
│   │   │   └── v1/           # Versioned REST APIs
│   │   ├── billing/          # Billing & subscription pages
│   │   ├── chat/             # AI chat interface
│   │   ├── dashboard/        # Main dashboard & analytics
│   │   ├── documents/        # Document management UI
│   │   ├── logs/             # Audit logs viewer
│   │   ├── profile/          # User profile pages
│   │   ├── sign-in/          # Authentication pages
│   │   ├── sign-up/          # Registration pages
│   │   ├── layout.tsx        # Root layout with providers
│   │   └── page.tsx          # Landing page
│   ├── components/            # React components
│   │   ├── ui/               # shadcn/ui components
│   │   ├── documents/        # Document-specific components
│   │   ├── chat/             # Chat UI components
│   │   ├── billing/          # Billing UI components
│   │   ├── ai/               # AI configuration components
│   │   ├── layout/           # Layout components
│   │   └── profile/          # Profile management components
│   ├── lib/                  # Core library code
│   │   ├── ai/              # AI service integrations
│   │   │   ├── providers/   # OpenRouter, OpenAI, ImageRouter adapters
│   │   │   ├── services/    # AI processing & routing services
│   │   │   ├── monitoring/  # AI usage tracking & metrics
│   │   │   ├── config/      # AI configuration management
│   │   │   └── __tests__/   # AI service tests
│   │   ├── inngest/         # Background job processing
│   │   │   └── functions/   # Inngest function definitions
│   │   ├── documents/       # Document management logic
│   │   ├── file-processing/ # File type handlers (PDF, DOCX, etc.)
│   │   ├── audit/           # Audit logging system
│   │   ├── auth/            # Authentication utilities
│   │   ├── cache/           # Caching layer (Redis)
│   │   ├── config/          # Environment configuration
│   │   ├── db/              # Database utilities
│   │   ├── errors/          # Error handling framework
│   │   ├── storage/         # File storage (Supabase)
│   │   ├── supabase/        # Supabase client setup
│   │   └── validation/      # Input validation schemas
│   ├── hooks/                # Custom React hooks
│   ├── stores/               # Zustand state management
│   ├── contexts/             # React context providers
│   ├── types/                # TypeScript type definitions
│   ├── data/                 # Static data files
│   ├── styles/               # Global styles
│   └── middleware.ts         # Next.js middleware (auth, CORS)
├── .env.example              # Environment variables template
├── .env.local               # Your local config (git-ignored)
├── .gitignore               # Git ignore rules
├── Dockerfile               # Production Docker image
├── docker-compose.yml       # Local development setup
├── next.config.mjs          # Next.js configuration
├── tailwind.config.ts       # Tailwind CSS configuration
├── tsconfig.json            # TypeScript configuration
├── package.json             # Dependencies and npm scripts
└── README.md                # This file
-
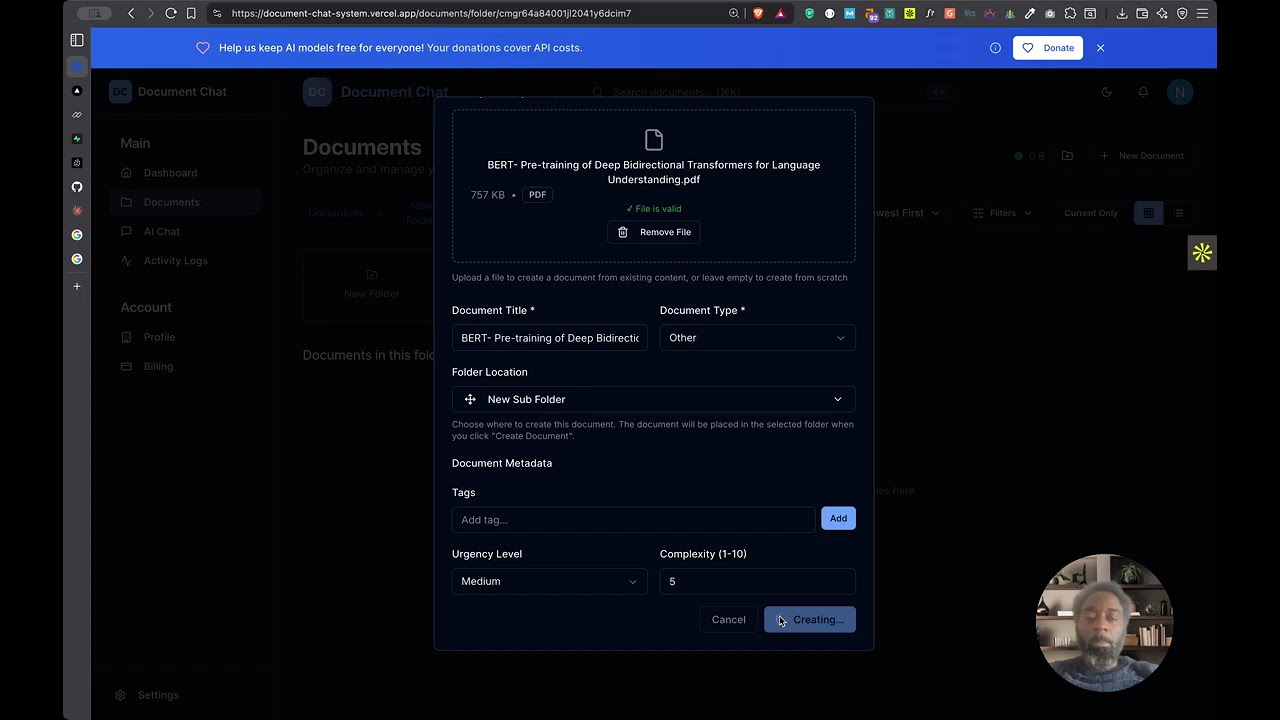
Upload Documents:
- Click Upload in the Documents page
- Drag and drop files or click to browse
- Supported formats: PDF, DOCX, TXT, MD, and more
- Documents are automatically processed and indexed
-
Organize with Folders:
- Create folders to organize your documents
- Use drag-and-drop to move documents between folders
- Set permissions for team collaboration
-
Chat with Documents:
- Select one or more documents
- Click Chat to start an AI conversation
- AI has full context of your selected documents
- Get answers with source citations
POST /api/v1/documents/upload
Content-Type: multipart/form-data
Authorization: Bearer {clerk_token}

{
  "file": File,
  "folderId": "optional_folder_id",
  "organizationId": "org_xxx"
}
Response:
{
  "success": true,
  "document": {
    "id": "doc_xxx",
    "title": "example.pdf",
    "status": "PROCESSING",
    "url": "https://..."
  }
}GET /api/v1/documents?organizationId=org_xxx&folderId=folder_xxx
Authorization: Bearer {clerk_token}Response:
{
  "documents": [
    {
      "id": "doc_xxx",
      "title": "example.pdf",
      "status": "COMPLETED",
      "createdAt": "2024-01-01T00:00:00Z",
      "processingMetadata": {
        "pages": 10,
        "wordCount": 5000
      }
    }
  ],
  "total": 42
}POST /api/v1/ai/chat
Content-Type: application/json
Authorization: Bearer {clerk_token}
{
"message": "What are the key points in document X?",
"documentIds": ["doc_xxx"],
"stream": true,
"provider": "openrouter",
"model": "anthropic/claude-3.5-sonnet"
}Response (streaming):
data: {"type":"token","content":"The key"}
data: {"type":"token","content":" points"}
data: {"type":"token","content":" are..."}
data: {"type":"citation","documentId":"doc_xxx","page":5}
data: {"type":"done"}
View the complete API documentation at /api/docs when running the application locally.
Enhance your document processing with IBM's Docling - an advanced document processing library that provides superior PDF understanding, table extraction, and structure preservation compared to traditional tools.
Before Docling (pdf-parse, mammoth):
- Tables become unstructured text
- Layout information lost
- Poor chunking for embeddings
- Lower AI response accuracy
After Docling:
- ✅ Tables preserved as Markdown
- ✅ Document structure maintained
- ✅ 3-5x better RAG quality
- ✅ Superior AI responses
Docling auto-starts with npm run dev but disabled by default. To enable:
- Enable in environment:
# .env.local
DOCLING_ENABLED=true- Start development:
npm run devYou'll see three services start:
- 🔵 NEXT - Next.js app (port 3000)
- 🟣 INNGEST - Background jobs (port 8288)
- 🟡 DOCLING - Document processing (port 8001)
Option 1: Railway (Recommended - Free Tier)
-
Deploy Docling service to Railway:
- Create new project at Railway.app
- Connect your repository
- Set root directory:
services/docling-api - Railway auto-detects Dockerfile
-
Copy Railway URL and add to Vercel:
vercel env add DOCLING_SERVICE_URL production
# Enter: https://your-docling.railway.app

vercel env add DOCLING_ENABLED production
# Enter: true

vercel --prod- That's it! Docling is proxied through your main domain via
/api/docling/*
Option 2: Docker (Self-Hosted)
docker build -t docling-api ./services/docling-api
docker run -d -p 8001:8001 docling-api| Aspect | Without Docling | With Docling |
|---|---|---|
| Setup Time | 0 min | 5-10 min |
| Document Quality | Good | Excellent (3-5x better) |
| Table Support | Basic | Advanced |
| Cost | $0 | $0 (Railway free tier) |
| Maintenance | None | Minimal |
See DOCLING_INTEGRATION.md for:
- Detailed setup instructions
- Configuration options
- Troubleshooting guide
- API reference
- Performance benchmarks
- Automatic Fallback: If Docling is unavailable, the system automatically uses traditional processors (pdf-parse, mammoth)
- No Breaking Changes: Existing functionality works with or without Docling
- Fork-Friendly: Users who fork your repo can deploy without Docling (default: disabled)
This guide covers deploying your Document Chat System to production. We provide an automated Vercel deployment script that syncs all environment variables in one command.
# 1. Install Vercel CLI
npm install -g vercel

# 2. Login to Vercel
vercel login

# 3. Link your project
vercel link

# 4. Sync all environment variables (automated!)
./scripts/setup-vercel.sh --all

# 5. Deploy to production
vercel --prod
That's it! The automated script reads your .env.local file and syncs all variables to Vercel. See scripts/setup-vercel.sh for advanced options like --dry-run, --prod, --preview, etc.
Before deploying, ensure you have:
- ✅ PostgreSQL database (Supabase recommended for free hosting)
- ✅ Clerk account with production keys
- ✅ Supabase project for file storage
- ✅ AI provider API keys (OpenRouter/OpenAI/ImageRouter)
- ✅ Inngest account for background jobs
- ✅ (Optional) Railway account for Docling - Superior document processing (Sign up free)
- ✅ (Optional) Pinecone for vector search
- ✅ (Optional) Upstash Redis for caching
- ✅ (Optional) Stripe for billing
Create a production .env file with these values:
# ============================================
# REQUIRED: Core Configuration
# ============================================
NODE_ENV=production
NEXT_PUBLIC_APP_URL=https://your-actual-domain.com  # ⚠️ Update with your real domain

# ============================================
# REQUIRED: Database
# ============================================
DATABASE_URL="postgresql://user:password@host:5432/dbname"
# Get from Supabase: Project Settings → Database → Connection String → URI

# ============================================
# REQUIRED: Authentication (Clerk)
# ============================================
# ⚠️ Use PRODUCTION keys (pk_live_... and sk_live_...)
NEXT_PUBLIC_CLERK_PUBLISHABLE_KEY="pk_live_xxxxx"
CLERK_SECRET_KEY="sk_live_xxxxx"
# Get from: https://dashboard.clerk.com → Your App → API Keys → Production

# ============================================
# REQUIRED: File Storage (Supabase)
# ============================================
NEXT_PUBLIC_SUPABASE_URL="https://xxxxx.supabase.co"
NEXT_PUBLIC_SUPABASE_ANON_KEY="eyJhbGciOiJIUzI1NiIsInR5cCI6IkpXVCJ9..."
# Get from: Supabase Project → Settings → API

# ============================================
# REQUIRED: AI Providers (At least one)
# ============================================
# Option 1: OpenRouter (Recommended - 100+ models)
OPENROUTER_API_KEY="sk-or-v1-xxxxx"
# Get from: https://openrouter.ai/keys

# Option 2: OpenAI (Direct access)
OPENAI_API_KEY="sk-xxxxx"
# Get from: https://platform.openai.com/api-keys

# Option 3: ImageRouter (Visual AI)
IMAGEROUTER_API_KEY="xxxxx"
# Get from: https://imagerouter.com/

# ============================================
# REQUIRED: Inngest Background Jobs
# ============================================
INNGEST_EVENT_KEY="your-inngest-event-key"
# Get from: Inngest Dashboard → Your App → Keys → Event Key

INNGEST_SIGNING_KEY="signkey_prod_xxxxx"
# Get from: Inngest Dashboard → Your App → Keys → Signing Key

# ⚠️ IMPORTANT: See "Step 4: Configure Inngest" below for complete setup

# ============================================
# REQUIRED: Security
# ============================================
# Generate with: openssl rand -base64 32
ENCRYPTION_KEY="your-secure-32-char-encryption-key-here"

# ============================================
# RECOMMENDED: Vector Search (Pinecone)
# ============================================
PINECONE_API_KEY="your-pinecone-api-key"
PINECONE_ENVIRONMENT="us-west1-gcp"
PINECONE_INDEX_NAME="document-embeddings"
# Get from: https://app.pinecone.io/ → API Keys

# ============================================
# RECOMMENDED: Caching (Upstash Redis)
# ============================================
UPSTASH_REDIS_REST_URL="https://xxxxx.upstash.io"
UPSTASH_REDIS_REST_TOKEN="xxxxx"
# Get from: https://console.upstash.com/ → Your Redis → REST API

# ============================================
# OPTIONAL: Billing (Stripe)
# ============================================
# ⚠️ Use PRODUCTION keys (sk_live_... and pk_live_...)
STRIPE_SECRET_KEY="sk_live_xxxxx"
NEXT_PUBLIC_STRIPE_PUBLISHABLE_KEY="pk_live_xxxxx"
STRIPE_WEBHOOK_SECRET="whsec_xxxxx"
# Get from: https://dashboard.stripe.com/apikeys

# To disable billing entirely:
# DISABLE_BILLING=true1. Install Vercel CLI:
npm install -g vercel2. Login to Vercel:
vercel login3. Deploy:
# From your project directory
vercel

# Follow prompts:
# - Set up and deploy? Yes
# - Which scope? (Select your account)
# - Link to existing project? No
# - Project name? document-chat-system
# - Directory? ./
# - Override settings? No
4. Add Environment Variables:
We've provided an automated script to sync your environment variables to Vercel:
# Option 1: Automated Script (Recommended)
./scripts/setup-vercel.sh --all

# This will:
# - Read your .env.local file
# - Add all variables to Vercel (production, preview, development)
# - Skip placeholder values automatically
# - Handle sensitive variables securely

# For production only:
./scripts/setup-vercel.sh --prod

# To preview what would be added without making changes:
./scripts/setup-vercel.sh --dry-run

# See all options:
./scripts/setup-vercel.sh --help
# Option 2: Manual CLI (Alternative)
vercel env add NEXT_PUBLIC_APP_URL
# Enter: https://your-app.vercel.app
# Select: Production
# Repeat for all environment variables...# Option 3: Via Dashboard (Alternative)
# 1. Go to: https://vercel.com/your-username/document-chat-system
# 2. Click "Settings" → "Environment Variables"
# 3. Add all variables from your .env.local file
# 4. Select appropriate environments for each📖 For detailed deployment instructions, see scripts/README.md
5. Configure Clerk Redirect URLs:
# In Clerk Dashboard:
# 1. Go to: https://dashboard.clerk.com
# 2. Select your app → "Paths"
# 3. Add these URLs:
#    - Sign-in URL: https://your-app.vercel.app/sign-in
#    - Sign-up URL: https://your-app.vercel.app/sign-up
#    - After sign-in: https://your-app.vercel.app/documents
#    - After sign-up: https://your-app.vercel.app/documents
6. Redeploy with Environment Variables:
vercel --prod7. Your app is live at: https://your-app.vercel.app
1. Update Redirect URLs in Clerk Dashboard:
Go to: Clerk Dashboard → Your App → "Paths"
Add these URLs (replace with your actual domain):
Sign-in URL: https://your-domain.com/sign-in
Sign-up URL: https://your-domain.com/sign-up
After sign-in: https://your-domain.com/documents
After sign-up: https://your-domain.com/documents
Home URL: https://your-domain.com
2. Add Allowed Origins:
Go to: "Settings" → "Advanced" → "Allowed origins"
https://your-domain.com
3. Switch to Production Keys:
Make sure you're using Production API keys (not Test keys):
pk_live_...(notpk_test_...)sk_live_...(notsk_test_...)
Inngest handles all background jobs (document processing, vectorization, AI analysis). Follow these steps carefully:
In production, Inngest Cloud needs to:
- Discover your functions by calling your
/api/inngestendpoint - Execute functions when events are triggered
- Monitor and retry failed jobs automatically
- Go to Inngest Dashboard: app.inngest.com
- Sign in or create a free account
- Select your app (or create one named "document-chat-system")
- Go to "Keys" section
- Copy these two keys:
- Event Key: Used to send events TO Inngest (format:
inngest_event_key_xxx) - Signing Key: Used to verify requests FROM Inngest (format:
signkey_prod_xxx)
- Event Key: Used to send events TO Inngest (format:
In your deployment platform (Vercel/Railway/Render/Docker), add:
INNGEST_EVENT_KEY="your-event-key-from-step-4.1"
INNGEST_SIGNING_KEY="signkey_prod_from-step-4.1"
Redeploy your app after adding these variables.
After deployment, you need to tell Inngest about your app:
-
Go to Inngest Dashboard: app.inngest.com
-
Select your app
-
Click "Apps" tab in the sidebar
-
Click "Sync" or "Create App Sync"
-
Enter your deployed app URL:
https://your-actual-domain.com/api/inngestImportant: Must be the full URL with
/api/inngestendpoint -
Click "Sync Now"
What happens:
- Inngest makes a GET request to your app
- Your app returns a list of all available functions
- Inngest registers these functions
You should see 7 functions appear:
- ✅
process-document-basic- Extract text from documents - ✅
process-document-full- Complete document analysis - ✅
vectorize-document- Create embeddings for search - ✅
score-document- Calculate document scores - ✅
batch-process-documents- Process multiple documents - ✅
analyze-document- AI-powered analysis - ✅
cancel-document-processing- Cancel running jobs
Test the integration:
- Upload a document in your deployed app
- Go to Inngest Dashboard → "Runs" tab
- You should see:
- Event:
document/process-basic.requested - Status: Running or Completed
- Duration: ~2-10 seconds
- Result: Success
- Event:
If you DON'T see any runs:
- ❌ Check that
INNGEST_EVENT_KEYis set correctly - ❌ Verify you synced functions in Step 4.3
- ❌ Check browser console for errors
- ❌ Verify app URL is correct and publicly accessible
Event Flow:
1. User uploads document
   ↓
2. Your app sends event to Inngest Cloud:
   inngest.send({ name: "document/process-basic.requested", ... })
   ↓
3. Inngest Cloud receives event
   ↓
4. Inngest makes POST request to your app:
   POST https://your-domain.com/api/inngest
   ↓
5. Your app processes document and returns result
   ↓
6. Inngest logs completion in dashboard
Security:
- All requests from Inngest are signed with
INNGEST_SIGNING_KEY - Your app automatically verifies the signature
- Only Inngest can trigger your functions
Problem: Functions not showing up after sync
Solution:
- Verify
/api/inngestendpoint is publicly accessible:curl https://your-domain.com/api/inngest # Should return JSON with function definitions - Check
INNGEST_SIGNING_KEYis set in environment variables - Re-sync in Inngest Dashboard
Problem: Events sent but functions not executing
Solution:
- Check Inngest Dashboard → "Runs" → Look for errors
- Verify
NEXT_PUBLIC_APP_URLmatches your actual domain - Check app logs for errors
- Ensure app is not behind authentication that blocks Inngest
Problem: "Function execution failed" errors
Solution:
- Check app logs for detailed error messages
- Verify all required environment variables are set (database, AI keys, etc.)
- Test locally first with Inngest Dev Server
If you skipped enabling Docling, the system will work fine with traditional processors (pdf-parse, mammoth). To enable superior document processing with IBM's Docling:
- ✅ 3-5x better RAG quality - Superior table extraction and structure preservation
- ✅ Free tier available - Railway provides $5/month credit (no card required)
- ✅ Automatic fallback - If Docling is down, system uses traditional processors
- ✅ Zero maintenance - Docker container handles everything
1. Create Railway Account
- Go to railway.app
- Sign up with GitHub (free tier: $5/month credit)
2. Deploy Docling Service
Option A: Deploy from GitHub (Recommended)
# Push your code to GitHub first
git add .
git commit -m "Add Docling integration"
git push origin main

# Then in Railway:
# 1. Click "New Project"
# 2. Select "Deploy from GitHub repo"
# 3. Select your repository
# 4. Railway will auto-detect the Dockerfile
Option B: Deploy via Railway CLI
# Install Railway CLI
npm install -g @railway/cli

# Deploy Docling service
cd services/docling-api
railway login
railway init
railway up
3. Configure Railway Project
- Set root directory:
services/docling-api - Railway auto-detects
Dockerfileand builds automatically - No environment variables needed for Docling service
- Service will auto-assign a public URL like:
https://docling-production-xxxx.up.railway.app
4. Copy Railway URL
After deployment completes:
# Railway will show your public domain
# Example: https://docling-production-a1b2.up.railway.app

# Copy this URL - you'll need it for Vercel
5. Add to Vercel Environment Variables
# Option A: Vercel Dashboard
# Go to: Project → Settings → Environment Variables
# Add for Production environment:
DOCLING_SERVICE_URL=https://your-railway-url.up.railway.app
DOCLING_ENABLED=true

# Option B: Vercel CLI
vercel env add DOCLING_SERVICE_URL production
# Enter: https://your-railway-url.up.railway.app

vercel env add DOCLING_ENABLED production
# Enter: true
6. Verify Configuration
The Vercel proxy is already configured in next.config.mjs:
// Proxies /api/docling/* through your main domain
rewrites: [
  {
    source: '/api/docling/:path*',
    destination: process.env.DOCLING_SERVICE_URL
      ? `${process.env.DOCLING_SERVICE_URL}/:path*`
      : 'http://localhost:8001/:path*',
  },
]
This means users hit: https://yourdomain.com/api/docling/process
But it routes to: https://your-railway-url.up.railway.app/process
7. Test Docling Service
# Test Railway service directly
curl https://your-railway-url.up.railway.app/health
# Should return: {"status":"healthy","service":"docling-api"}

# After Vercel deployment, test through proxy
curl https://yourdomain.vercel.app/api/docling/health
# Should return same health check- $5 monthly credit (no card required)
- 500 hours execution (~20 days if running 24/7)
- Service sleeps after 30min inactivity
- First request after sleep: 10-20 second delay (cold start)
- Subsequent requests: Normal speed
If you exceed free tier, Railway charges $0.000463/minute ($20/month for 24/7 operation).
Your app will work perfectly even if:
- You don't deploy Docling (uses pdf-parse/mammoth)
- Railway service is down (automatic fallback)
- Railway service is sleeping (waits for cold start, then processes)
Check browser console logs to see which processor was used:
🚀 Attempting Docling processing for application/pdf
✅ Docling processing succeeded (7180 chars)
Or fallback:
⚠️ Docling processing failed, falling back to traditional processors
📄 Using fallback processor: PDFProcessor
If you prefer self-hosting instead of Railway:
# Build and run Docling service
docker build -t docling-api ./services/docling-api
docker run -d -p 8001:8001 --name docling docling-api

# Set environment variable to your Docker host
DOCLING_SERVICE_URL=http://your-server:8001
DOCLING_ENABLED=trueIf you're using Stripe for billing:
1. Configure Webhook in Stripe Dashboard:
- Go to: Stripe Dashboard
- Click "Add endpoint"
- URL:
https://your-domain.com/api/v1/webhooks/stripe - Events to send:
customer.subscription.createdcustomer.subscription.updatedcustomer.subscription.deletedinvoice.payment_succeededinvoice.payment_failed
2. Get Webhook Secret:
- After creating webhook, copy the "Signing secret" (starts with
whsec_...) - Add to environment variables:
STRIPE_WEBHOOK_SECRET="whsec_xxxxx"
3. Redeploy your app
After deployment, initialize your database:
# If using Vercel
vercel env pull .env.local
npx prisma generate
npx prisma db push
npm run db:seed

# If using Railway
railway run npx prisma generate
railway run npx prisma db push
railway run npm run db:seed

# If using Docker
docker exec -it document-chat-system npx prisma generate
docker exec -it document-chat-system npx prisma db push
docker exec -it document-chat-system npm run db:seedVerify everything is working:
- ✅ App loads: Visit
https://your-domain.com - ✅ Sign up works: Create a new account
- ✅ Authentication works: Sign in with your account
- ✅ Upload works: Upload a test document
- ✅ Processing works: Check Inngest Dashboard for successful runs
- ✅ Chat works: Try chatting with a document
- ✅ Settings work: Configure API keys in Settings page
Monitor your app with:
-
Inngest Dashboard: app.inngest.com
- View function execution metrics
- Monitor failed jobs
- Track processing times
-
Vercel Analytics: (if using Vercel)
- Real-time traffic
- Performance metrics
- Error tracking
-
Supabase Dashboard:
- Database performance
- API usage
- Storage usage
-
Clerk Dashboard:
- User registrations
- Authentication metrics
- Active sessions
-
Stripe Dashboard: (if using billing)
- Revenue tracking
- Subscription metrics
- Payment failures
We welcome contributions! Please see CONTRIBUTING.md for details.
# Fork the repository
# Clone your fork
git clone https://github.com/YOUR_USERNAME/document-chat-system.git

# Create a feature branch
git checkout -b feature/amazing-feature

# Make your changes
# ...

# Run tests and linting
npm run lint
npm run type-check
npm test

# Commit with conventional commits
git commit -m "feat: add amazing feature"

# Push to your fork
git push origin feature/amazing-feature

# Open a Pull Request- Write tests for new features
- Follow existing code style
- Update documentation
- Use conventional commits
- Keep PRs focused and small
Join our growing community of developers and users!
- 💬 Discord: Get help, share ideas, and connect with other users
- 🐛 GitHub Issues: Report bugs and request features
- 🌟 GitHub Discussions: Ask questions and share your projects
- 🐦 Twitter/X: Follow @watat83 for updates
We're building something great together. Your feedback and contributions make this project better for everyone!
This project is licensed under the MIT License - see the LICENSE file for details.
✅ Commercial use allowed
✅ Modification allowed
✅ Distribution allowed
✅ Private use allowed
❌ No liability
❌ No warranty
Built with amazing open-source technologies:
- Next.js - The React Framework
- Clerk - Authentication Made Simple
- Prisma - Next-generation ORM
- Radix UI - Accessible Components
- Tailwind CSS - Utility-First CSS
- Supabase - Open Source Firebase Alternative
- Inngest - Durable Workflows
- Pinecone - Vector Database
- OpenRouter - Unified AI API
⭐ Star this repo if you find it useful!
Made with ❤️ by the open source community