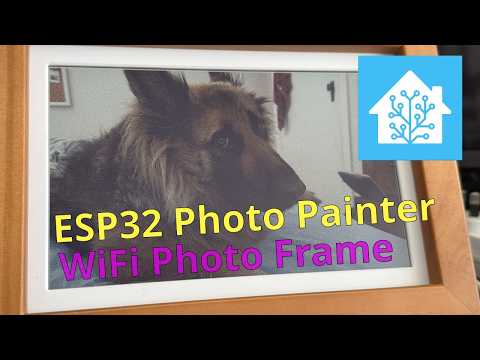
Custom firmware for the Waveshare ESP32-S3-PhotoPainter, a battery-powered e-ink photo frame featuring an ESP32-S3 and a 7.3" Spectra ACeP 6-colour display (800×480). This project replaces the stock firmware with an Arduino-based sketch.
The frame is self-contained: when plugged into USB-C power it runs a built-in web server where you browse a gallery of your original photos on the SD card and upload new ones (one or many at a time) from your phone or computer. The originals are kept on the card, and each is resized and Floyd–Steinberg dithered to the 6-colour panel format in the background. On battery the frame deep-sleeps, rotating through the dithered photos and reporting temperature, humidity, and battery voltage to Home Assistant via MQTT. No external image server is required.
Note: This firmware is not based on the official Waveshare ESP-IDF demo. It is written from scratch using the Arduino framework. The stock firmware is not required, but an SD card is (it stores your photos).
The frame has two modes, chosen automatically at boot based on whether USB-C power is present (detected via the AXP2101 PMU):
- Server mode (USB-C plugged in) — the frame stays awake and runs the web UI. It joins your home WiFi if it can (see below), otherwise it hosts its own setup hotspot. While powered it also rotates the displayed photo and keeps reporting sensors to MQTT.
- Battery mode (unplugged) — the frame deep-sleeps to conserve battery. Every ~5 minutes it wakes to report sensors via MQTT; every ~30 minutes it picks a random stored photo and refreshes the display. The web server does not run on battery.
By default (no saved network) the frame hosts its own WPA2 access point named PhotoFrame-Setup. Connect to it and open the web page to set your home WiFi. Once saved, the frame connects to your network as a normal client and you reach the gallery at its IP on your LAN. If the saved network can't be found, it falls back to hosting its own hotspot again so you can always reconfigure it.
- Built-in web server (USB-powered): photo gallery (shows originals), multi-file upload, delete, and "show now"
- Originals kept on the SD card; each dithered to the 800×480 6-colour panel format (bilinear cover-crop + Floyd–Steinberg) in a background queue so uploads don't block
- Self-hosting WPA2 access point with web-based WiFi configuration; STA with AP fallback
- Web-based MQTT configuration (separate settings page)
- Settings persisted to flash (NVS) — no recompiling to change WiFi/MQTT
- Deep sleep on battery (~5 min wake cycle, display refresh every 30 min)
- GPIO4 button press triggers immediate photo change (battery mode)
- SHTC3 temperature & humidity + battery voltage reported to Home Assistant via MQTT auto-discovery
This project targets the Waveshare ESP32-S3-PhotoPainter which includes:
- ESP32-S3 with 16MB flash and OPI PSRAM
- 7.3" Spectra ACeP e-ink display (800×480, 6-colour: Black/White/Yellow/Red/Blue/Green)
- AXP2101 PMU with LiPo battery management (I2C) — also used to detect USB-C power
- SHTC3 temperature/humidity sensor (I2C, same bus as AXP2101)
- MicroSD card slot (SPI) — required; this is where your photos are stored
- BOOT button on GPIO4 (used to trigger an immediate photo change)
- PWR button for power on/off
The Arduino sketch lives in the esp32_photo-frame/ folder. Open esp32_photo-frame/esp32_photo-frame.ino in the Arduino IDE (the folder name matches the main sketch, so all the .ino/.h files load as one sketch).
| Setting | Value |
|---|---|
| Board | ESP32S3 Dev Module |
| Flash Size | 16MB |
| PSRAM | OPI PSRAM |
| USB CDC On Boot | Enabled |
| Partition Scheme | Default |
Install the following via the Arduino Library Manager:
- XPowersLib — AXP2101 PMU driver
- JPEGDEC — JPEG decoder by Larry Bank
- PubSubClient — MQTT client by Nick O'Leary
WiFi, WebServer, DNSServer, Preferences, SD, SPI, and Wire ship with the ESP32 Arduino core — nothing extra to install.
Configuration now happens in the browser, so you do not need to edit any files to build. The defaults live in config_defaults.h — most importantly the setup hotspot:
#define AP_SSID       "PhotoFrame-Setup"
#define AP_PASSWORD   "photoframe"        // WPA2 — must be >= 8 characters
#define ROTATE_MINUTES 30
If you'd like a device to come up already knowing your WiFi/MQTT (so you can skip the browser step), copy esp32_photo-frame/secrets_template.h to esp32_photo-frame/secrets.h (gitignored) and uncomment the values you want to pre-seed. Anything you set there is overridden the moment you save settings in the web UI.
- Flash the sketch and keep the frame on USB-C power.
- On a phone/laptop, join the WiFi network
PhotoFrame-Setup(passwordphotoframeunless you changed it). - Open a browser to
http://192.168.4.1/(most devices pop up the captive portal automatically). - Go to the WiFi page, enter your home network, and Save. Unplug and replug the frame to join it.
- Reconnect your phone/laptop to your home WiFi and browse to the frame's new IP (check your router, or it logs the IP to the serial console). The gallery is now reachable on your LAN.
- Upload — on the Gallery page, choose one or more
.jpg/.jpeg/.bmpfiles (multi-select is supported) and upload. The originals are saved immediately and each is dithered to the panel format in the background; cards show processing until ready. - Gallery — shows the original photos. Each shows a status badge (processing / ready / failed).
- Show — display a ready photo on the panel immediately (~30s refresh).
- Delete — removes both the original and its dithered buffer from the SD card.
Open the MQTT settings page in the web UI and enter your broker host, port, and (optionally) username/password, then Save. Leave the host blank to disable MQTT. Sensor reporting starts on the next cycle.
If you haven't already, install the Mosquitto MQTT broker. On Home Assistant OS the easiest way is the official Mosquitto broker add-on:
- In Home Assistant go to Settings → Add-ons → Add-on Store.
- Search for Mosquitto broker and install it.
- Start the add-on.
- Go to Settings → People → Users.
- Click Add User — e.g. display name
Photo Frame, usernamephotoframe, a strong password. - Toggle "Can only log in from the local network" on (recommended) and leave Administrator off.
- Enter that username/password on the frame's MQTT settings page.
The Mosquitto add-on automatically allows any HA local user to authenticate, so no extra Mosquitto config is needed.
The device publishes MQTT auto-discovery messages on connection. Once it reports its first reading, three entities appear automatically in Home Assistant:
- Photo Frame Temperature — °C from the SHTC3 sensor
- Photo Frame Humidity — % RH from the SHTC3 sensor
- Photo Frame Battery — battery voltage in V from the AXP2101 PMU
No manual MQTT entity configuration is needed — just ensure the HA MQTT integration is set up against the same broker.
| File | Description |
|---|---|
esp32_photo-frame.ino |
Main sketch — power-mode selection, setup/loop, display rotation, background dithering queue |
spectra73.ino |
Spectra 7.3" ACeP e-ink panel driver + framebuffer ⇄ SD .bin I/O |
image_processing.ino |
JPEG/BMP decode, bilinear resize, Floyd–Steinberg dither |
network.ino |
WiFi station connect + WPA2 access-point fallback |
webserver.ino |
HTTP server: gallery, upload, serve originals, WiFi/MQTT settings pages |
config.ino / config.h |
Persistent configuration (Preferences/NVS) |
config_defaults.h |
Compile-time factory defaults (AP name/password, rotate interval) |
sdcard.ino |
SD card initialisation |
sensor.ino |
SHTC3 sensor + MQTT reporting with HA auto-discovery |
secrets_template.h |
Optional template to pre-seed WiFi/MQTT defaults |
/originals/<base>.<ext>— the original uploaded photos (.jpg/.jpeg/.bmp). This is what the gallery displays./dithered/<base>.bin— pre-processed 800×480 4bpp panel buffers (192,000 bytes each), paired with each original by base name. This is the source for display rotation.
A photo shows as processing in the gallery until its /dithered/<base>.bin exists, then ready.
- The browser uploads one or more JPEG/BMP files to
/upload; each is streamed straight into/originalsand the request returns immediately (no blocking). - A background queue (
processNextPending()in esp32_photo-frame.ino) drains inloop(), one image at a time, so uploads return immediately and processing proceeds while the gallery updates. Non-image files on the card are ignored. - For each pending original,
processImage()in image_processing.ino decodes it, picks the most aggressive downscale that still covers 800×480, and bilinear-resizes (cover + centred crop) into an RGB888 buffer in PSRAM. - The Floyd–Steinberg stage converts the RGB data into the 6-colour ACeP palette directly in the panel framebuffer, which is then written to
/dithered/<base>.bin(epdSaveBufferToFile). - At display time the frame just loads a
.binback into the framebuffer (epdLoadBufferFromFile) and refreshes the panel — no decoding needed, which keeps battery refreshes fast and cheap.
Deleting a photo removes both its original and its dithered buffer. A file that fails to decode is marked failed and skipped (not retried in a loop).
| Condition | Behaviour |
|---|---|
| USB-C connected | Web server runs; WiFi joins home network or hosts PhotoFrame-Setup; display rotates and MQTT reports on timers; never deep-sleeps. |
| On battery | Deep sleep. Wakes every ~5 min to report sensors via MQTT; every ~30 min rotates to a random stored photo. Button (GPIO4) forces an immediate refresh. |
This project uses the following third-party libraries. Full license texts are available in each library's repository.
| Library | Author | License | Repository |
|---|---|---|---|
| JPEGDEC | Larry Bank / BitBank Software, Inc. | Apache-2.0 | bitbank2/JPEGDEC |
| XPowersLib | Lewis He / LilyGO | MIT | lewisxhe/XPowersLib |
| PubSubClient | Nick O'Leary | MIT | knolleary/pubsubclient |
The WiFi, WebServer, DNSServer, Preferences, SD, SPI, and Wire libraries are part of the ESP32 Arduino Core by Espressif Systems, licensed under the GNU Lesser General Public License v2.1 (LGPL-2.1).
This project is licensed under the BSD Zero Clause License (0BSD). See LICENSE.
In short: you can use, modify, and redistribute this project for any purpose, including commercial use, without attribution. The software is provided "as is" without warranty.
Third-party libraries remain under their own licenses (MIT, Apache-2.0, LGPL-2.1). If you distribute binaries/firmware, keep the relevant third-party notices and provide source/build information as required by those licenses.