How to create a new System Preset
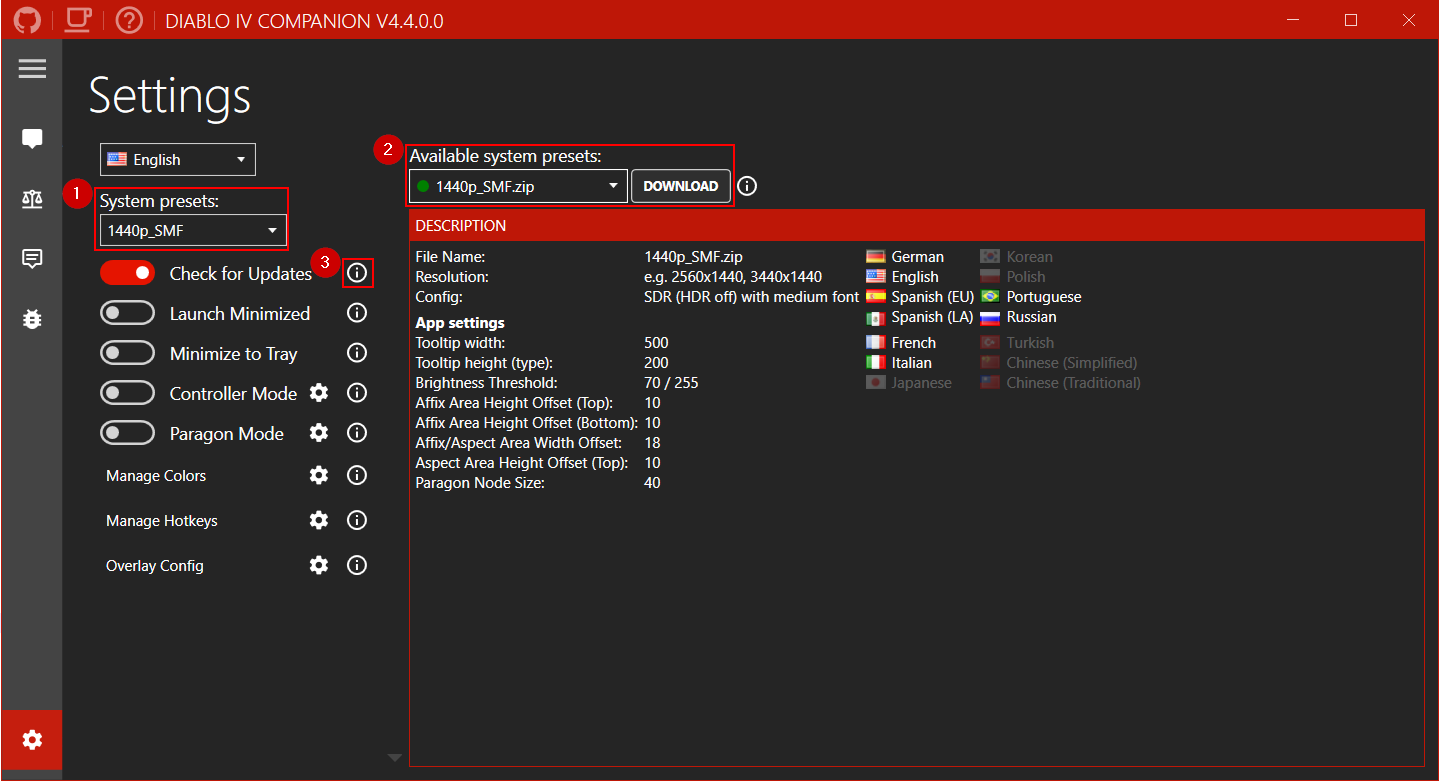
The settings menu allows you to switch between System presets matching your resolution.
Follow the steps on this page to create your own.
To keep all system presets organized the folder name should contain the resolution and relevant in-game settings. For example:
1080p_HSF : HDR Small Font
1440p_SMF : SDR Medium Font
2160p_HLF : HDR Large Font
For the following languages the same folder can be used:
- Brazilian Portuguese
- English
- French
- German
- Italian
- Polish
- Russian
- Spanish (AL)
- Spanish (EU)
- Turkish
The remaining languages differ too much and require their own folder:
- Chinese (Simplified)
- Chinese (Traditional)
- Japanese
- Korean
For those languages add the language code to the preset folder like this:
1440p_SMF_zhCN
1440p_SMF_zhTW
1440p_SMF_jaJP
1440p_SMF_koKR
| Language | code |
|---|---|
| English | enUS |
| Brazilian Portuguese | ptBR |
| Chinese (Simplified) | zhCN |
| Chinese (Traditional) | zhTW |
| French | frFR |
| German | deDE |
| Italian | itIT |
| Japanese | jaJP |
| Korean | koKR |
| Polish | plPL |
| Russian | ruRU |
| Spanish (EU) | esES |
| Spanish (LA) | esUS |
| Turkish | trTR |
See 1440p_SMF for an example:
\---D4Companion:.
    \---Tooltips
        |    tooltip_gc_square.png (optional)
        |    tooltip_gc_x.png (optional)
        |    tooltip_kb_all.png
    |   dot-affixes_greater.png
    |   dot-affixes_normal.png
    |   dot-affixes_reroll.png
    |   dot-affixes_rune_invocation.png
    |   dot-affixes_rune_ritual.png
    |   dot-affixes_temper_defensive.png
    |   dot-affixes_temper_mobility.png
    |   dot-affixes_temper_offensive.png
    |   dot-affixes_temper_resource.png
    |   dot-affixes_temper_utility.png
    |   dot-affixes_temper_weapons.png
    |   dot-aspects_legendary.png
    |   dot-aspects_unique.png
    |   dot-socket_1.png
    |   dot-socket_1_mask.png
    |   dot-socket_invocation.png
    |   dot-socket_invocation_mask.png
    |   dot-socket_ritual.png
    |   dot-socket_ritual_mask.png
    |   dot-splitter_1.png
    |   dot-splitter_top_1.png
This folder contains images to recognize the item tooltip. Make sure to use the file names as shown in the example.
- For keyboard/mouse:
tooltip_kb_all.png - For game controllers:
tooltip_gc_*. e.g.tooltip_gc_square.pngortooltip_gc_x.png
The default tooltip image is tooltip_kb_all.png, when a language requires a different image you can add the language code to the name. The app will then automatically use the correct image. For example:
- tooltip_kb_all_esES.png
- tooltip_kb_all_esMX.png
- tooltip_kb_all_frFR.png
- tooltip_kb_all_itIT.png
You can easily capture the required images by pressing Shift + Windows Key + S. Then use the snipping tool to draw a rectangle around the part you want to capture.
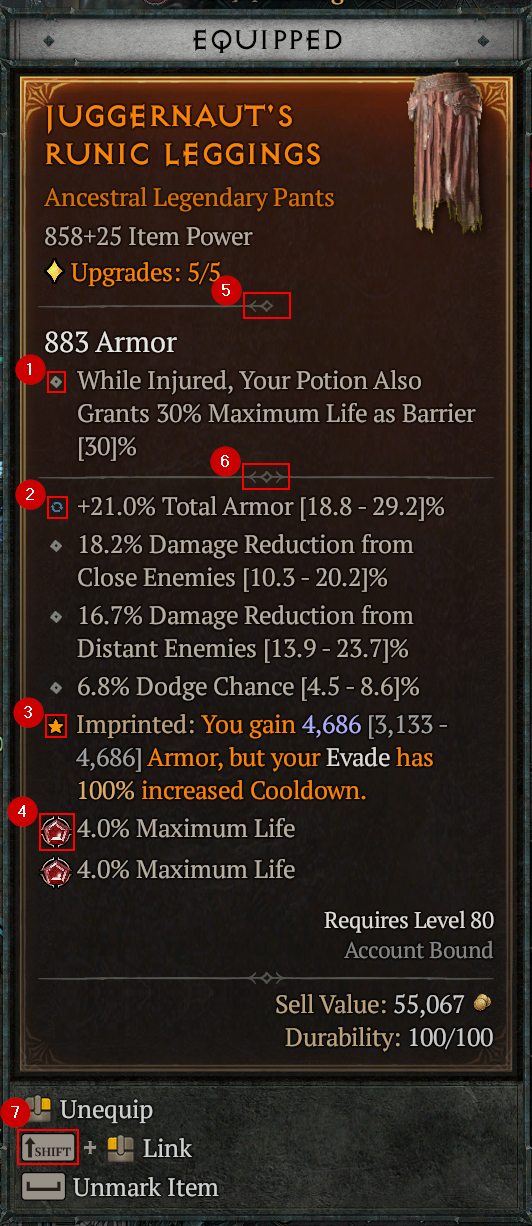
- Save the affix location as
dot-affixes_normal.png. - Save the enchanted affix location as
dot-affixes_reroll.png. - Save the aspect location as
dot-aspects_legendary.pngand for unique items asdot-aspects_unique.png. - Save the socket location as
dot-socket_1.pnganddot-socket_1_mask.png. - Save the top splitter location as
dot-splitter_top_1.png. - Save the other splitter location as
dot-splitter_1.png. - Save the
Shiftimage astooltip_kb_all.pngin theTooltipsfolder. - From a rune item type create a
dot-affixes_rune_ritual.png and
and dot-affixes_rune_invocation.png image.
To be able to detect sockets a pair of images is required. The first one from an empty socket (dot-socket_1.png). The second one is a mask (dot-socket_1_mask.png). The mask is used so we can ignore socketed gems.


- This is the empty socket image. Name this one
dot-socket_1.png. - This is an example on how to create the mask image. Open the
dot-socket_1.pngand edit it in for example Gimp. Select a rectangle as shown in the example so that only the corners are outside. Now make everything inside the rectangle white and the outside black. Save this new image asdot-socket_1_mask.png. - This is the resulting
dot-socket_1_mask.pngimage.
The second pair of images we need is to detect socketed runes.


- This is the socketed rune image. Name this one
dot-socket_ritual.png. - This is an example on how to create the mask image. Open the
dot-socket_ritual.pngand edit it in for example Gimp. Now make everything inside the rune white and the outside black. Save this new image asdot-socket_ritual_mask.png. - This is the resulting
dot-socket_ritual_mask.pngimage. - Repeat step 1-3 for the Invocation rune and name those
dot-socket_invocation.pnganddot-socket_invocation_mask.png.
Start by creating the tooltip image tooltip_kb_all.png and save it in your Tooltips folder.
- Now start the app, go to
Settings, and choose yourSystem preset. - Go to
Affixesand enable theAffix Overlay. - Go to
Debugand check if the tooltip is detected. You should see a red rectangle like in the image below.
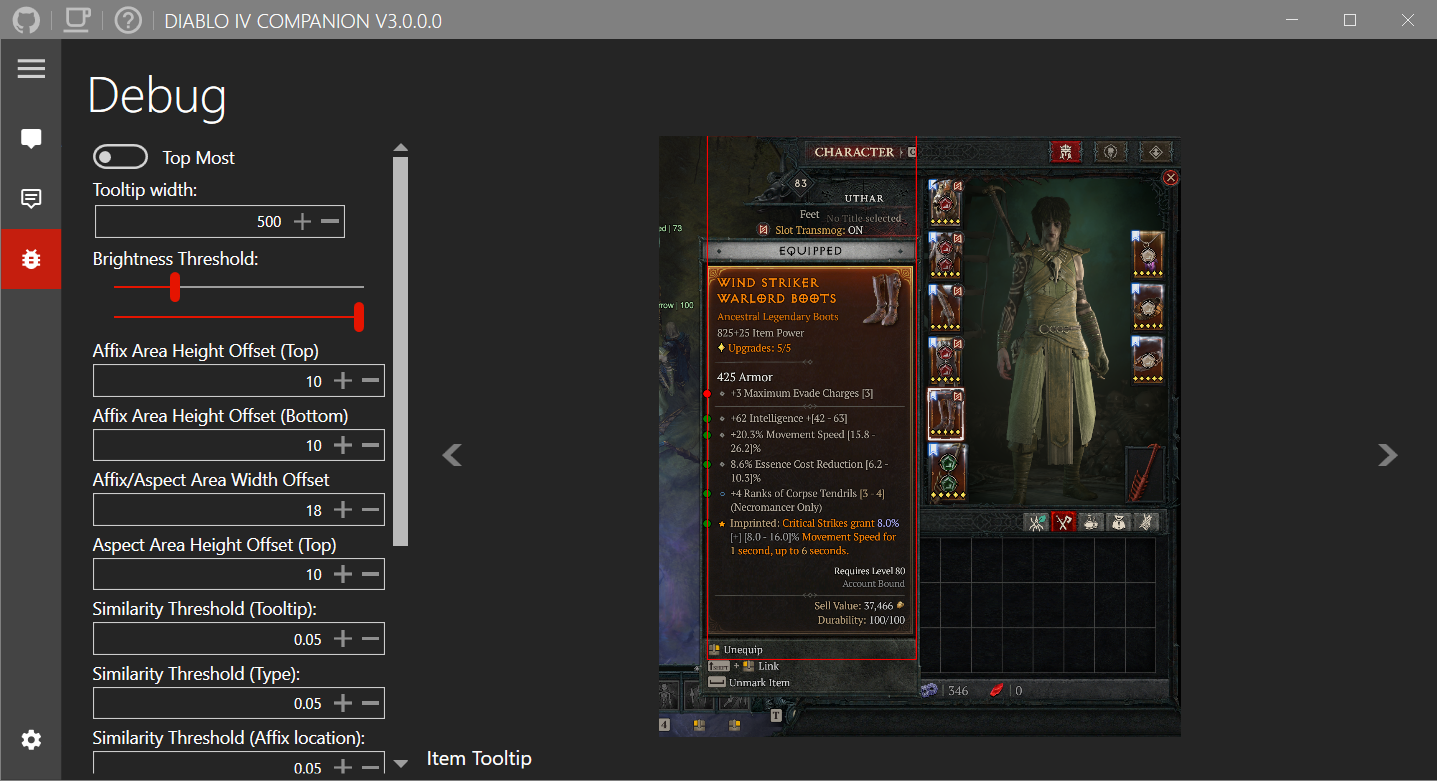
If the width does not match the tooltip you can adjust it using the Tooltip width setting.
- Next step is to collect all the other required images. You can use the debug tab to test those images as well.
You can share your created preset with others by sending me zip file containing all the images.
- Create a new GitHub issue and add your zip file as attachment.
- Or post the zip file on Discord.
Another option is to create a pull request. This requires the following steps:
- Add your images in: tree/master/downloads/systempresets/images
- Add your zip file in: tree/master/downloads/systempresets
- Update blob/master/downloads/systempresets/systempresets.json
- FileName: Name of the zip file.
- Resolution: In-game setting.
- Config: In-game setting.
- TooltipWidth: App setting. (See debug)
- BrightnessThreshold: App setting. (See debug)
- Affix Area Height Offset (Top): App setting. (See debug)
- Affix Area Height Offset (Bottom): App setting. (See debug)
- Affix/Aspect Area Width Offset: App setting. (See debug)
- Aspect Area Height Offset (Top): App setting. (See debug)
 |
 |
|---|