Azure AD Integration
If you manage your the users of your organization with Azure AD, you might want to integrate that with Fleet Manager. This way, it will be much easier to manage which members of your organization can access Fleet Manager.
Please NOTE that the Azure AD integration requires that your users all have usernames consisting of email addresses, and those email addresses must (primarily) belong to a domain, which you control!
Usually, your organization's email addresses will be on the form donny@biglebows.ski, walter@biglebows.ski, elduderino@biglebows.ski, etc, meaning that the domain biglebows.ski is controlled by you. Your Fleet Manager AD integration would then be configured to map all of the @biglebows.ski email addresses to YOUR Azure AD. Exceptions CAN be made though, so if you have certain guest accounts in your AD you want to include as well, they can be put on a special whitelist. The most common case should be something-something@yourdomain.com, though. 🙂
To start using your own Azure AD to authenticate users for Fleet Manager, you need to go through a few steps:
- Create an App Registration
- Configure redirect URI and token type
- Provide IDs
- Maybe some additional stuff
- Maybe add a client secret
This page will walk you through the steps.
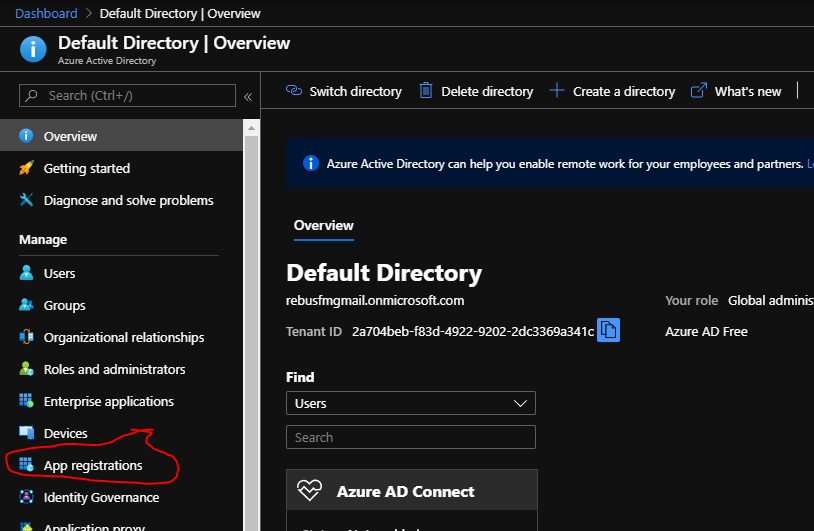
An "App Registration" in AD is an area dedicated to one specific application, which can then leverage AD to authenticate its users. It's natural then, that we start out by creating an App Registration for Fleet Manager:
You don't have to, but giving it a nice picture doesn't hurt. 🙂

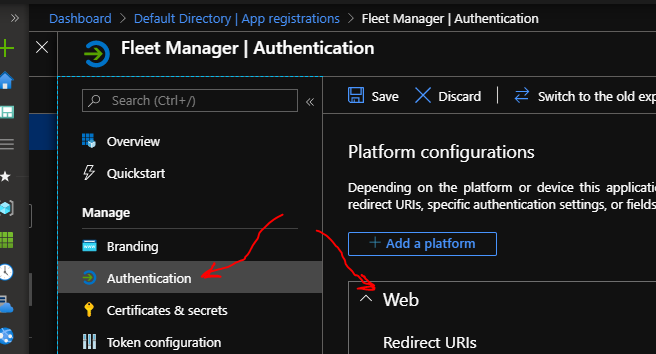
To guarantee that it's only possible for your AD to pass tokens to pre-approved applications, you need to configure a redirect URI in your App Registration.
You do that by going to the "Authentication" item and locate the "Web" portion of the area to the right.
If you're using the cloud-hosted Fleet Manager, the redirect URI should be
https://manager.rebus.fm/callback
If you're hosting your Fleet Manager locally, it should be whatever root URL you're punching into the browser to load it with /callback appended to it.
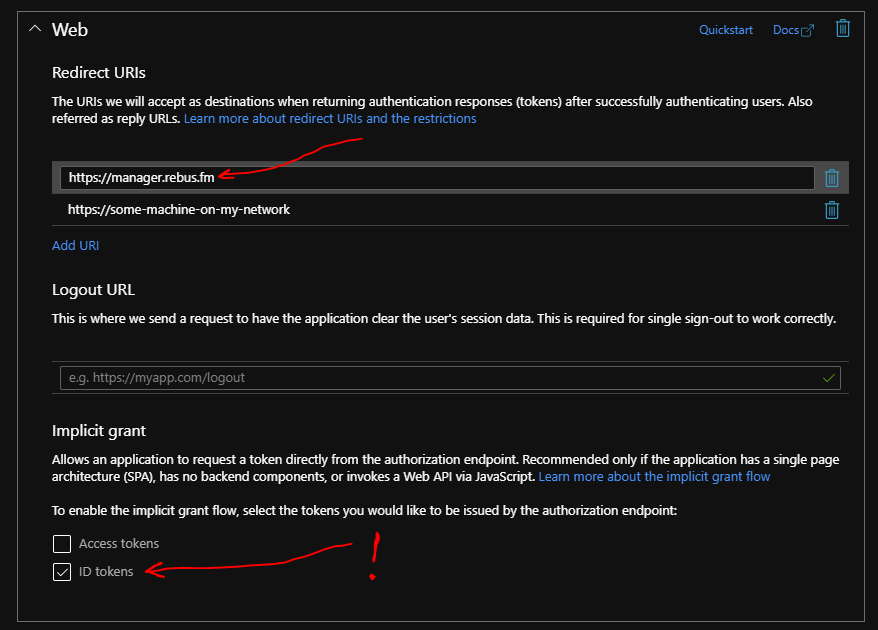
Moreover, as shown above, you must check the "ID tokens" options, which means that the Fleet Manager app (which is a SPA) gets the resulting token in its own JavaScript-hands, making it possible to pass it to the Fleet Manager backend.
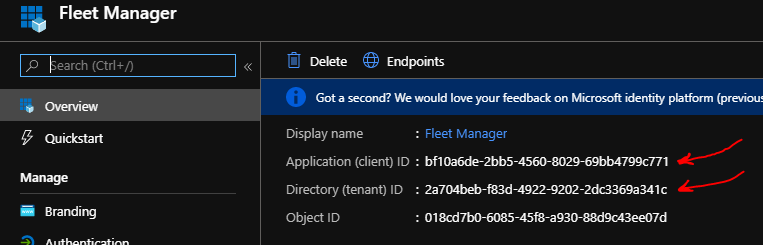
When it's done, Fleet Manager must be configured with appropriate Azure AD auth settings containing the following two IDs: Tenant ID and Client ID.
If you're on the cloud-hosted Fleet Manager, simply get in touch and we'll set it up for you. 🙂
If you're self-hosting, take a look here
When a user initially logs in using your Azure AD, there's no privileges assigned to the user. There's basically three ways to handle new users:
- Leave them without privileges
- Make user member of a default team
- Make user member of teams found by mapping Azure AD groups to Fleet Manager teams
Let's walk them through.
This way, the user will sign in the first time and be greeted by some empty overviews telling that the user doesn't have access to anything.
After a user has signed in the first time, an already existing team administrator can then invite the user into one or more teams.
When the Azure AD integration is initially set up, we can agree that newly created users are automatically added as members of a specific team. We just need to agree beforehand which team that is.
The most advanced option is that we agree beforehand which Azure AD groups should be mapped to which teams. This also requires a little bit of extra setup on your part in Azure AD.
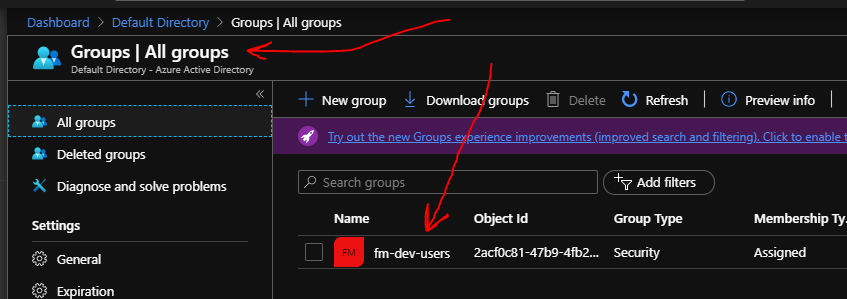
First, you'll need to decide on which groups to create to represent team memberships in Fleet Manager. In this case, I have created a group called "fm-dev-users".
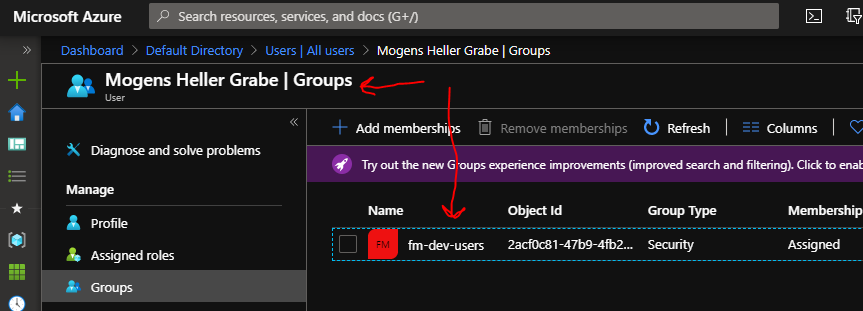
and then I have made myself a member of that group:
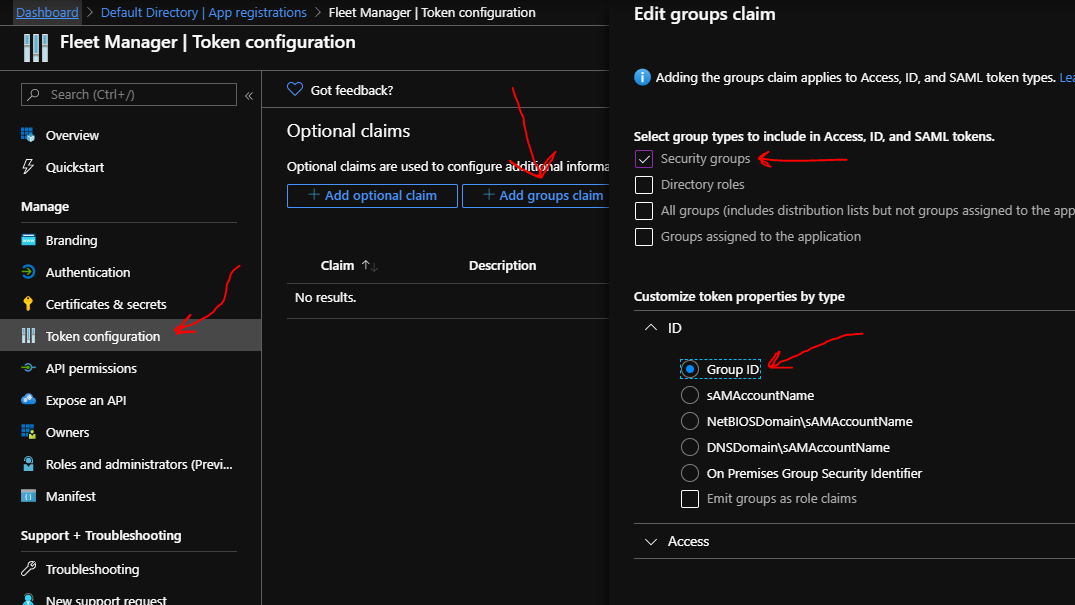
To make it possible for Fleet Manager to learn about the group memberships, you'll need to go to your App Registration and find the "Token configuration" item, and then configure it to provide group memberships as claims passed to Fleet Manager.
In the right side of the screen you click "Add groups claim" and put a checkmark next to "Security groups", and then you select that the group should be passed to Fleet Manager in the shape of the "Group ID".
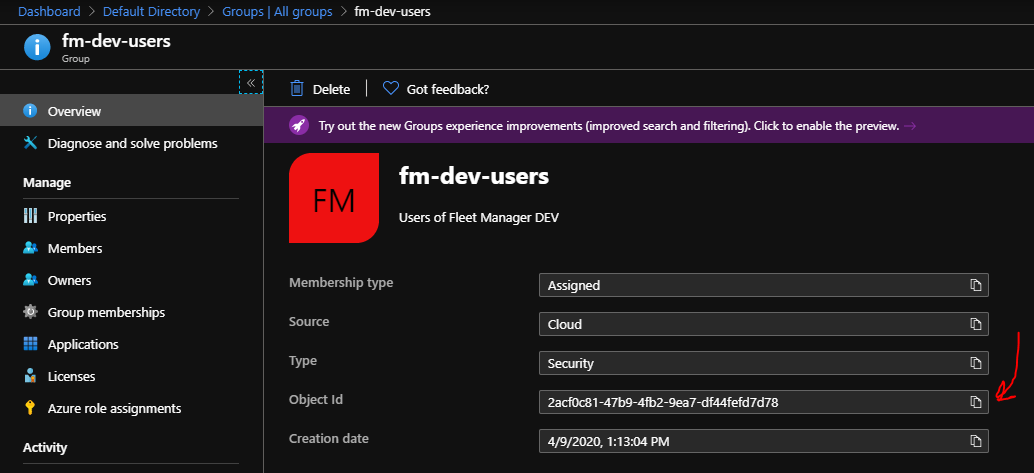
Lastly, you'll need to provide Rebus FM with information about which Azure AD group IDs should map to which Fleet Manager team. Finding the group IDs is easy enough, just go to each group and copy the "Object Id":
If you use Fleet Manager's ability to map Azure AD group memberships to Fleet Manager teams and roles, and you have users that belong to 6 or more AD groups, then it's necessary to configure Fleet Manager with a client secret.
The reason is that Azure AD will not give Fleet Manager the user's group membership claims when there's 6 or more memberships, it will simple give it one claim saying that "has_groups=true" (e.g. check this StackOverflow question).
To figure out which groups a logged-in user belongs to, Fleet Manager can query the Graph API to retrieve the group IDs – it just needs a client secret to do so (requires the permission/scope "User.Read" under Microsoft Graph on the API Permissions tab).
To configure Fleet Manager with your Azure AD app, add an "AzureAd" section to the configuration:
 "AzureAd": {
   "Domain": "rebus.fm",
   "TenantId": "0fc5adc7-f217-46e0-928d-f82178416075",
   "ClientId": "491ddbf0-e8a7-48e7-9a42-678bb3292eb3",
   "ClientSecret": "DwO8Q~vyfefj84f489384jf8439jigjrioejigroi",
   "AdditionalEmails": "rebusfm@gmail.com",
   "Roles": {
     "MemberGroupId": "246d5c36-fc01-46aa-84a4-7e50a2643752",
     "AdminGroupId": "97508eed-5235-47f2-ba5b-6c7e5a12207b"
   }
}- Domain: Configures which email domain to match with these particular Azure AD settings. Can be left empty if you don't want to automatically let users from your domain log in.
- TenantId: This is the "Directory (tenant) ID" from the app - it will be the same for all apps in your AD.
- ClientId: This is the "Application (client) ID" from the app - this identifies the app registration.
- ClientSecret: If your users have more than 6 roles, then Fleet Manager needs the client secret to be able to query Azure AD for all if the roles. The scope "User.Read" is required to do this.
- AdditionalEmails: List of emails (separated by ;) of additional logins that must be matched to these Azure AD settings. Can be used if you want to allow certain guest accounts to log in as well.
- Roles (optional):
- MemberGroupId: If you would like membership of a specific Azure AD group to grant access to Fleet Manager, specify its ID here(*)
- AdminGroupId: If you would like membership of a specific Azure AD group to grant ADMIN access to Fleet Manager, specify its ID here(*)
(*) Please note that the groups functionality requires that Fleet Manager receives the group IDs as a claim when the user is logged in. If a user has more than 6 group membership claims, then Azure AD does not deliver them directly, and Fleet Manager must query Microsoft Graph for them, which requires the presence of a client secret. See here for more information.