1. Setup Guide
To use this package you would need to have access to a Salesforce org with at least 1 Pardot Business Unit already configured. Email Validator for Pardot is a Marketing App Extension which uses the new External Action (Action Type) and External Activity (Activity Type) features of Pardot:
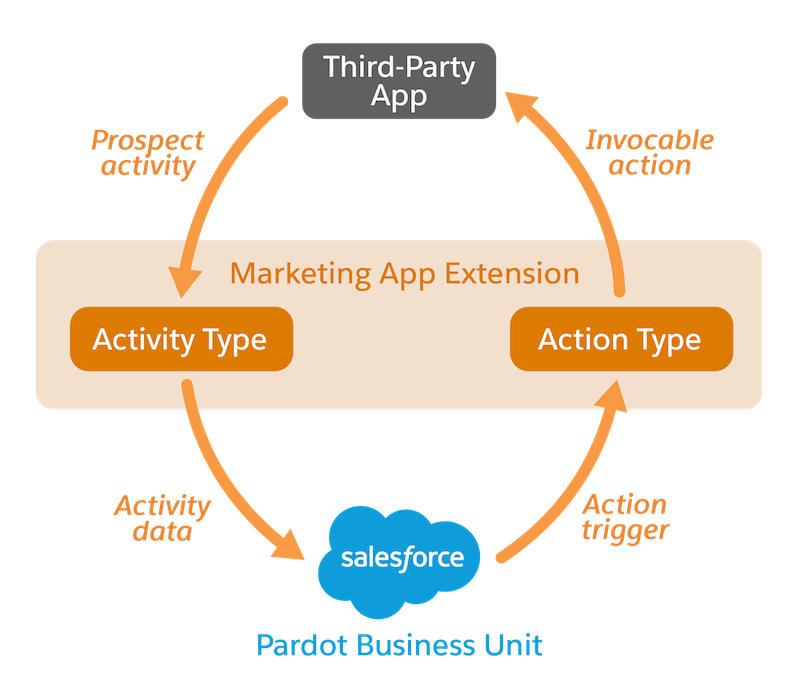
Learn more about Marketing App Extensions here: https://help.salesforce.com/s/articleView?id=sf.pardot_extensions_overview.htm&type=5
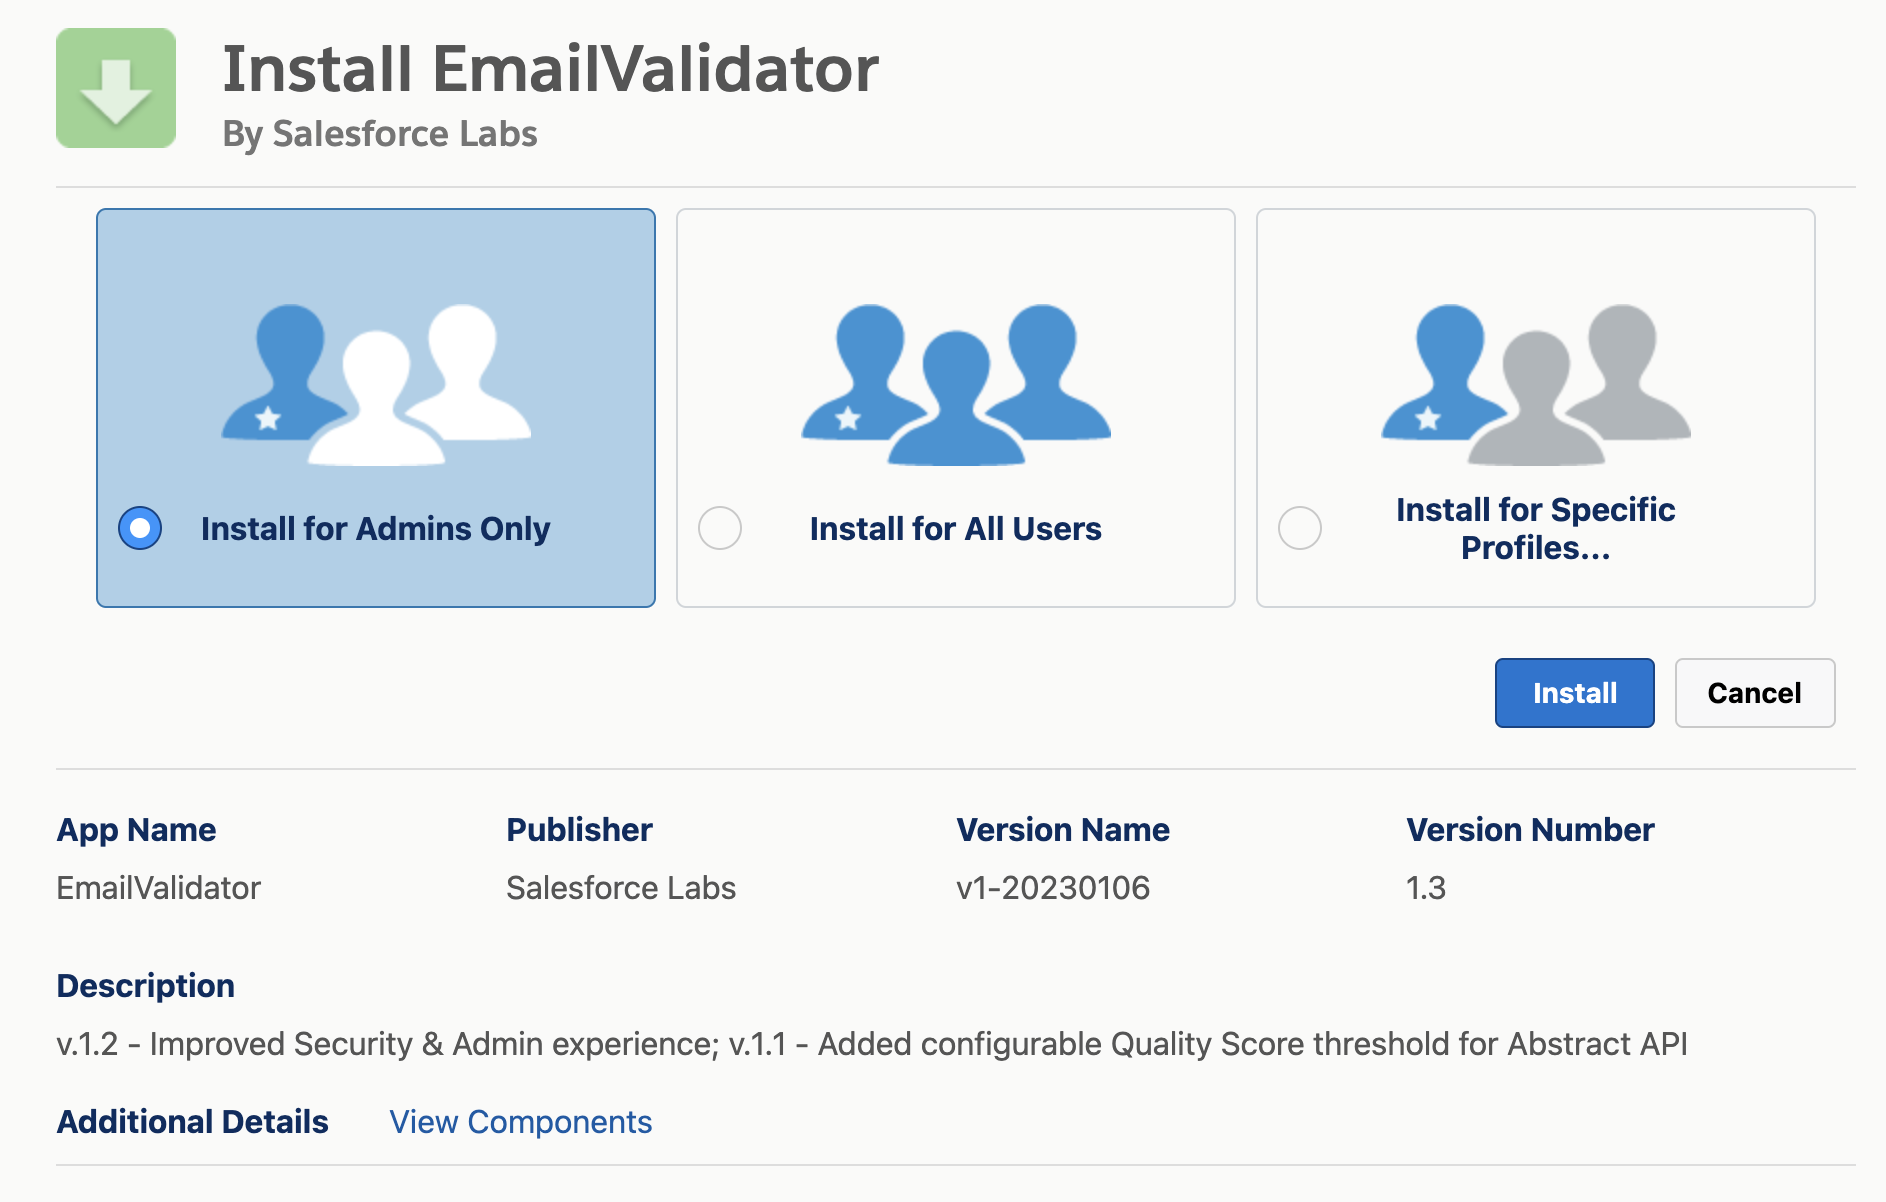
The package can be installed from the following URL: https://login.salesforce.com/packaging/installPackage.apexp?p0=04t7S000000HOPi&isdtp=p1
- Select “Install for Admins Only” and click on "Install"
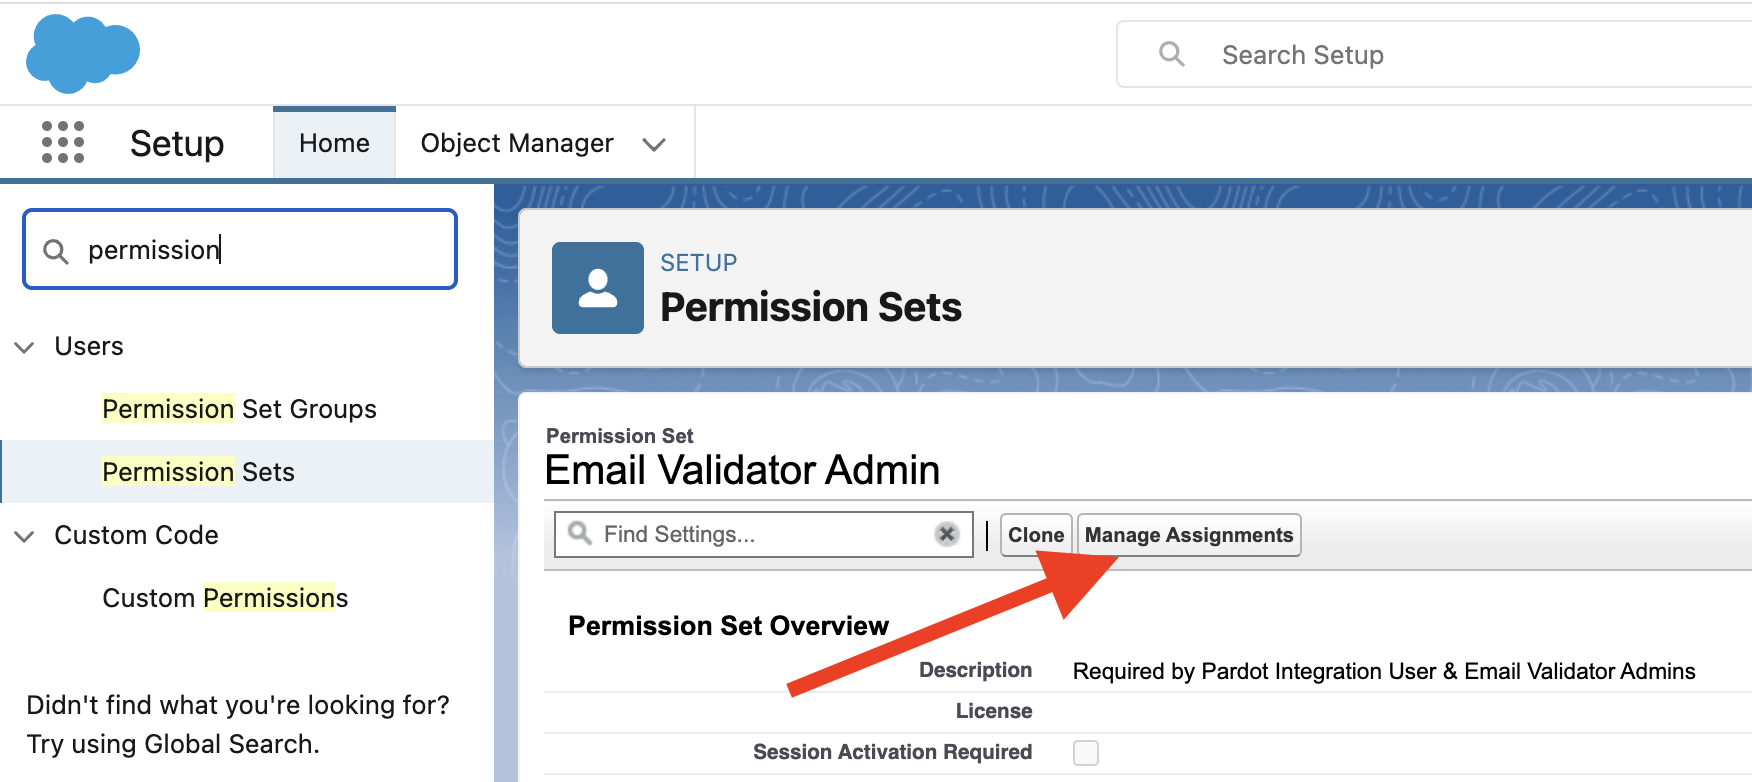
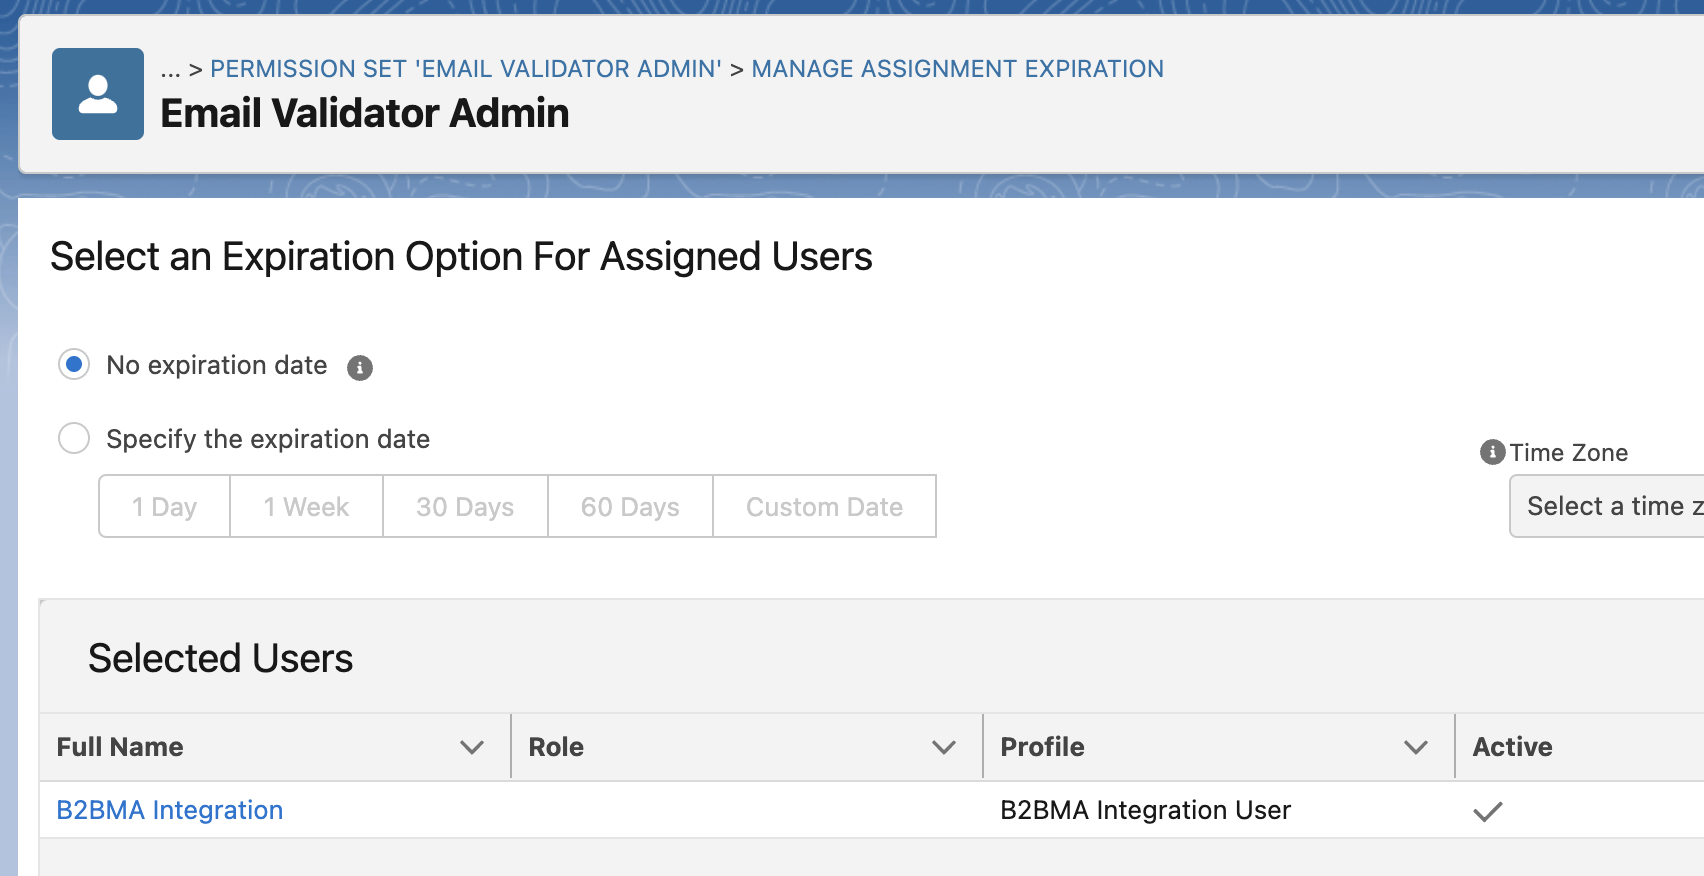
From Salesforce Setup, open the Permission Set menu item.
Find and assign the Permission Set “Email Validator Admin” to “B2BMA Integration” User and any other user needing access to Email Validator Setup & Email Validator Logs:
To use Email Validator, you need to have at least an API key provided by one of the supported services. The steps are always the following:
- Obtain an API key
- Save the API key on the Email Validator Setup page
- Activate the relevant Action Type in the Email Validator Marketing App Extension
- Create the related Activity Type
- Associate Pardot Business Units to the Marketing App Extension
Follow the configuration of one of more services before continuing with the setup:
To be able to write back the email validation results into Pardot (as External Activities), we need to create a Salesforce Connected App as well as a Named Credential
- Create a Self-signed certificate following the instructions from https://help.salesforce.com/s/articleView?id=sf.security_keys_creating.htm&type=5
- Download the Certificate
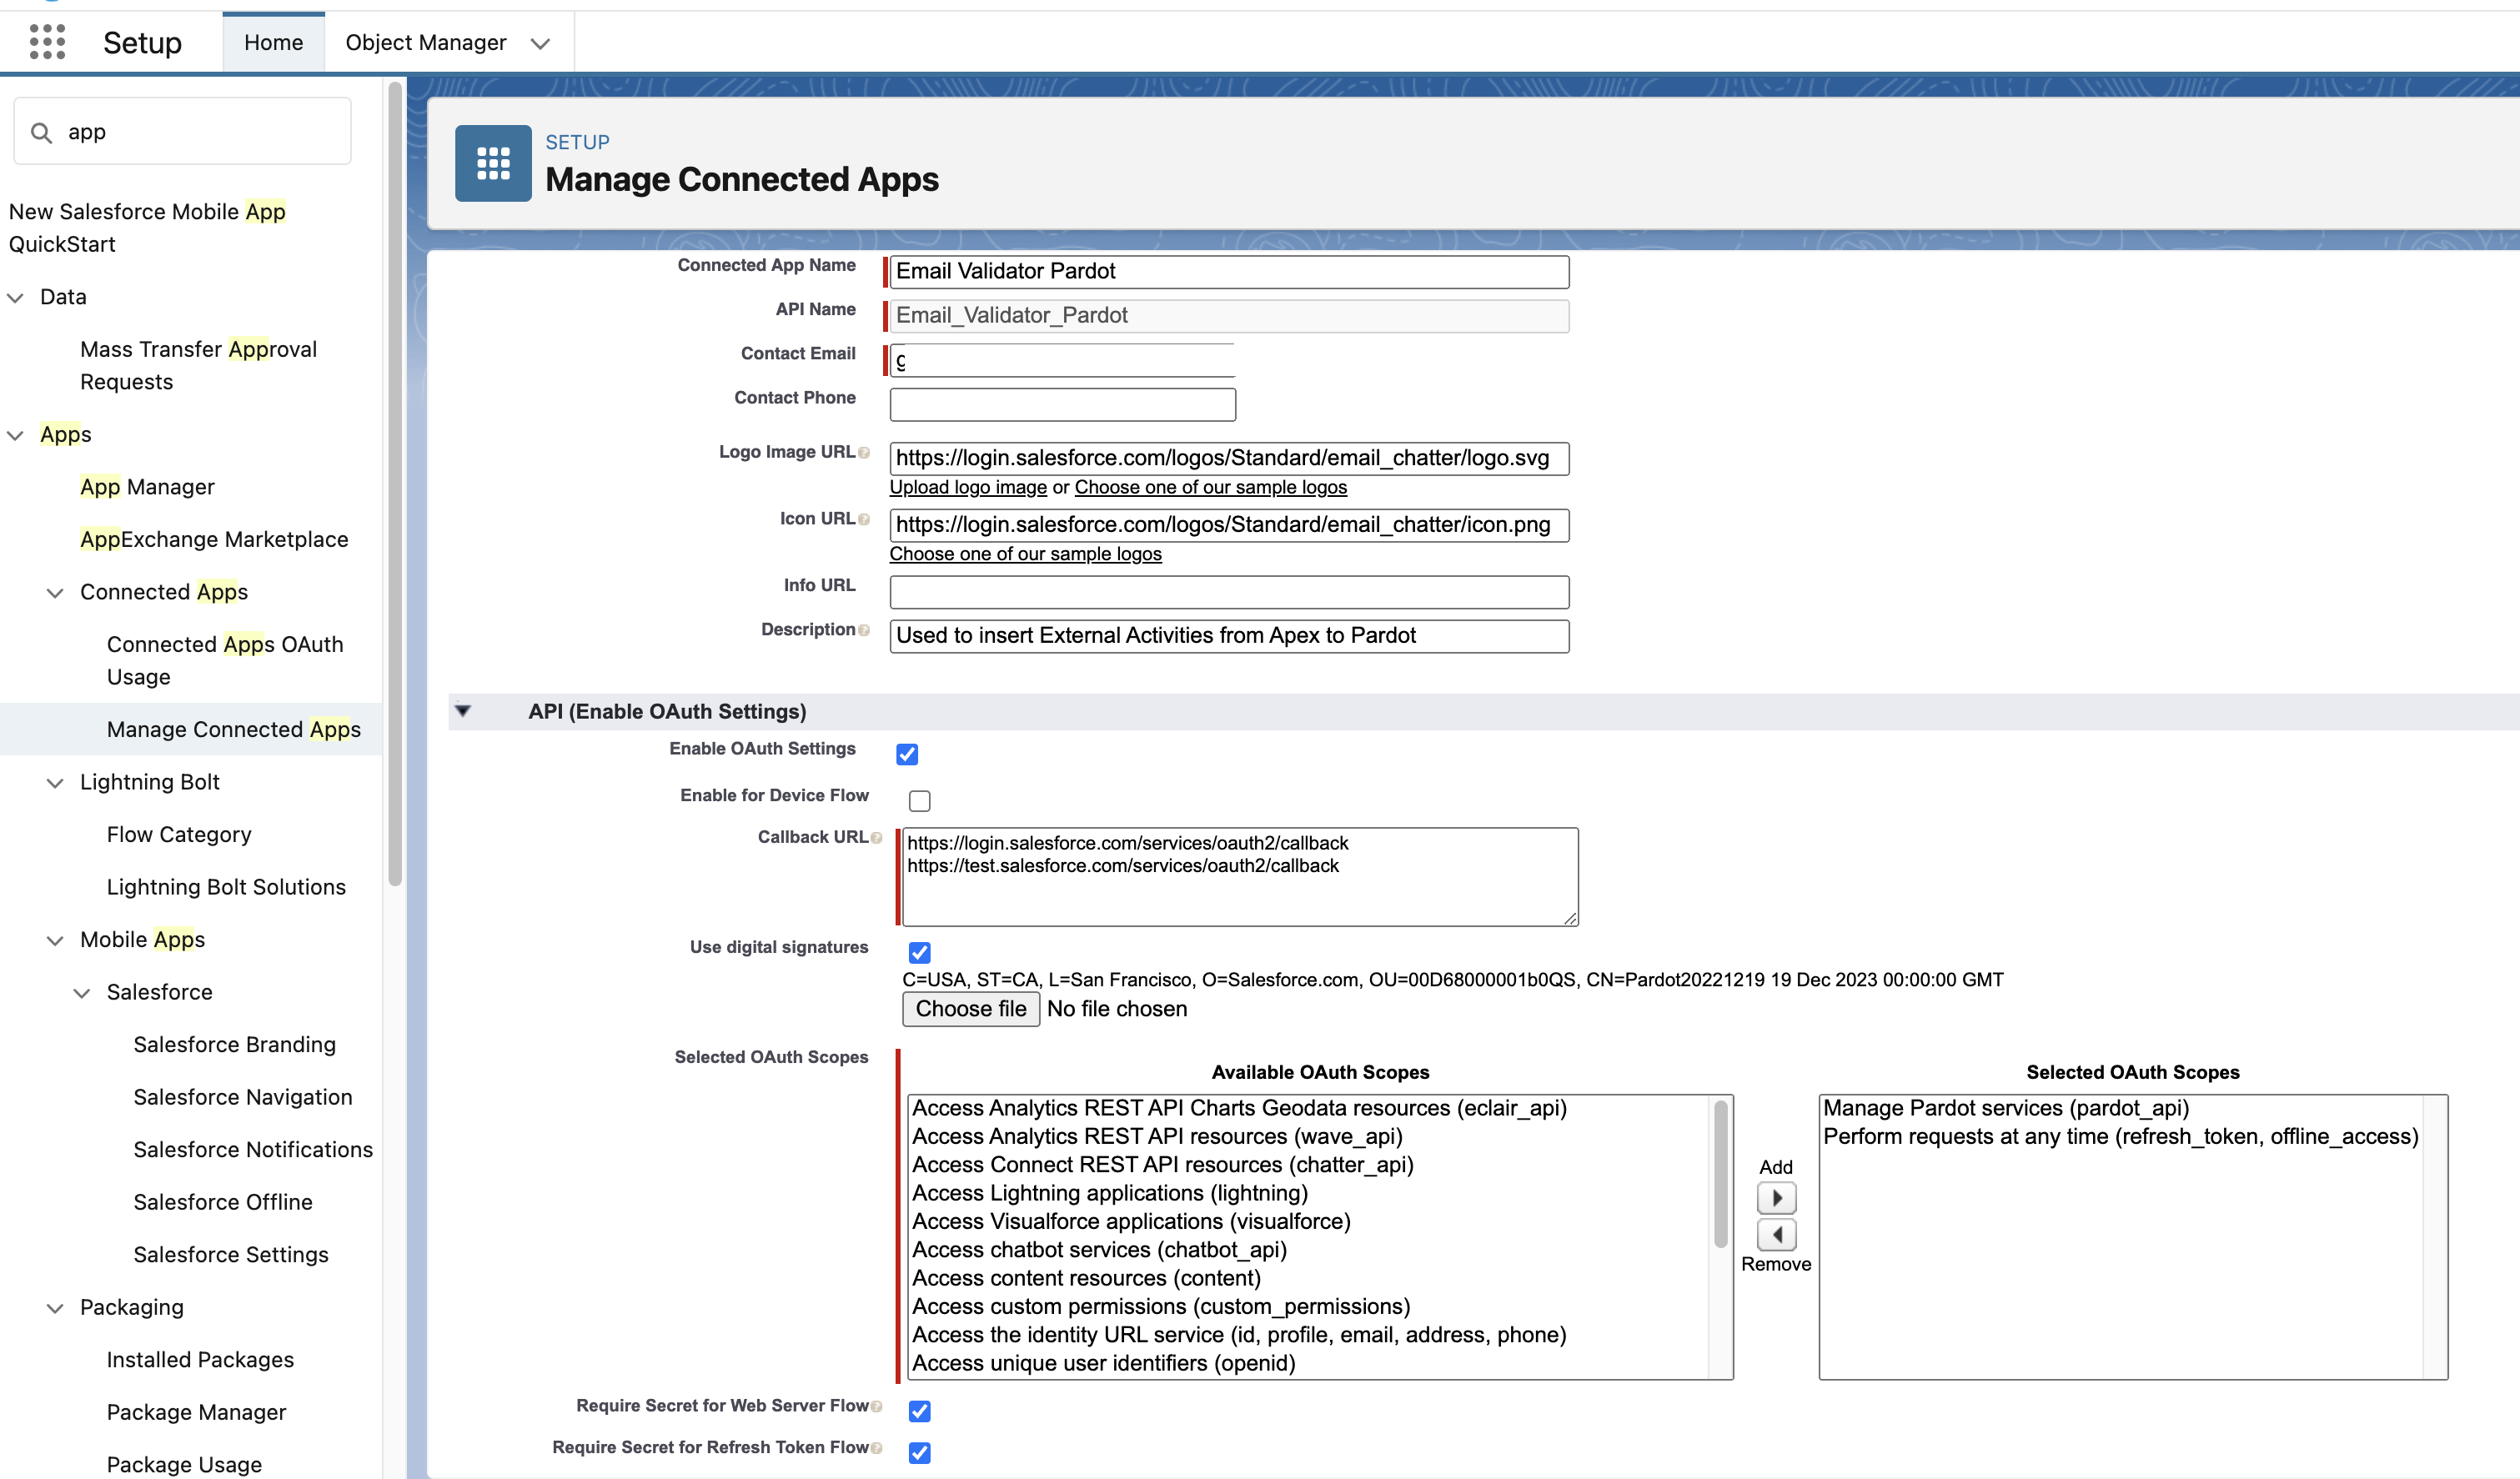
- Create a Connected App with the following settings:
- Setup > App Manager > New Connected App
- Choose a name for the app (e.g. “Email Validator Pardot“)
- Check “Enable OAuth Settings”
- Under “Callback URL” paste the following URLs:
https://login.salesforce.com/services/oauth2/callback
https://test.salesforce.com/services/oauth2/callback - Check “Use digital signatures” and upload the certificate created above
- Add the following OAuth Scopes to the Connected App:
Manage Pardot services (pardot_api)
Perform requests at any time (refresh_token, offline_access) - Verify that the following checkboxes are checked:
Require Secret for Web Server Flow
Require Secret for Refresh Token Flow - Click on Save
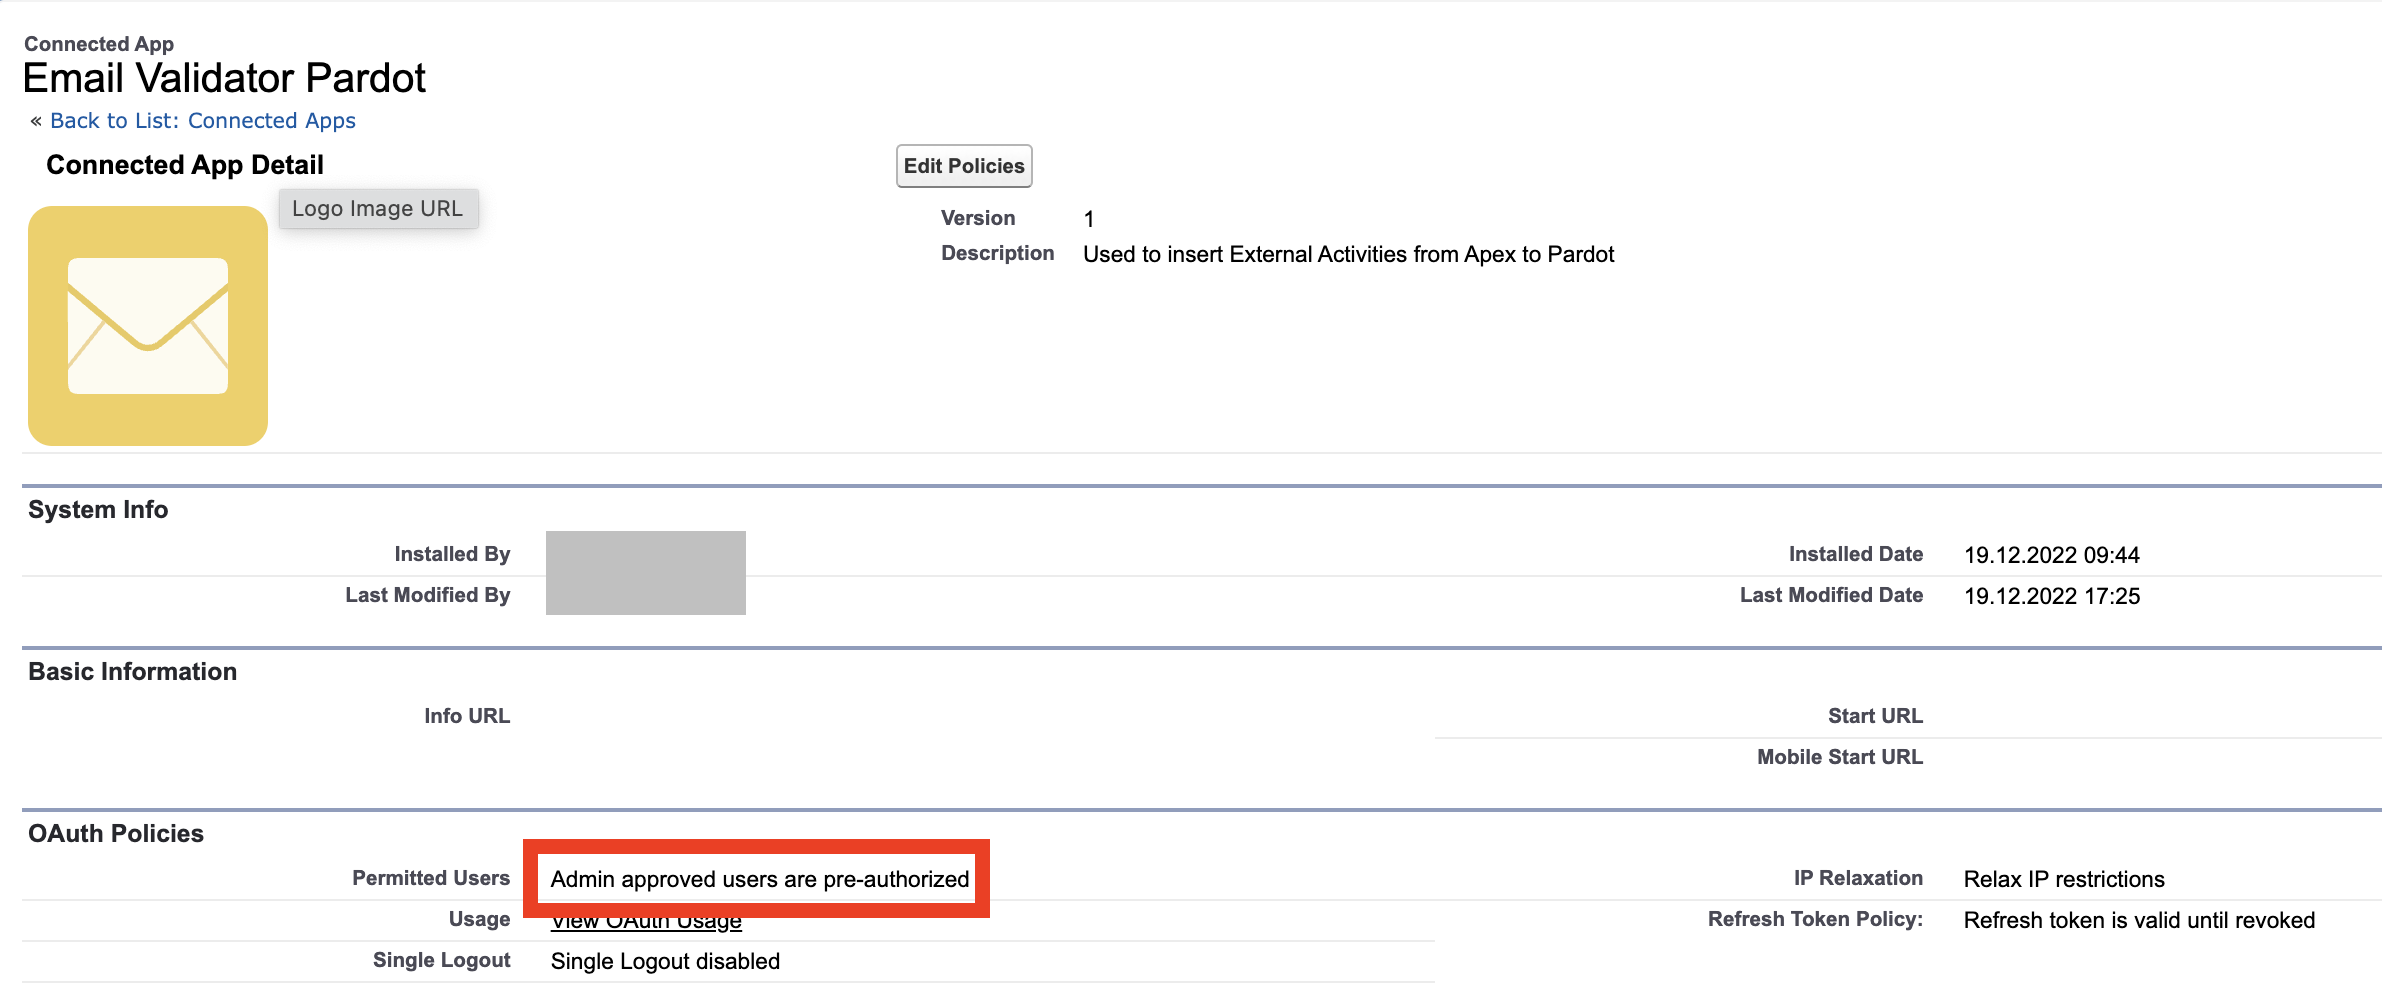
- From the Connected App page, click on Manage and Edit Policies to make sure you select "Admin approved users are pre-authorized" in the OAuth Policies > Permitted Users and scroll down to give access to all relevant Profiles or Permission Sets.
Let's now create a Named Credential to connect to Pardot APIs and update Email Validator settings to use that.
9. Navigate to Setup > Security > Named Credentials
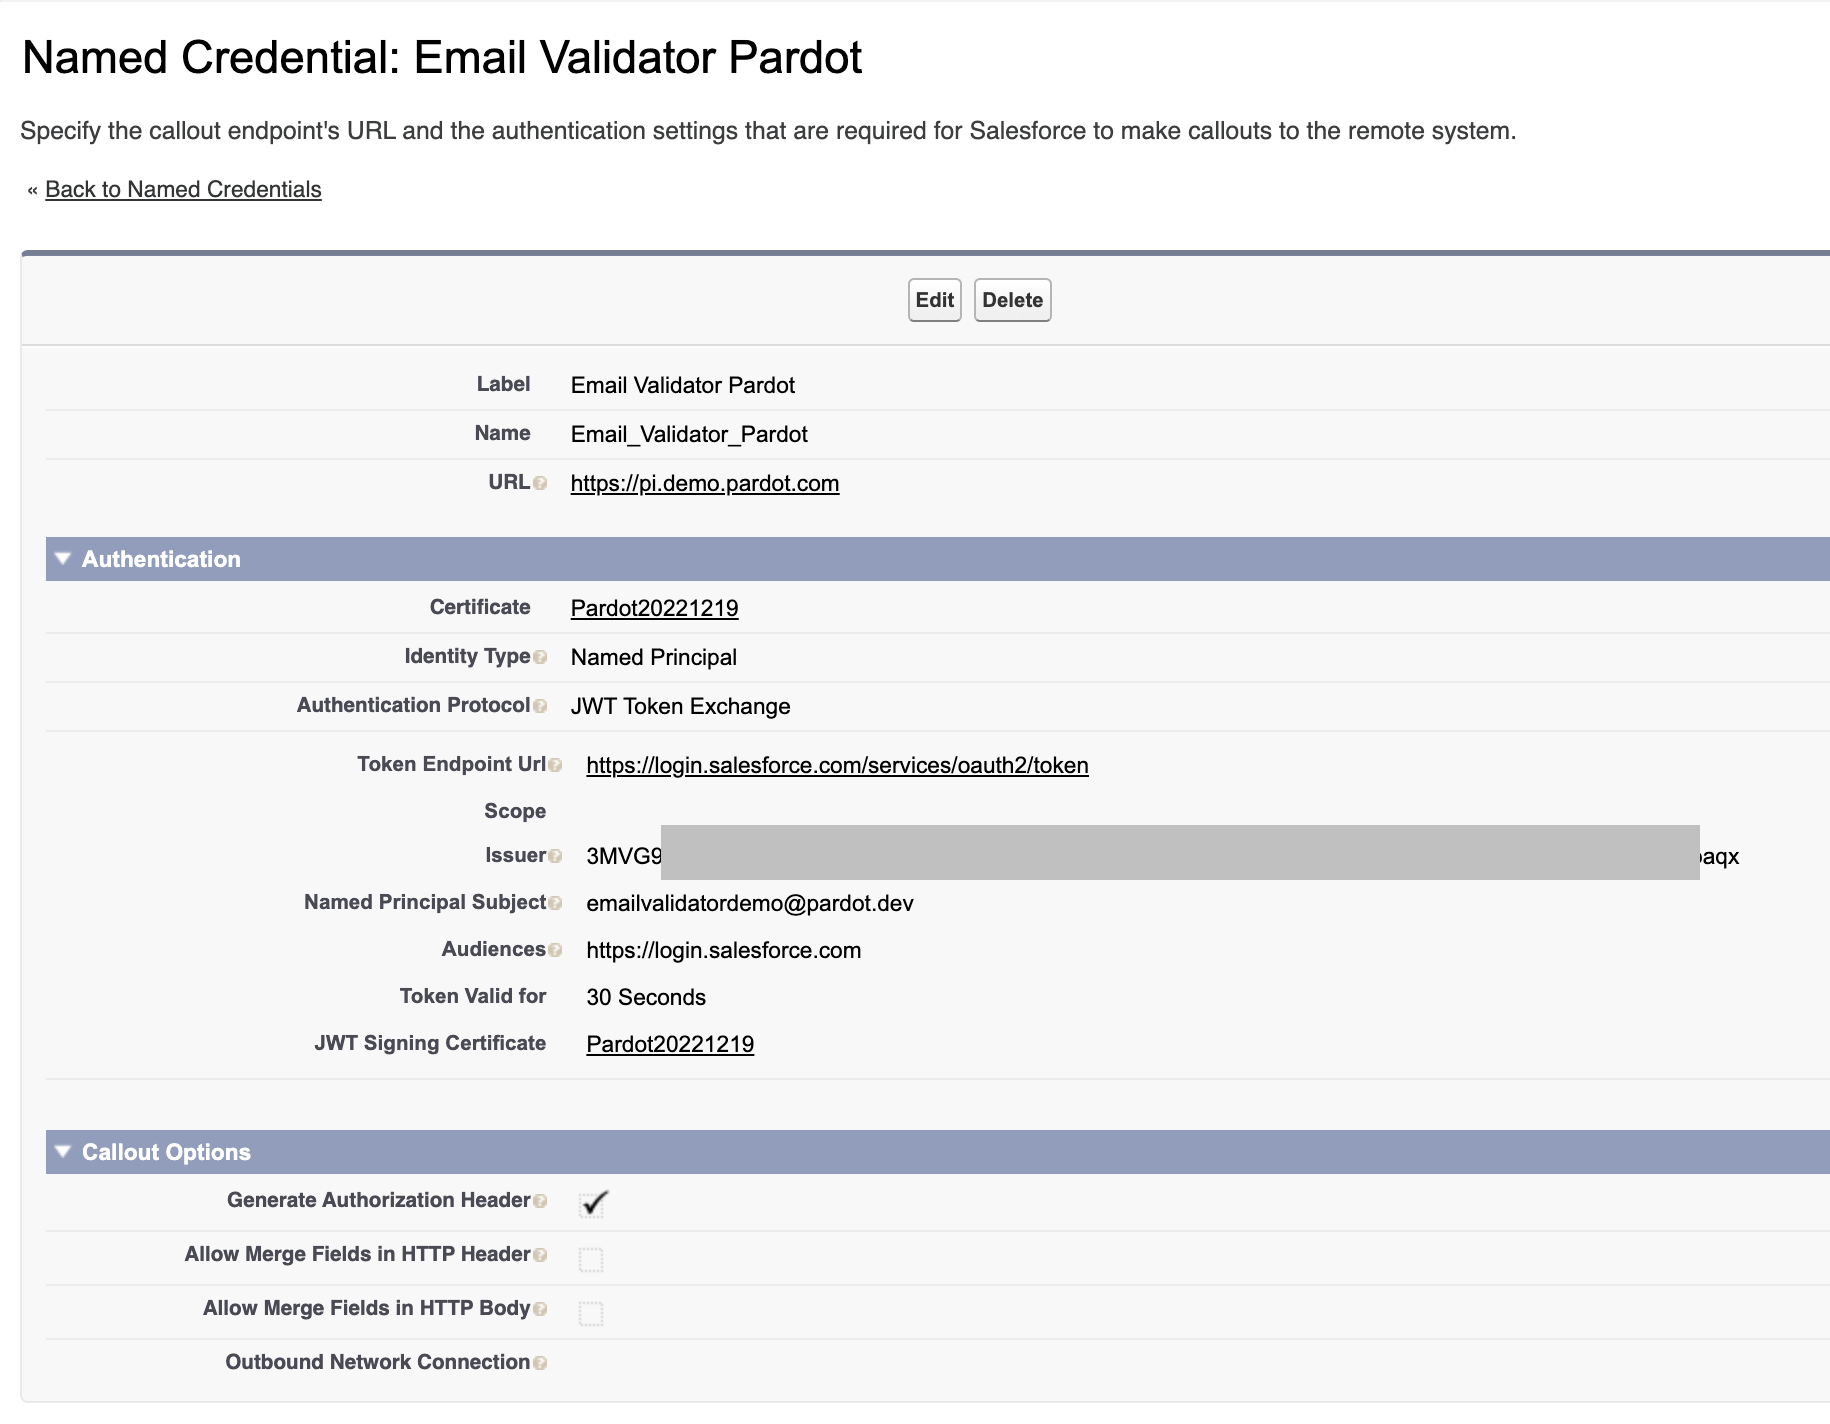
- Create a New Legacy Named Credential with the following parameters:
Label: Email Validator Pardot
Name: Email_Validator_Pardot
Url: https://pi.pardot.com (or https://pi.demo.pardot.com if you're using a Demo org)
Certificate: select the self-signed certificate created earlier
Identity Type: Named Principal
Authentication Protocol: JWT Token Exchange
Token Endpoint Url: https://login.salesforce.com/services/oauth2/token
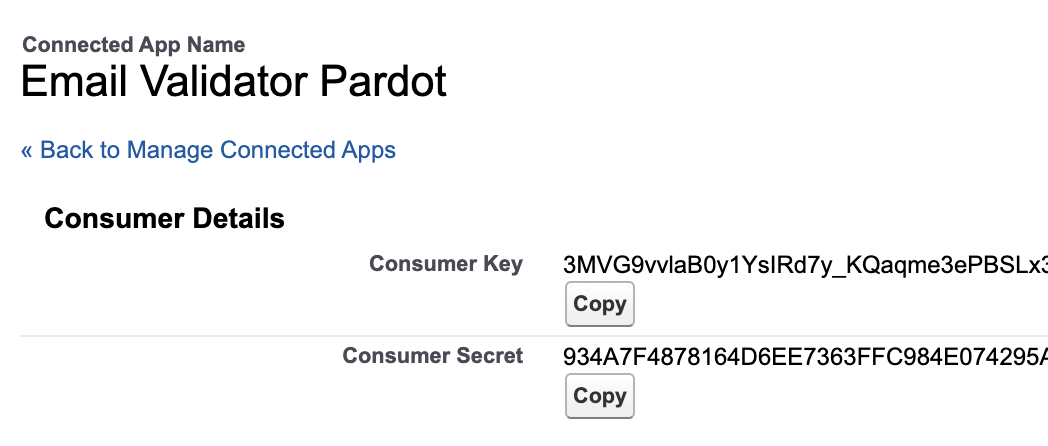
Issuer: copy the full Consumer Key from the Connected App created above
Named Principal Subject: your username in the org
Audiences: https://login.salesforce.com
Token Valid for: 30 Seconds
JWT Signing Certificate: select the self-signed certificate created earlier
It should look like this at the end:
Open the Email Validator Setup tab from the "Email Validator for Pardot" App.

This page lets you configure:
- Pardot Named Credential (this is the API Name of the named credential we just created, for example, Email_Validator_Pardot)
- External Activity return values (could be any text, we recommend a short one, for example, Pass for good addresses & Warn for potential fake prospects or undeliverable emails)
- API Keys (and other custom settings) for the different Email Validation services (need to choose at least one of these, a green checkmark will let you know if the API key value has been stored).
NOTE: For security reasons API keys can only be overwritten and they're never displayed.
You're good to go!
Follow the User Guide to create a test Engagement Program and test the solution.
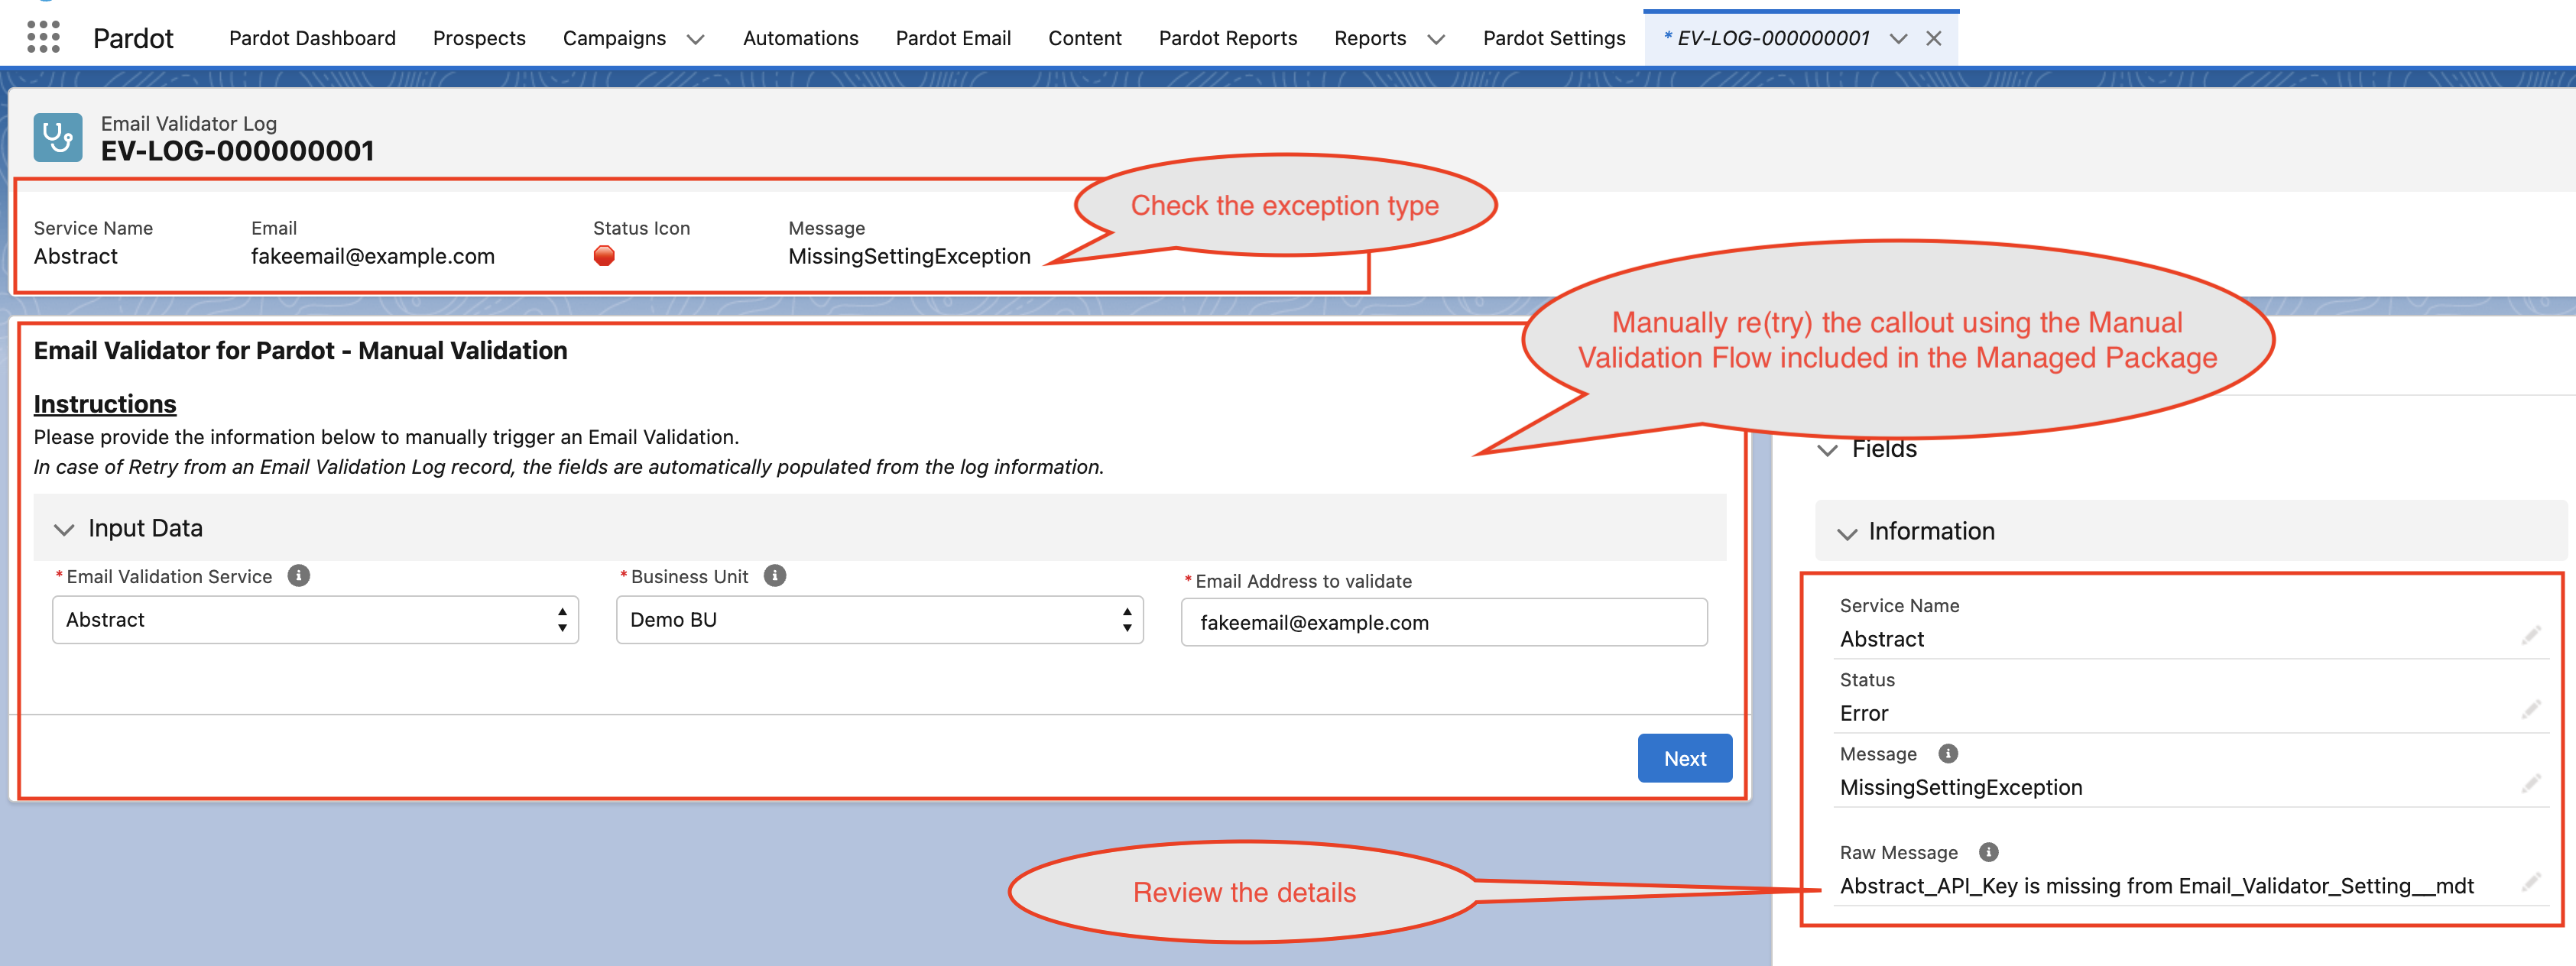
The easiest way to debug Email Validator in case the solution doesn't seem to work is by using the "Email Validator Log" object: