Roar configuration
The Roar supercomputer is Penn State's high-performance research cloud. Anyone who has a Penn State account can access Roar upon request. Here, we will cover a basic configuration of Roar for further data processing and analysis.
For more information, please visit the Roar website.
-
Go to https://www.icds.psu.edu/computing-services/roar-user-guide/
-
Click the "Account Request" box at the Top-right side of the page
-
If you have not activated Two-Factor authentication, you need to set up with Duo (https://accounts.psu.edu/2fa)
-
Click "Sign up for your account"
-
Sign in with your PSU account
-
Fill out the form
- Affiliation
- University Role
- Sponsor Account (Please put your PI's information)
- ICDS Linux Clusters (Roar Collab is a new platform that eventually transfers Roar resources in the future; you can mark both of them, but we will use "Roar" still)
-
Click "Submit"
-
Wait 1-2 business days and you will get an email to be approved
There are a few different ways to access Roar. You can connect via i) ssh, ii) interactive desktop, iii) ACI Shell Access.
Please note that we are connecting the "submission portal," the batch portion of Roar. You CANNOT use the full resources of computation power if you run your job from the submission portal, and it is highly not recommended. In the later part of the instruction, we will also cover how to submit your job using the "qsub" command. You can still navigate your files, and delete and organize files.
For Mac and Linux
- Open 'terminal'
- Type the following command
ssh <your penn state account(i.e., abc1234)>@submit.aci.ics.psu.edu
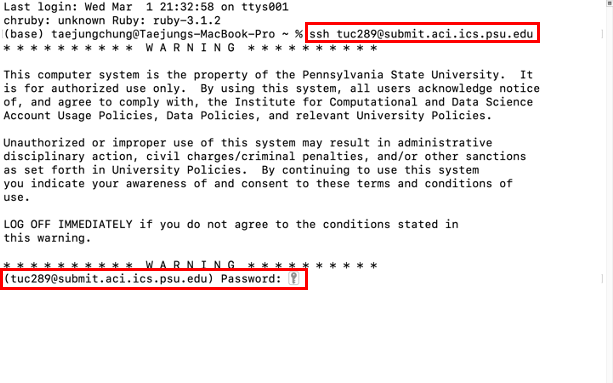
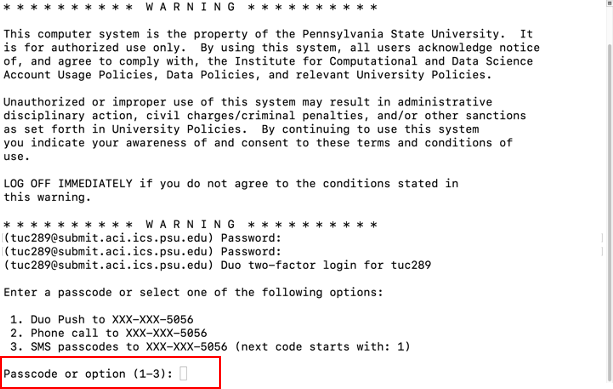
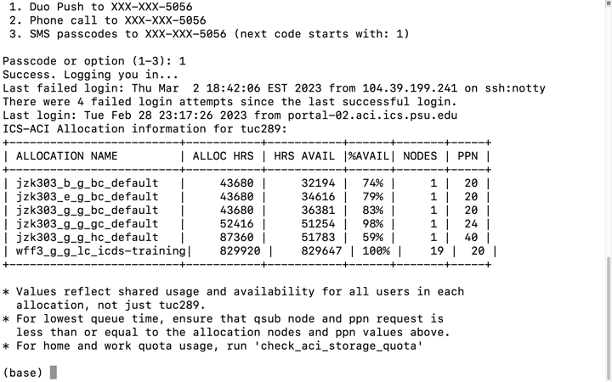
- Once you run this command, the system will ask you for your Penn State account password 2-factor authentication via Duo app. Once authentication is completed, you should be connected to Roar.
NOTE: You WILL NOT see anything typed even if you are typing your password, don't worry and keep going and press "enter"
- You are good to go!
For Windows
For Windows users, you need external programs to connect SSH (Putty). Alternatively, you can install and use Ubuntu on your machine. If you have ubuntu installed from the app store, you can follow the instruction above as Linux OS.
- Install and open the Putty
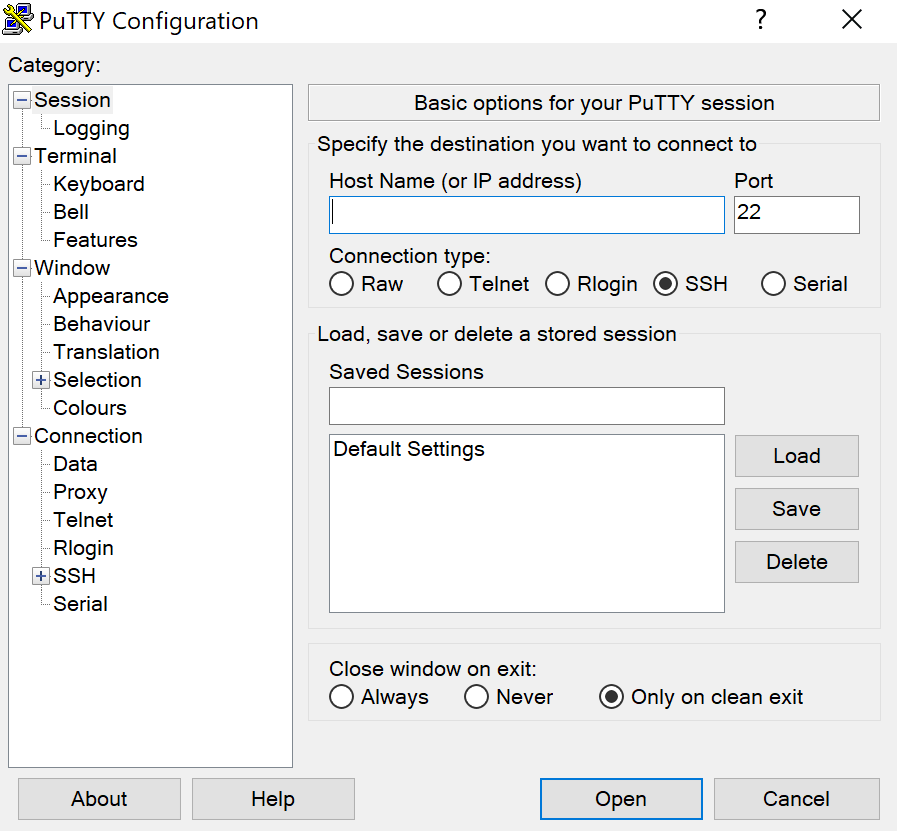
- You can log in to the Roar by using the below -
- Host Name - submit.aci.ics.psu.edu
- Connection type - SSH
- Username (login as) - your PSU username (i.e., abc1234)
- Password - your PSU password
- The system will ask you for 2-factor authentication via the Duo app once you open the windows. Once authentication is completed, you should be connected to Roar.
You can connect to the submission portal via web-based shell access. It is very similar to SSH, so consider using this approach if you have a problem connecting via SSH.
- Go to https://portal2.aci.ics.psu.edu
- Click "Clusters" from the top menu, then click ">_ACI Shell Access"

- You will see a very similar screen than you connect via SSH. Once you open the windows, the system will ask you for 2-factor authentication via the Duo app. Once authentication is completed, you should be connected to Roar.

Unlike SSH or shell access to submit.aci.ics.psu.edu, Opening an interactive desktop means you are requesting resources from the Roar. You can run your code, get the results, and monitor your job. It is a "virtual" computer you are borrowing from the university.
- Go to https://portal2.aci.ics.psu.edu
- Click "Interactive Apps" from the top menu, then click "ACI RHEL7 Interactive Desktop."
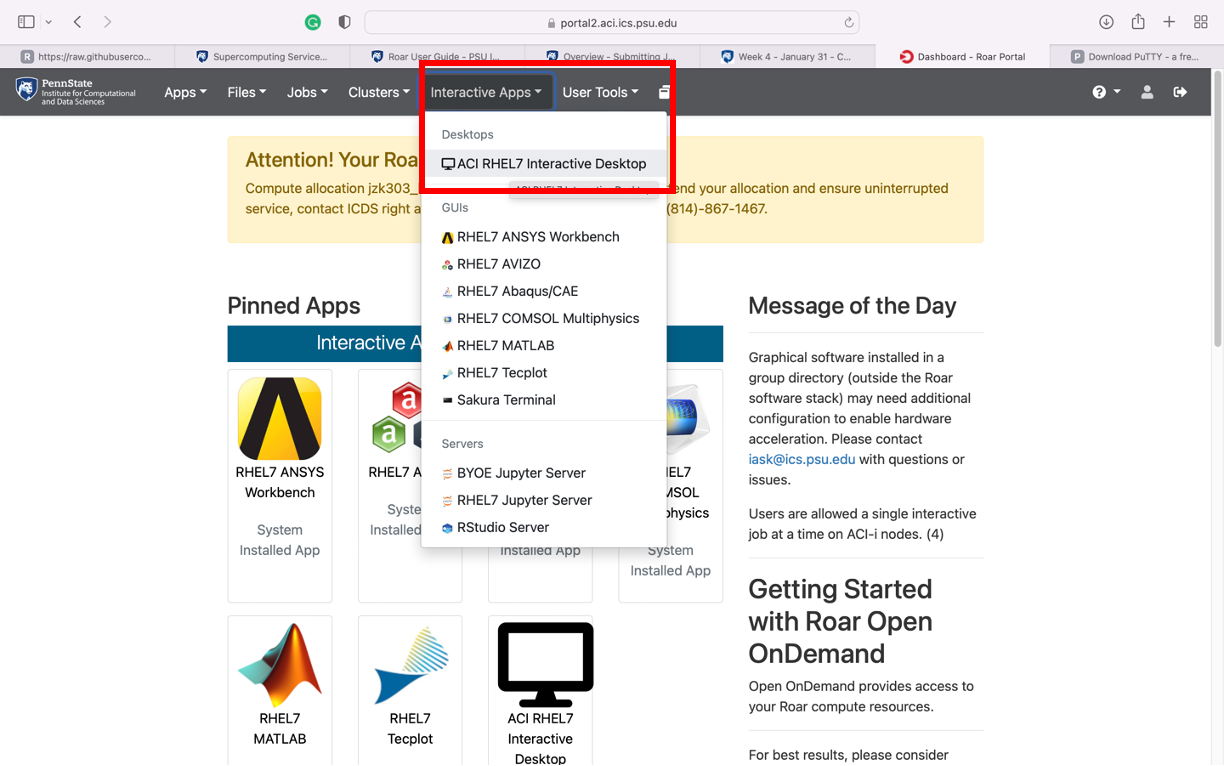
- You can launch an interactive desktop using the below configurations -
- Desktop Environment - MATE Gnome2
- Allocation - Open (OR choose paid allocation if you have any)
- Number of hours - You can use up to 48 hours if using Open allocation, and more time can be used if you use paid allocation.
- Node type - ACI-i is only available for open account submissions. Other node types can be used too.

You can also launch Rstudio Server from the interactive apps menu.
- Go to https://portal2.aci.ics.psu.edu
- Click "Interactive Apps" on the top menu bar
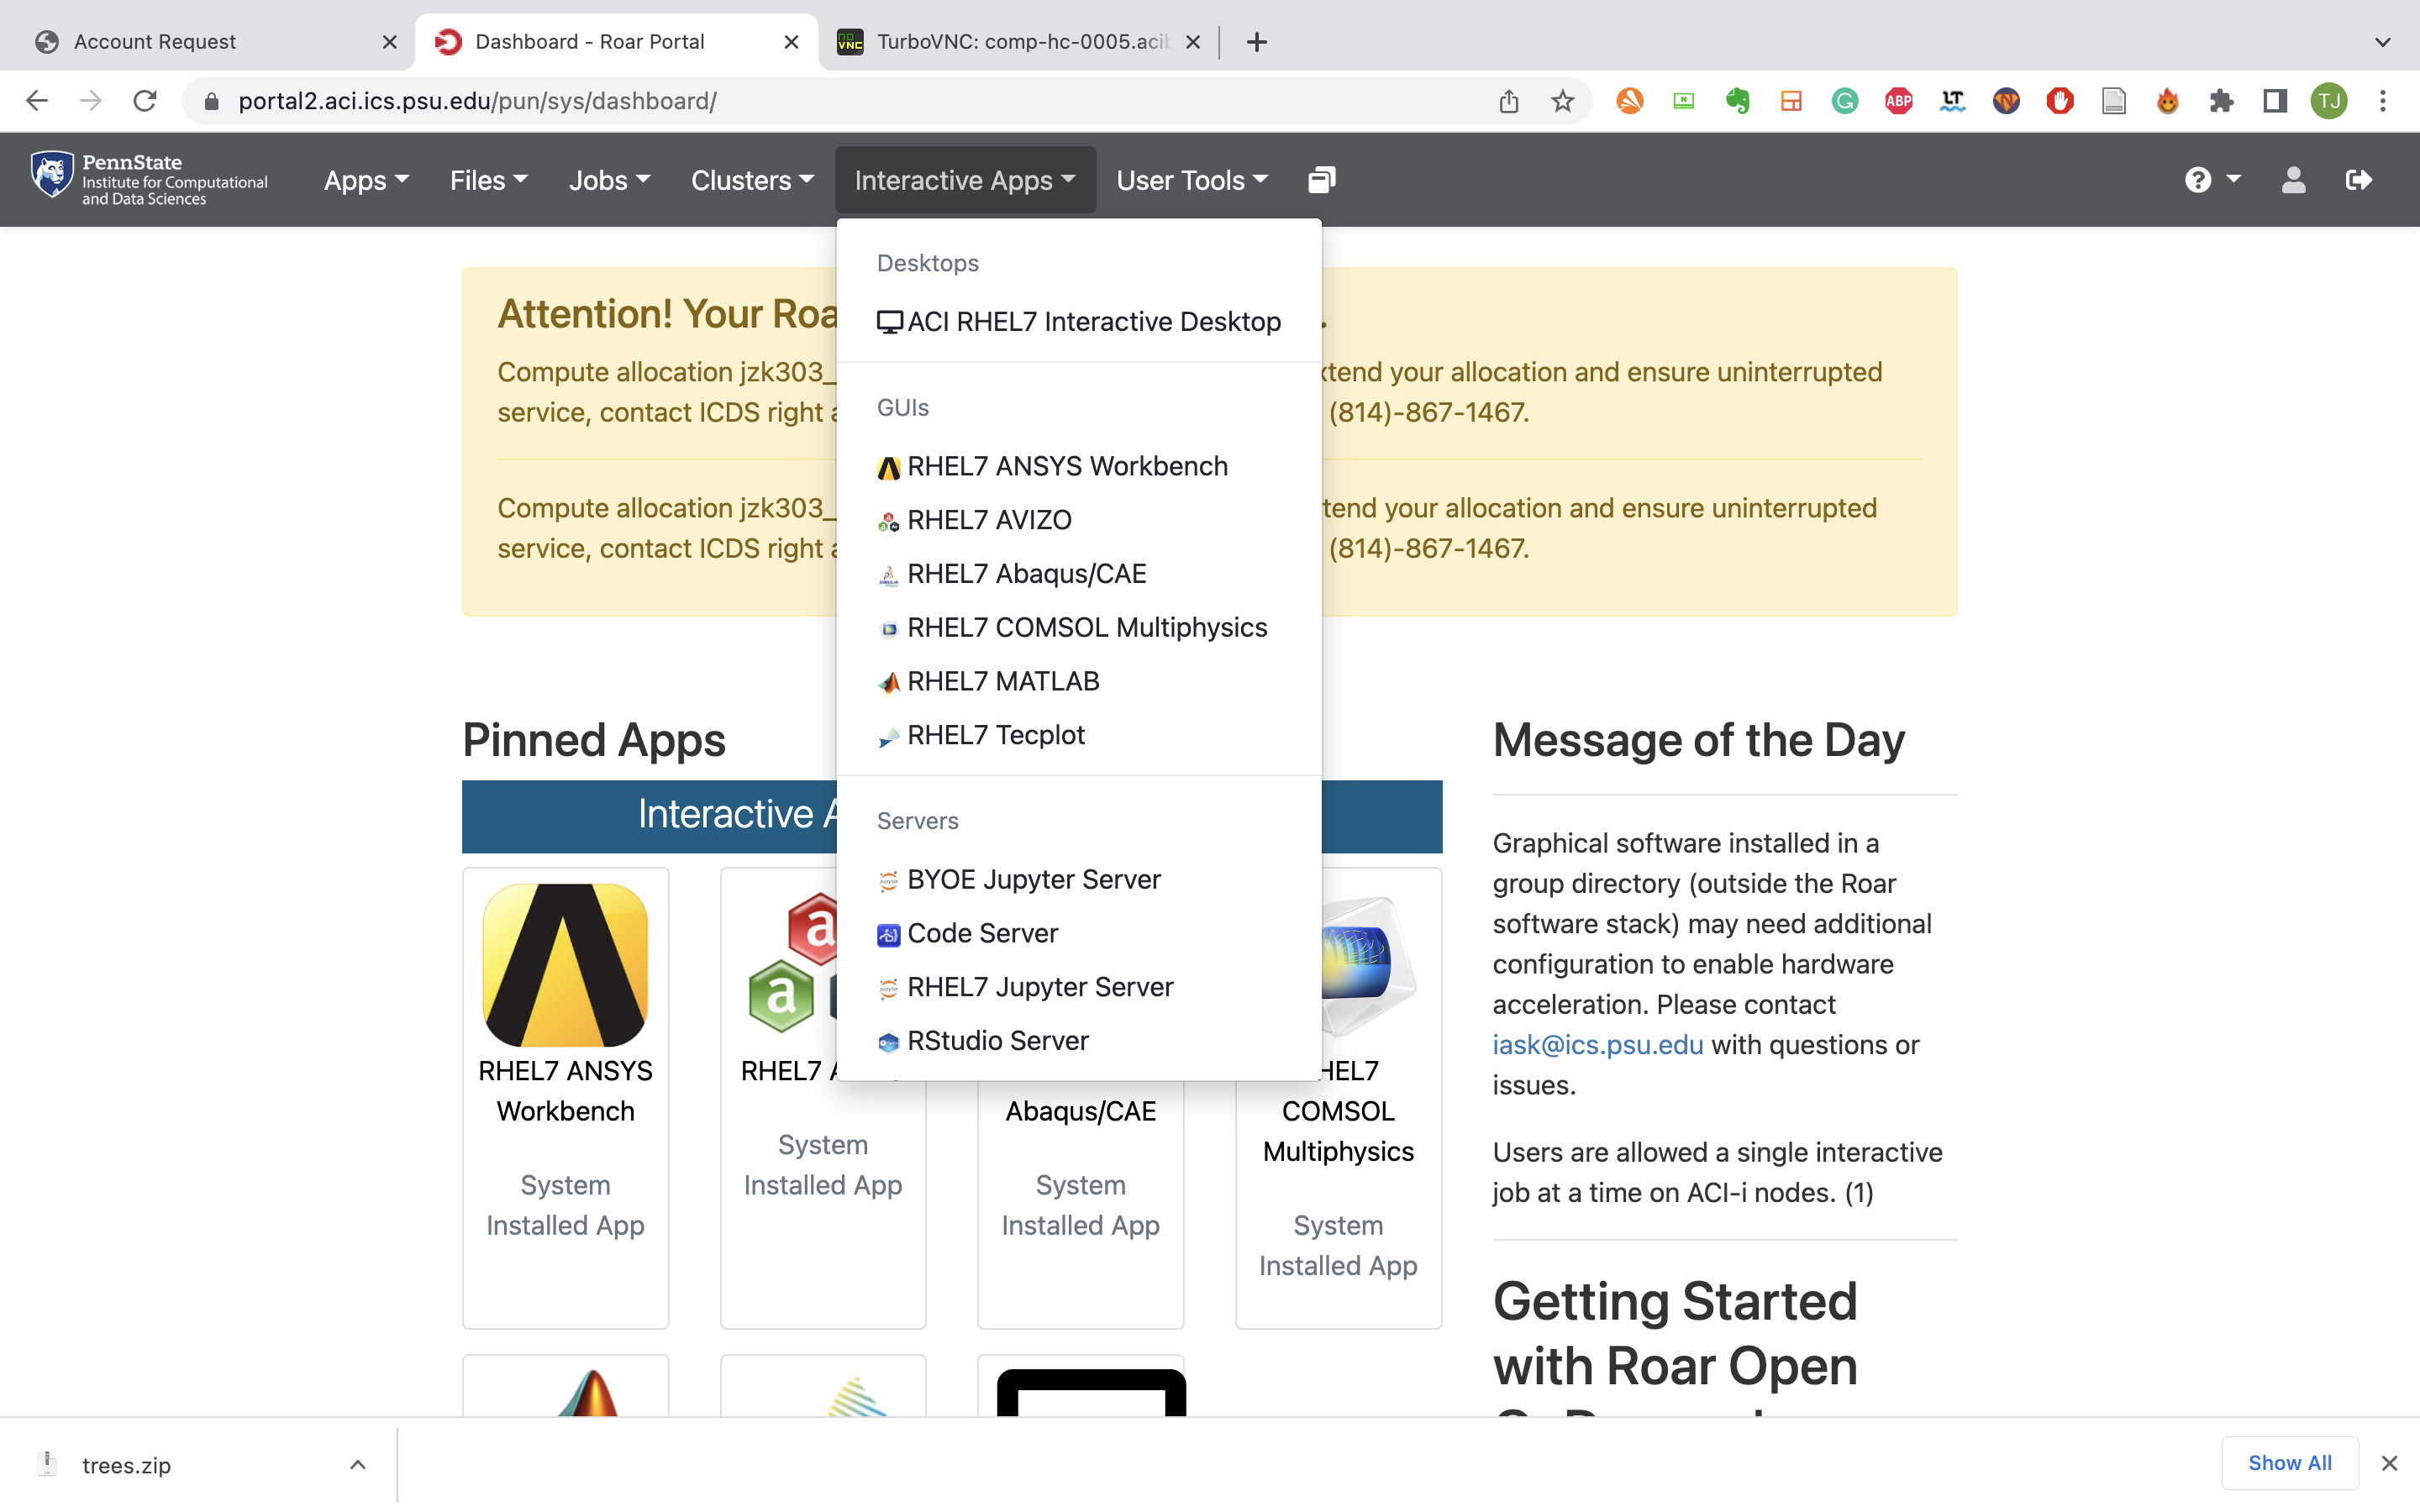
- Click "Rstudio Server" on the left menu bar

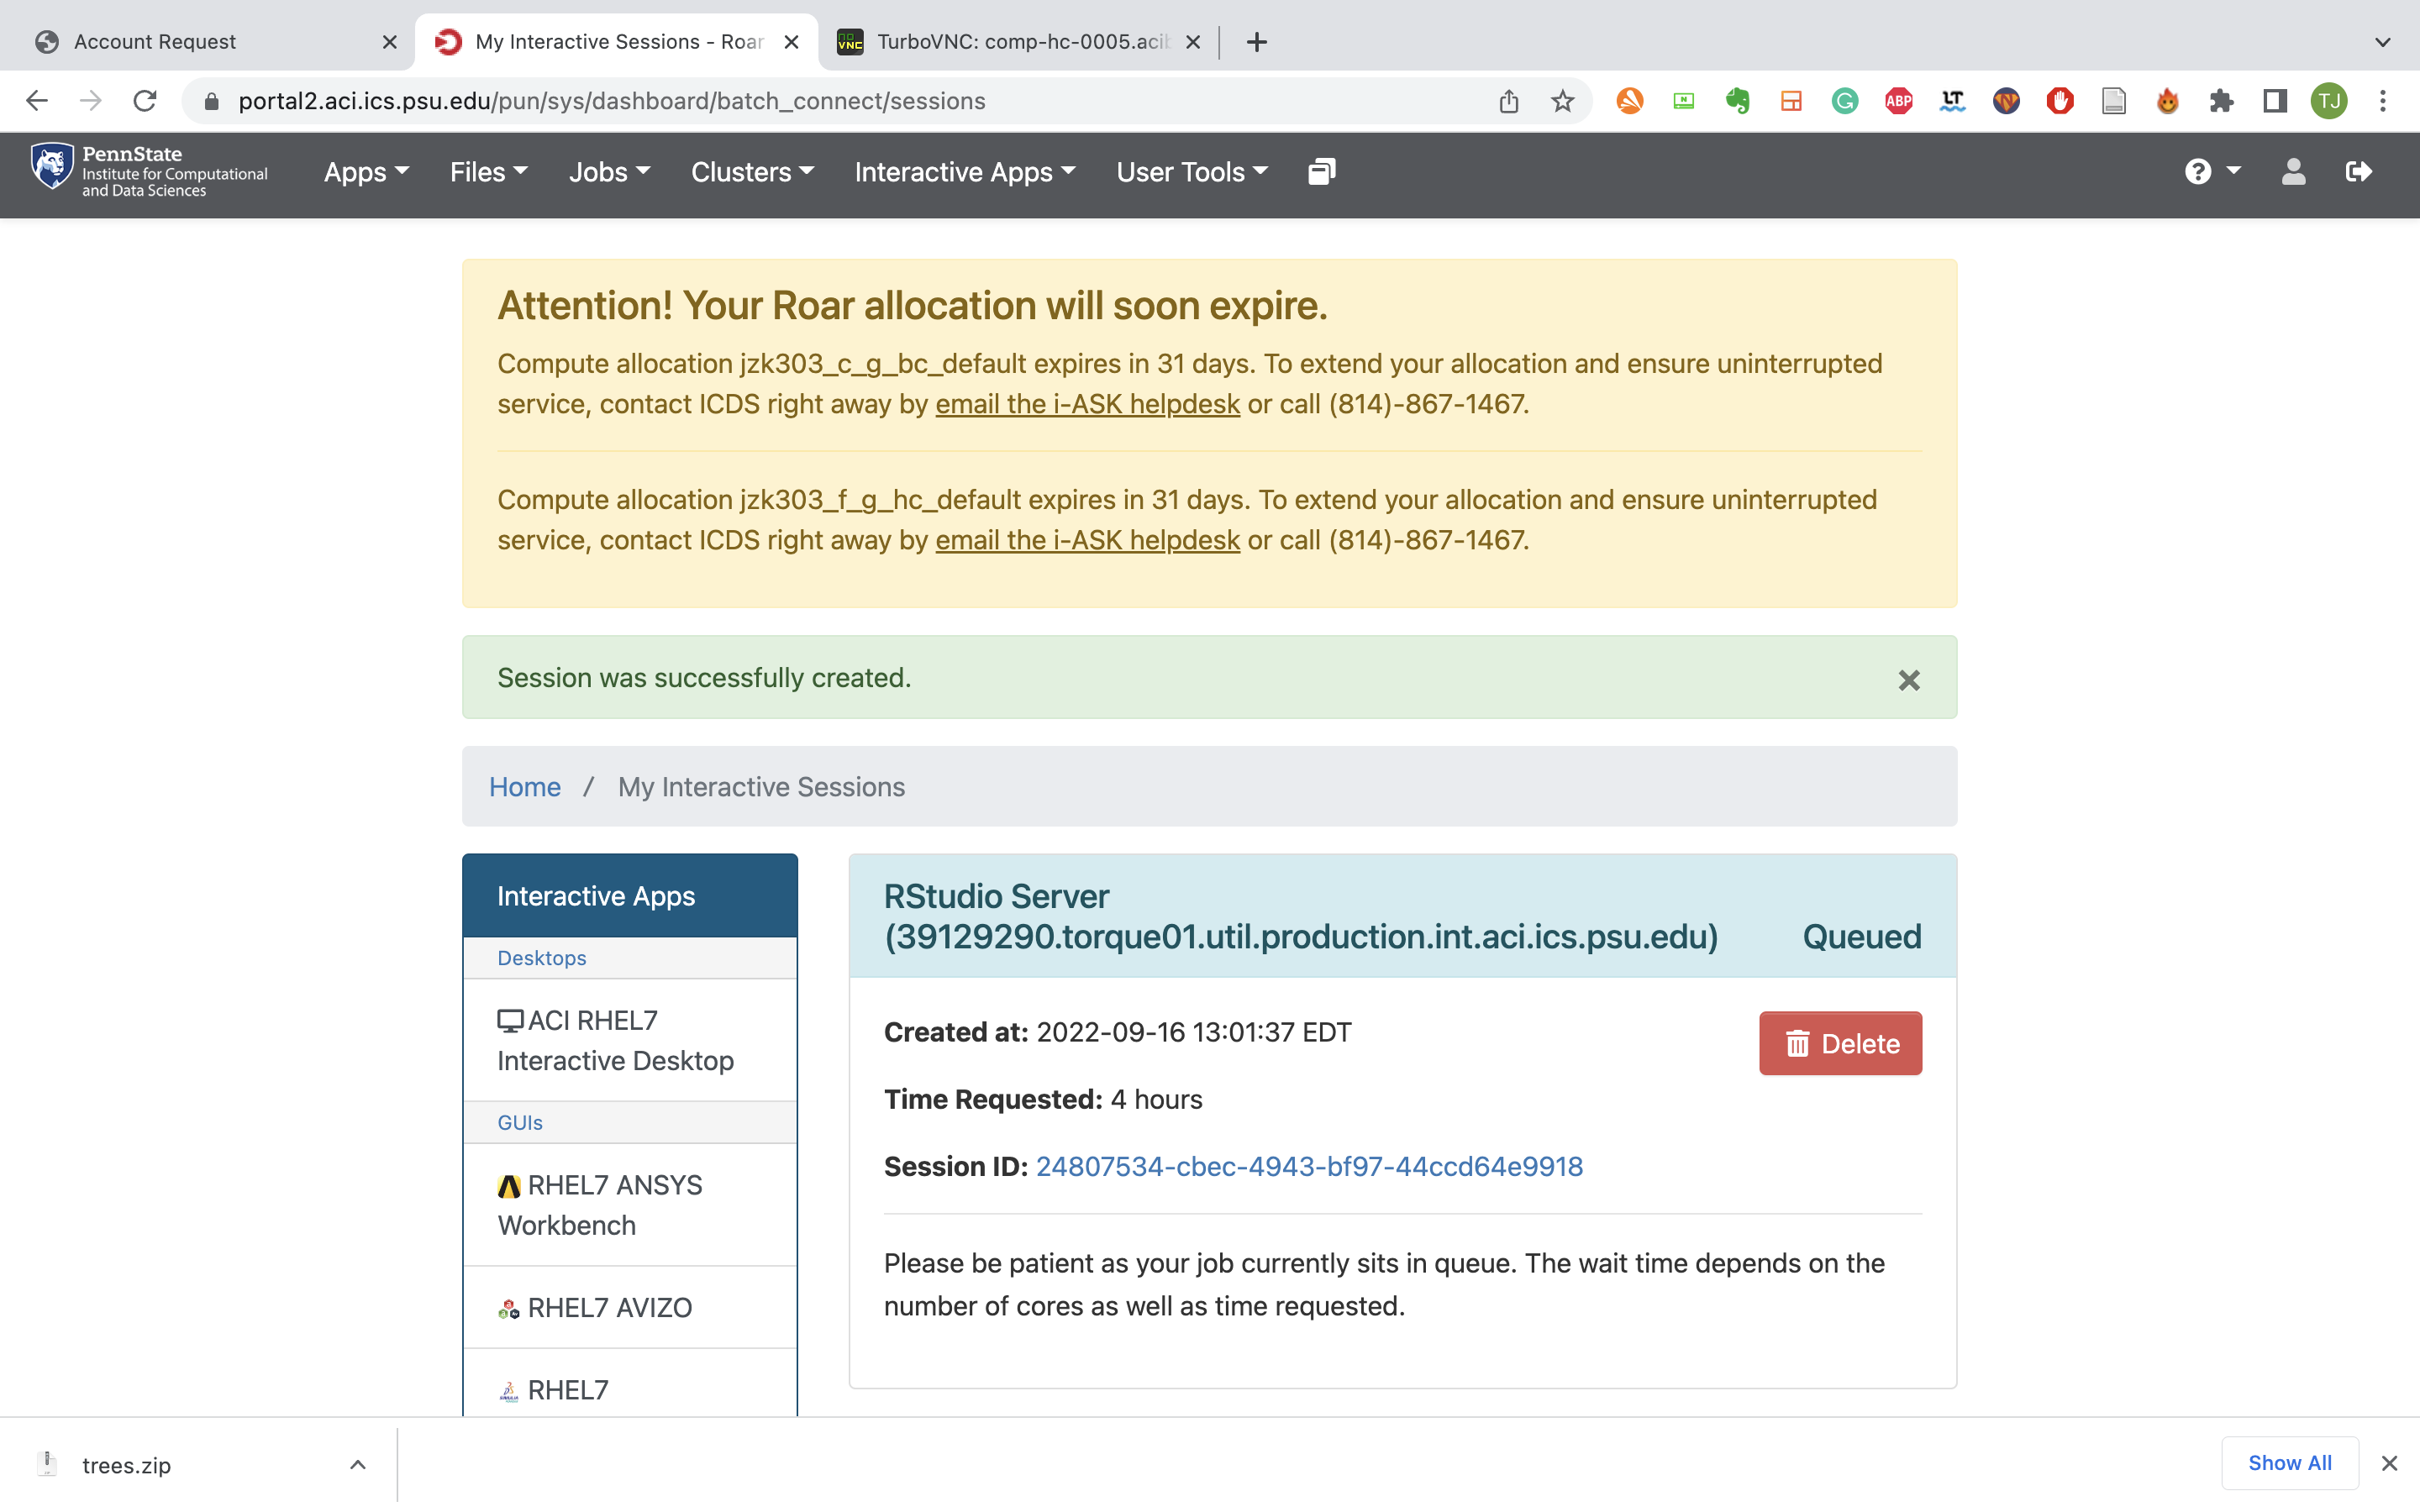
- Requesting Rstudio server
- Allocation - open (unless you already have your own paid allocation from your lab)
- Environment type - Use predefined environments from the dropdown (unless you want to use R installed in your environment)
- Select an R version from the RISE Software Stack - You can select from v3.5.2. to v4.2.2.
- Number of hours (up to 48 hours - if you request more times, it will take more time to open the session, so do not request more than what you need)
- Select Number of Cores (up to 20 - same has a number of hours, amount of requested resources will affect the time to start the session)
- Select Memory per core (in GB) (TOTAL memory you can request in 128 GB ( Number of cores * memory per core = total memory)
- Select Note type (If you are using "Open" allocation, leave this as ACI-b Standard or Basic Core)
-
Click "Launch" at the bottom
-
Wait until the session is open - it would take several minutes; if it does not open later than 30 minutes, there might be something wrong with your setting.
<When you launch your session and are still "Queued">
<After several minutes, your session is ready to run ("Running")>

- Click "Connect to Rstudio Server