ja plugin dev components command
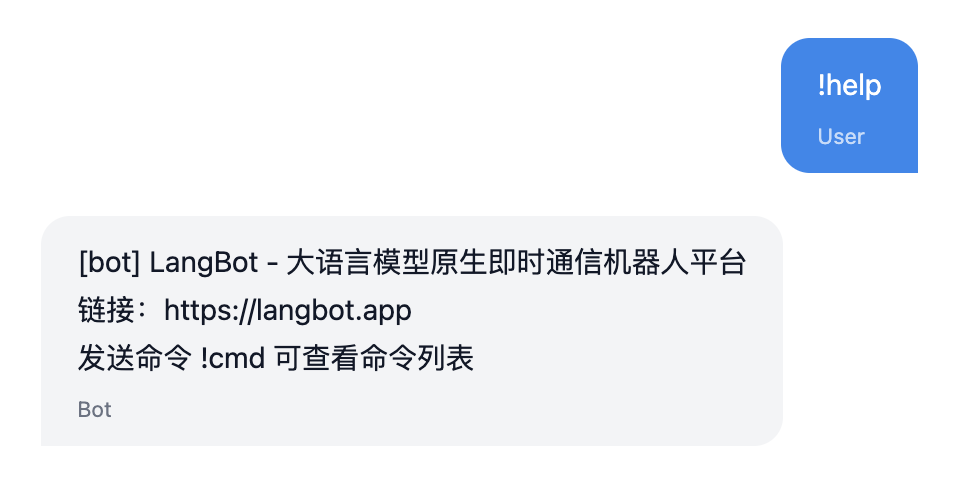
Commandコンポーネントは、!(または他の設定されたプレフィックス)で始まるユーザーコマンドメッセージによってトリガーされます。!helpコマンドをトリガーする例を次に示します:
1つのプラグインには任意の数のコマンドを含めることができます。プラグインディレクトリでコマンドlbp comp Commandを実行し、プロンプトに従ってコマンド設定を入力します。
➜  HelloPlugin > lbp comp Command
Generating component Command...
Command name: info
Command description: Show information of the query
Component Command generated successfully.
組件 Command 生成成功。これにより、components/commands/ディレクトリにinfo.yamlとinfo.pyファイルが生成されます。.yamlファイルは!infoコマンドの基本情報を定義し、.pyファイルはコマンドハンドラです:
➜  HelloPlugin > tree
...
├── components
│   ├── __init__.py
│   ├── commands
│   │   ├── __init__.py
│   │   ├── info.py
│   │   └── info.yaml
...apiVersion: v1 # 変更しないでください
kind: Command # 変更しないでください
metadata:
name: info # コマンド名、ユーザーは!infoでこのコマンドをトリガーします
label: # コマンド表示名、LangBot UIに表示、多言語対応
en_US: Info
zh_Hans: Info
description: # コマンド説明、LangBot UIに表示、多言語対応。オプション。
en_US: 'Show information of the query'
zh_Hans: '発送此次消息的詳細信息'
spec:
execution:
python:
path: info.py # コマンドハンドラ、変更しないでください
attr: Info # コマンドハンドラクラス名、info.pyのクラス名と一致以下のコードがデフォルトで生成されます(components/command/<command_name>.py)。Infoクラスのinitializeメソッドでサブコマンド処理ロジックを登録して実装する必要があります。
# Auto generated by LangBot Plugin SDK.
# Please refer to https://docs.langbot.app/en/plugin/dev/tutor.html for more details.
from __future__ import annotations

from typing import Any, AsyncGenerator

from langbot_plugin.api.definition.components.command.command import Command, Subcommand
from langbot_plugin.api.entities.builtin.command.context import ExecuteContext, CommandReturn

class Info(Command):

    async def initialize(self):
        await super().initialize()

        "Fill with your code here"
サブコマンドの追加:
...
class Info(Command):

    async def initialize(self):
        await super().initialize()

        @self.subcommand(
            name="",  # 空文字列はルートコマンドを表す
            help="Show information of the query", # コマンドヘルプ情報
            usage="info", # コマンド使用例、コマンドヘルプに表示
            aliases=["i"], # コマンドエイリアス
        )
        async def send(self, context: ExecuteContext) -> AsyncGenerator[CommandReturn, None]:
            print(context)

            reply_text = f"Query ID: {context.query_id}\n"
            reply_text += f"command: {context.command}\n"
            reply_text += f"command_text: {context.command_text}\n"
            reply_text += f"params: {context.params}\n"
            reply_text += f"crt_params: {context.crt_params}\n"
            reply_text += f"privilege: {context.privilege}\n"
            reply_text += f"session: {context.session.launcher_type.value}_{context.session.launcher_id}\n"

            yield CommandReturn(
                text=reply_text,
            )

        @self.subcommand(
            name="field",
            help="Show information of the field",
            usage="info field",
            aliases=["f"],
        )
        async def field(self, context: ExecuteContext) -> AsyncGenerator[CommandReturn, None]:
            print(context)

            field_name = context.crt_params[0]
            field_value = getattr(context, field_name)

            yield CommandReturn(
                text=f"{field_name}: {field_value}",
)このコードでは、@self.subcommandデコレータを通じてsend関数がサブコマンドとして登録され、コマンドコンテキスト(ExecuteContext)情報を出力し、それを返信メッセージに連結します。
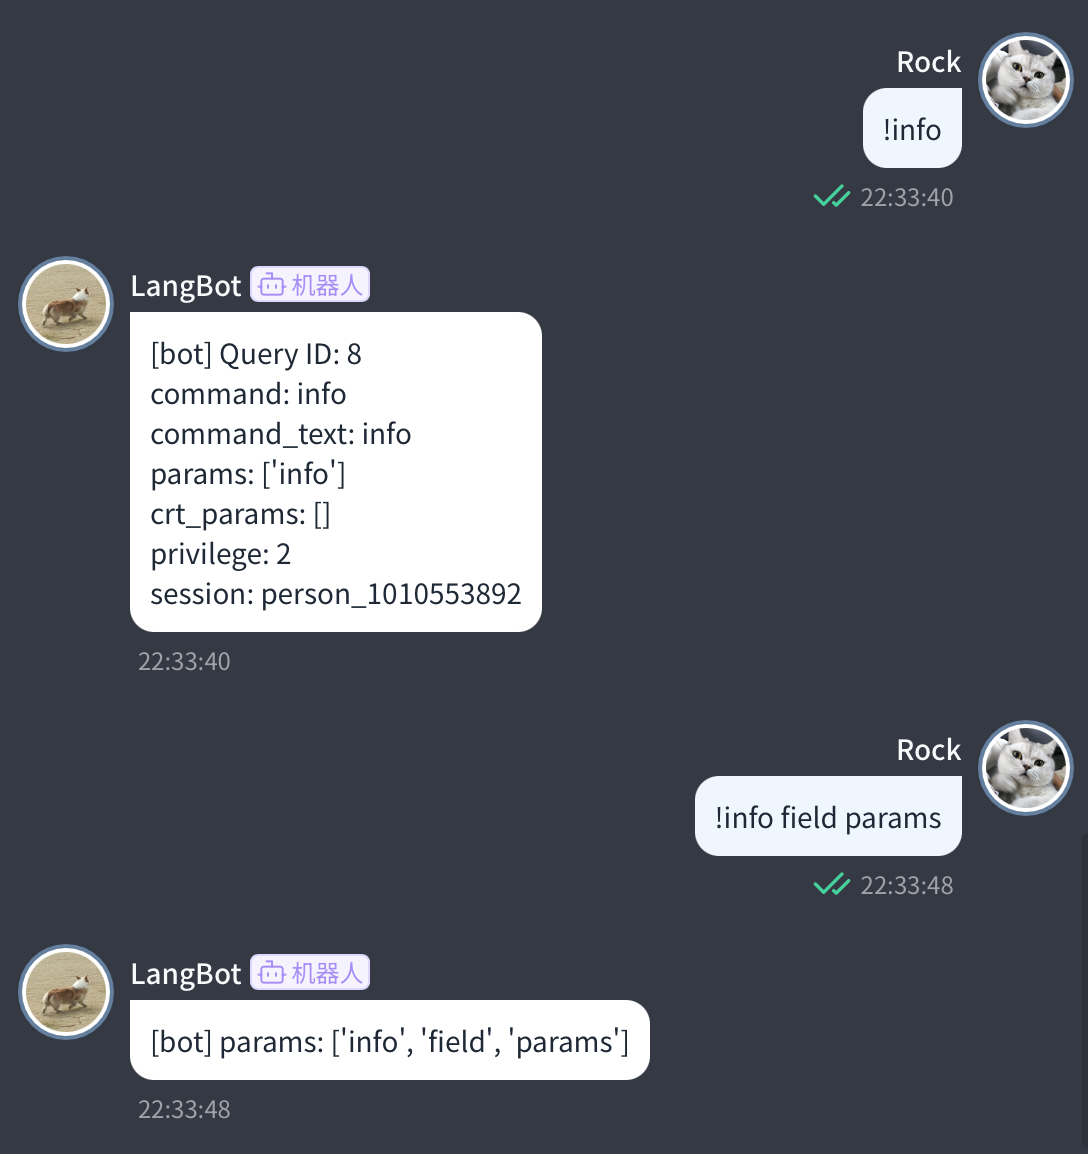
nameはサブコマンド名です。空のままにすると、メインコマンドを処理することを意味します。空でない場合、2番目のパラメータをコマンドとして照合します。例えば:
-
!infoは、name=""のサブコマンドに一致 -
!info fieldは、name="field"のサブコマンドに一致 -
!info field valueは、name="field"のサブコマンドに一致し、valueがサブコマンドパラメータ - 特に、
name="*"は、一致しないすべての第1レベルサブコマンドに一致し、infoの後の各セクションをパラメータとして渡します。例えば!info 123、!info abc。ユーザーの入力に応じて、context.crt_paramsから['123']または['abc']を取得できます。
サブコマンド関数では、context変数を通じてコマンドパラメータを読み取ることができます。
上記のコマンドの効果は画像に示されています:
class ExecuteContext(pydantic.BaseModel):
    """単一コマンド実行コンテキスト"""

    query_id: int
    """リクエストID"""

    session: provider_session.Session
    """このメッセージのセッションオブジェクト"""

    command_text: str
    """完全なコマンドテキスト"""

    command: str
    """コマンド名"""

    crt_command: str
    """現在のコマンド

    マルチレベルコマンドでは、crt_commandは現在のコマンド、commandはルートコマンド。
    例: !plugin on Webwlkr
    pluginを処理する場合、commandはplugin、crt_commandはplugin
    onを処理する場合、commandはplugin、crt_commandはon
    """

    params: list[str]
    """コマンドパラメータ

    コマンド全体をスペースで分割した後のパラメータリスト
    """

    crt_params: list[str]
    """現在のコマンドパラメータ

    マルチレベルコマンドでは、crt_paramsは現在のコマンドパラメータ、paramsはルートコマンドパラメータ。
    例: !plugin on Webwlkr
    pluginを処理する場合、paramsは['on', 'Webwlkr']、crt_paramsは['on', 'Webwlkr']
    onを処理する場合、paramsは['on', 'Webwlkr']、crt_paramsは['Webwlkr']
    """

    privilege: int
    """セッション権限レベル"""

...コマンド戻り値(CommandReturn)は、現在テキスト、画像(image_url、画像リンク)、エラーの返却をサポートしています。
yield CommandReturn(
    text=reply_text,
)

yield CommandReturn(
    image_url=image_url,
)コマンド処理は複数のメッセージを返すことをサポートしているため、yieldステートメントを使用してメッセージを返してください。
具体的な戻り値については、CommandReturnの定義を参照してください: langbot_plugin.api.entities.builtin.command.context.CommandReturn
コマンド登録とコマンド実行の基本情報を学びました。次は:
- プラグイン共通APIを確認してください